Much like dial, rewind, and hang up, a whitebox is a bit of an antiquated term that’s still in use. It’s a computer that someone has assembled from parts, instead of buying a pre-built one from a company like Apple or Dell. To whitebox a computer means to buy the parts like the CPU, motherboard, RAM, storage, and assemble it yourself.
Back in the earlier days of home computing, most computers lived in tall white boxes. There really wasn’t much in the way of variation on them.
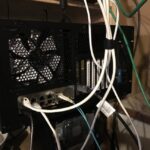
In 2017, computer cases come in a variety of colors and sizes. A Pentium N3700, which is my currently my Internet router, can be found in form factor such as this:

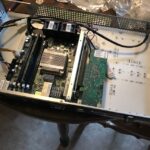
or this:

or this Dell Inspiron:

Nowadays, if you do happen to see a computer in a giant white case, chances are it’s someone trying to be retro.
My first real whitebox was probably a 386SX that was a whopping 16MHZ. Since then I’ve assembled more computers than I can count. So why not a rack mounted server?
The first rule of Whiteboxing
Even before I started, I knew there was one very important and steadfast rule when it comes to whiteboxing a rack-mount server. Whatever the catchy or cliché way of saying, the sentiment is simple.
YOU DO NOT WHITEBOX A 1U SERVER
The reason behind this is simple. With such limited vertical clearance, there are a number of challenges related to getting proper airflow and cooling to the appropriate spots, not to mention routing the variety of cables that live inside your standard server.
There’s a rather popular YouTube video where the YouTuber tries (and fails multiple times) to build a 1U rack-mount pfSense server. After having an airflow shroud custom designed and 3D printed, which is probably beyond the reach of many normal people, he ultimately ends up burning out a number of expensive motherboards.
The Pride before the Fall
So the question is… why did I think I could do it? Simple enough. If I buy a motherboard and case, which are designed to go together, I shouldn’t have ANY problems.
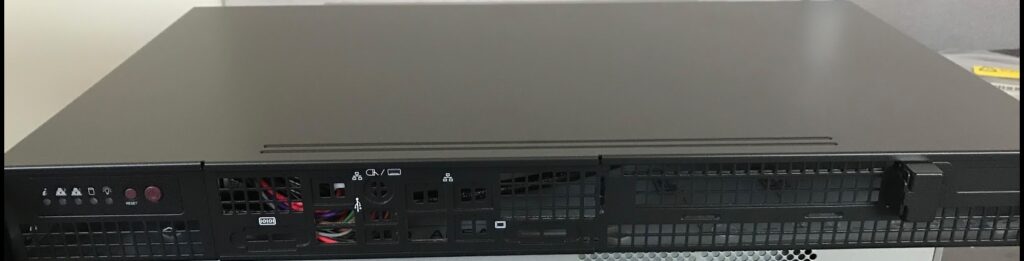
The build was simple:
- SC505-203B
- X10SDV-4C-TLN2F-O (the -O is important here)
- A few fan mounts designed for this case
I had some fans leftover from my previous migration, as well as the original DC-DC power supply from that came out of that server.
Everything arrives!
New parts day is always VERY exciting. There’s a certain thrill in unpacking everything, assembling it, and getting it all configured.


Unfortunately, my excitement was short-lived. Remember how I mentioned I made sure to order the “-O” version of that motherboard? Well in the Supermicro world, “-O” designates retail packaging. This means it includes important stuff like the the I/O shield.

As I quickly learned, this particular rack-mount case doesn’t use standard I/O shields. So despite believing I was being smart and ordering the board that shipped with an included shield, I was defeated.
Do you need an I/O shield? Probably not. But for the sake of this being an actual professional build, I required one. I was also missing the riser bracket and card, which was something I hadn’t even considered.
So my new build sat in a pile for over a week while the rest of my parts were delivered.

Continued in part 2