Introduction
Virtual LANs, or VLANs, are one of the most useful features in all of networking. To put it simply, they allow a logical separation of broadcast domains. In layperson’s terms, “I took a switch and put it in your switch!”.
I think it’s best to start with a traditional physical setup that would represent how most people start their networking adventures.
Physical Setup
For this adventure, I’ll be using be using:
- The WYSE 3040 from a previous blog post.
- An array of small Mikrotiks (hex, hap, hex lite) since they are painfully easy to set up as both simple switches and managed switches supporting VLANs.
- A few Virtual Machines to act as end devices, also from a prior blog post.
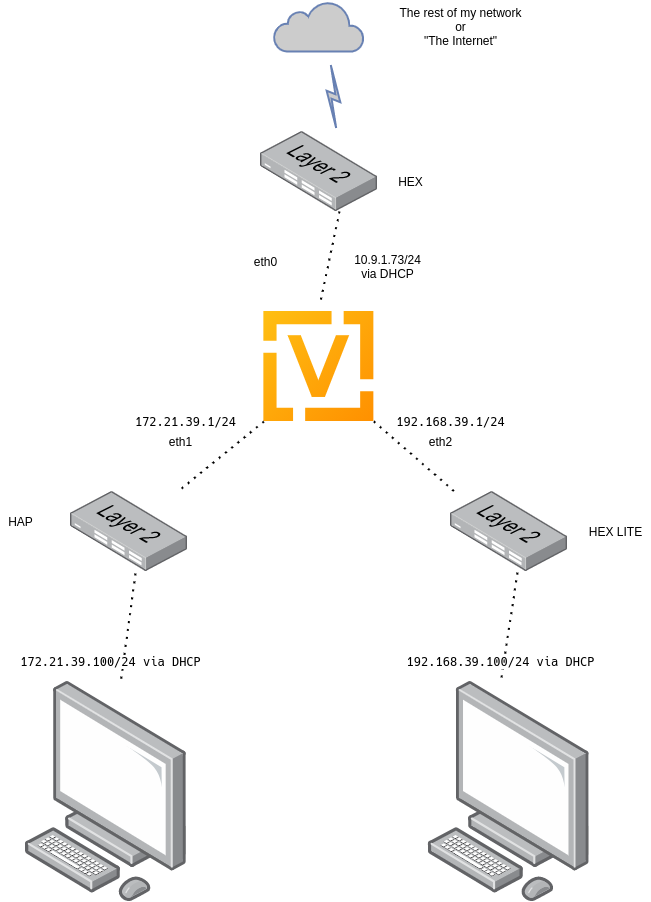
Let’s start with this simple network diagram.
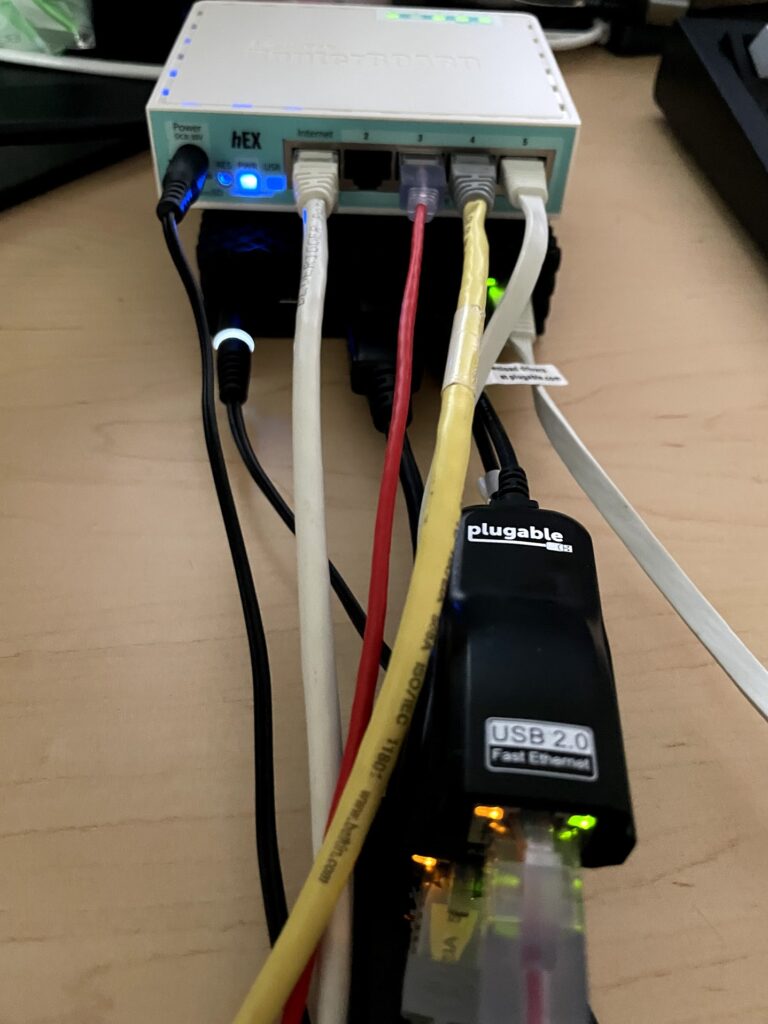
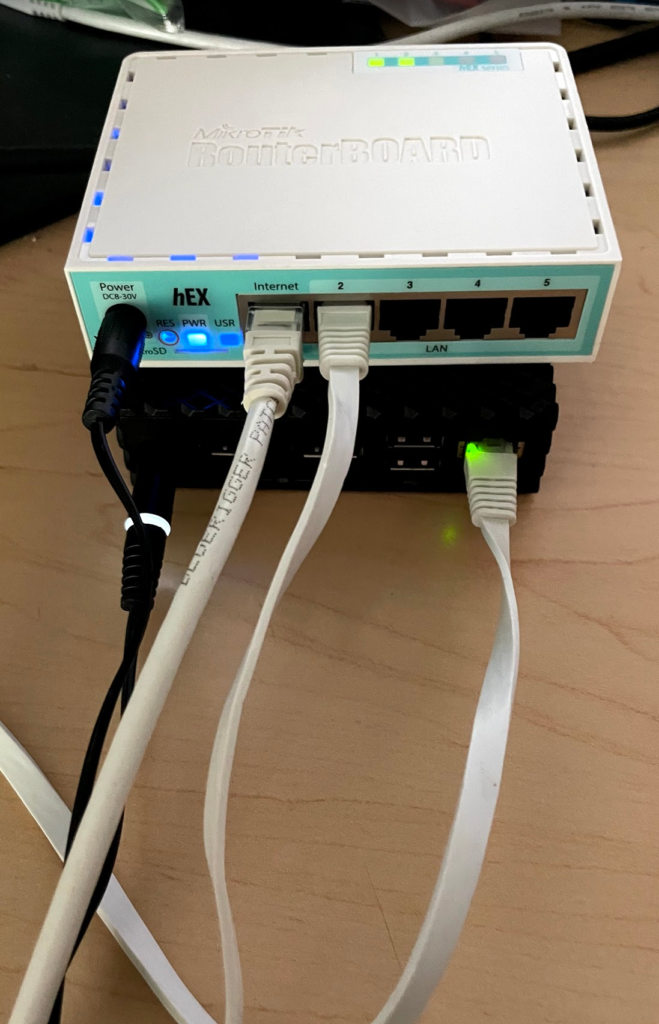
and how does this setup look when it’s all wired up?

Networking Config
This is the basic config for all three of the switches. I don’t want to get too bogged down with the Mikrotik config, but I should explain some of it.
In the Linux world, and subsequently in Mikrotik-land, a switch would be called a “bridge”. So in this case, I’ve created a bridge and added all the ports to it. And then I’ve told the switches to pull an IP address from the bridge for management.
[admin@MikroTik] > /export
# jun/28/2021 21:03:30 by RouterOS 6.48.3
# software id = IMPN-EEMU
#
# model = RB750Gr3

/interface bridge
add admin-mac=B8:69:F4:AB:2E:7A auto-mac=no comment=defconf name=bridgeLocal
/interface bridge port
add bridge=bridgeLocal comment=defconf interface=ether1
add bridge=bridgeLocal comment=defconf interface=ether2
add bridge=bridgeLocal comment=defconf interface=ether3
add bridge=bridgeLocal comment=defconf interface=ether4
add bridge=bridgeLocal comment=defconf interface=ether5
/ip dhcp-client
add comment=defconf disabled=no interface=bridgeLocal
This configuration essentially turns these Mikrotik devices into a dumb switch, with an IP address to manage them. They are also plugged into my existing network:
- HEX into my “WAN” network (random VLAN on my existing network that has internet access)
- HAP into a VLAN connected to the “enduser1” VM
- HEX LITE into a VLAN connected to the “enduser2” VM.
VyOS Config
The VyOS config here on the WYSE 3040 is very simple:
- Onboard NIC is eth0, connected to WAN/HEX switch, pulling an IP from my existing infrastructure.
- USB NIC1 is eth1, connected to HAP switch
- USB NIC2 is eth2, connected to HEX switch
- Some NAT, so my test clients can get on the Internet
- Some DHCP, so my test clients can auto-configure themselves
interfaces {
ethernet eth0 {
address dhcp
description WAN
hw-id 8c:ec:4b:6d:dc:d6
}
ethernet eth1 {
address 172.21.39.1/24
description HAPLAN
hw-id 8c:ae:4c:f5:e5:8f
}
ethernet eth2 {
address 192.168.39.1/24
description HEXLITELAN
hw-id 8c:ae:4c:f5:e5:94
}
loopback lo {
}
}
nat {
source {
rule 10 {
outbound-interface eth0
source {
address 172.21.39.0/24
}
translation {
address masquerade
}
}
rule 11 {
outbound-interface eth0
source {
address 192.168.39.0/24
}
translation {
address masquerade
}
}
}
}
service {
dhcp-server {
shared-network-name HAPDHCP {
subnet 172.21.39.0/24 {
default-router 172.21.39.1
dns-server 10.53.53.53
range 0 {
start 172.21.39.100
stop 172.21.39.200
}
}
}
shared-network-name HEXLITEDHCP {
subnet 192.168.39.0/24 {
default-router 192.168.39.1
dns-server 10.53.53.53
range 0 {
start 192.168.39.100
stop 192.168.39.200
}
}
}
}
ssh {
port 22
}
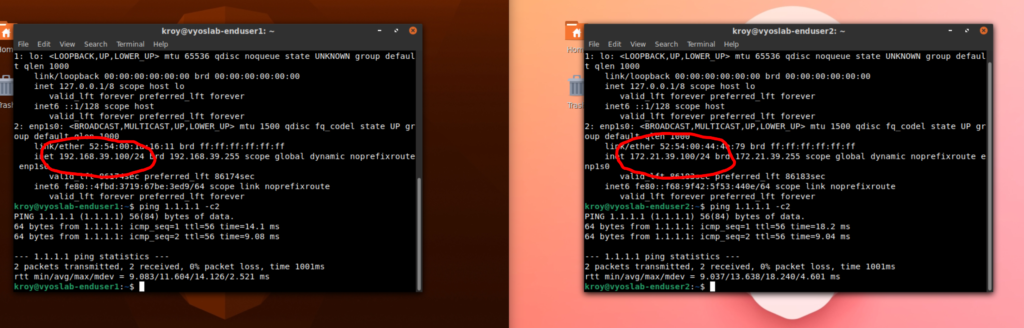
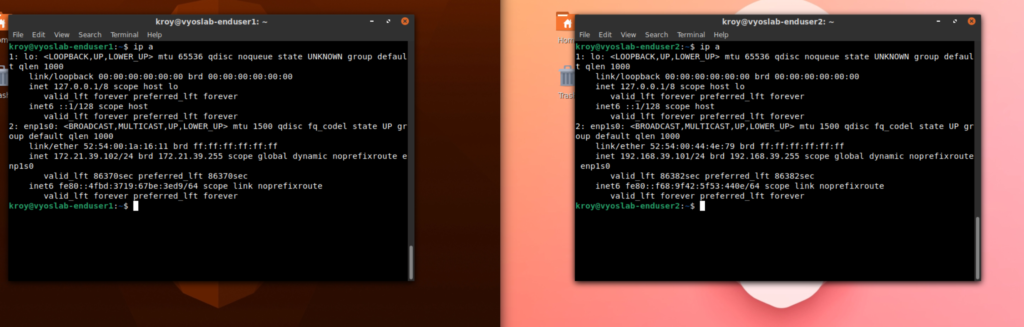
}And once it’s all set up, the two “enduser” VMs both have appropriate IP addresses and Internet access as served out by the VyOS-3040:
VLANs
Of course we aren’t here to just make a simple multi-network setup. We want some VLANs. So let’s rewrite some things, and eliminate two of the switches.
First off, let’s talk about the physical setup we had before. Before, each of the different switches were connected to “raw” ports connecting to existing VLANs on my network:
- HEX: VAN9. This is an existing client network in my homelab. You plug something in here, it gets a 10.9.1.0/24 address, and instantly has Internet access. This is what the “WAN” port of VyOS connects to.
- HAP: VLAN41. This was a new VLAN I created to connect between eth1 on VyOS and the “enduser1” VM.
- HEX LITE: VLAN42. Similarly, a new VLAN I created to connect between eth2 on VyOS and the “enduser2” VM.
Physically, this is how the new setup will look:
In most networking circles, a “trunk” just means a port carrying multiple VLANs. Since we removed two switches, the remaining switch, the HEX, will need to have its uplink port changed into a trunk:
- Remove HAP and HEX LITE switches
- On the HEX, change the port that was previously connected to a raw VLAN9 port on my existing network to a trunk.
- Plug eth1 from VyOS into port 4 on HEX, change the VLAN of that port to 41
- Plug eth2 from VyOS into port 3 on HEX, change the VLAN of the port to 42
- Change the VLAN on port 5 on the HEX to 9. This will change the PVID, or the raw VLAN that’s use when whatever is plugged in on the other end isn’t speaking VLANs.
- Due to the prior step, the nothing on VyOS will change
The characteristics of our trunk ports will be simple:
- VLAN1 == PVID/untagged. This is the VLAN traffic will land on if the traffic has no VLAN tags
- VLAN9 == Tagged.
- VLAN41 == Tagged
- VLAN42 == Tagged
I’ve highlighted the important changes on the remaining switch below:
- Add an Switched Virtual Interface or SVI. This is saying “Give this switch an interface on this VLAN”. This is important because VLAN9 is no longer the default “untagged” for the uplink port (ether1)
- Change the PVIDs/default VLANs of the appropriate ports on the bridge. We are doing this to make the VyOS-3040 think nothing has changed in our physical setup.
- Handle VLAN filtering. This is going to control what VLANs are allowed on these ports. This is how you create a trunk port in Mikrotik
ether1is the Trunk to the rest of the network. It is untagged on VLAN1 (which is a throwaway VLAN for security). It is tagged on the other two VLANs we are using, 41 and 42.bridgeLocalis Mikrotik itself. It is untagged on VLAN1 for similar reasons as above. It it tagged on VLAN9 as this is what allows our newly createdVLAN9_SVIso we can create a management address for it.ether3/4/5are all untagged on the VLANs that match the PVIDs.
- Finally, we tell the Mikrotik to pull its address via DHCP on the newly created
VLAN9_SVI
# jun/29/2021 10:27:41 by RouterOS 6.48.3
# software id = IMPN-EEMU
#
# model = RB750Gr3

/interface bridge
add admin-mac=B8:69:F4:AB:2E:7A auto-mac=no comment=defconf name=bridgeLocal vlan-filtering=yes
/interface vlan
add interface=bridgeLocal name=VLAN9_SVI vlan-id=9
/interface bridge port
add bridge=bridgeLocal comment=defconf interface=ether1
add bridge=bridgeLocal comment=defconf interface=ether2
add bridge=bridgeLocal comment=defconf interface=ether3 pvid=42
add bridge=bridgeLocal comment=defconf interface=ether4 pvid=41
add bridge=bridgeLocal comment=defconf interface=ether5 pvid=9
/interface bridge vlan
add bridge=bridgeLocal untagged=bridgeLocal,ether1 vlan-ids=1
add bridge=bridgeLocal tagged=bridgeLocal,ether1 untagged=ether5 vlan-ids=9
add bridge=bridgeLocal tagged=ether1 untagged=ether4 vlan-ids=41
add bridge=bridgeLocal tagged=ether1 untagged=ether3 vlan-ids=42
/ip dhcp-client
add comment=defconf disabled=no interface=VLAN9_SVI
As mentioned above, everything just works as before. As far as the VyOS-3040 is concerned, it is still connected to three separate switches:
VLANs – Going Deeper
Of course, we haven’t even touched VLANs on VyOS yet, so let’s dig into that.
The basic goals will be:
- Remove all the dongles
- Move the cable that goes to VyOS-3040 from port 5 to port 2.
- Trunk VLANs 41 and 42 into VyOS
- Change the config in VyOS to use VLAN interfaces instead of physical interfaces.
Physically, this is starting to look super clean. We only have two cables plugged into the switch, the trunk from the existing networking and the trunk to the VyOS-3040.
I’ve highlighted the changes to the switch, but basically we are turning port 2 into another trunk, BUUUUT, a trunk with the PVID of 9:
- Change the PVID of ether2 to 9. This is to make it so VyOS-3040 still is “on” VLAN9 on its raw port
- Add ether2 as untagged on VLAN9
- Add ether2 as tagged on VLANs 41/42
# jun/29/2021 10:49:20 by RouterOS 6.48.3
# software id = IMPN-EEMU
#
# model = RB750Gr3
# serial number = 8AFF09A3F98D
/interface bridge
add admin-mac=B8:69:F4:AB:2E:7A auto-mac=no comment=defconf name=bridgeLocal vlan-filtering=yes
/interface vlan
add interface=bridgeLocal name=VLAN9_SVI vlan-id=9
/interface bridge port
add bridge=bridgeLocal comment=defconf interface=ether1
add bridge=bridgeLocal comment=defconf interface=ether2 pvid=9
add bridge=bridgeLocal comment=defconf interface=ether3 pvid=42
add bridge=bridgeLocal comment=defconf interface=ether4 pvid=41
add bridge=bridgeLocal comment=defconf interface=ether5 pvid=9
/ip neighbor discovery-settings
set discover-interface-list=!dynamic
/interface bridge vlan
add bridge=bridgeLocal untagged=bridgeLocal,ether1 vlan-ids=1
add bridge=bridgeLocal tagged=bridgeLocal,ether1 untagged=ether5,ether2 vlan-ids=9
add bridge=bridgeLocal tagged=ether1,ether2 untagged=ether4 vlan-ids=41
add bridge=bridgeLocal tagged=ether1,ether2 untagged=ether3 vlan-ids=42
/ip dhcp-client
add comment=defconf disabled=no interface=VLAN9_SVI
And in VyOS, the only change is removing eth1/eth2, and moving the config under the appropriate vif:
interfaces {
    ethernet eth0 {
        address dhcp
        description WAN
        hw-id 8c:ec:4b:6d:dc:d6
        vif 41 {
            address 172.21.39.1/24
            description HAPLAN
        }
        vif 42 {
            address 192.168.39.1/24
            description HEXLITELAN
        }
    }
    loopback lo {
    }
}
which we can now access everywhere via eth0.41/eth0.42.
vyos@vyos:~$ show interfaces
Codes: S - State, L - Link, u - Up, D - Down, A - Admin Down
Interface        IP Address                        S/L  Description
---------        ----------                        ---  -----------
eth0             10.9.1.73/24                      u/u  WAN
eth0.41          172.21.39.1/24                    u/u  HAPLAN
eth0.42          192.168.39.1/24                   u/u  HEXLITELAN
VLANs – Gotta Find the Bottom!
Of course, if you are like me, you turn everything into a trunk to routers.
So we are going to remove VLAN as the PVID from our VyOS-3040 facing port, and just tag it:
[admin@MikroTik] > export
# jun/29/2021 10:52:50 by RouterOS 6.48.3
# software id = IMPN-EEMU
#
# model = RB750Gr3
/interface bridge
add admin-mac=B8:69:F4:AB:2E:7A auto-mac=no comment=defconf name=bridgeLocal vlan-filtering=yes
/interface vlan
add interface=bridgeLocal name=VLAN9_SVI vlan-id=9
/interface bridge port
add bridge=bridgeLocal comment=defconf interface=ether1
add bridge=bridgeLocal comment=defconf interface=ether2
add bridge=bridgeLocal comment=defconf interface=ether3 pvid=42
add bridge=bridgeLocal comment=defconf interface=ether4 pvid=41
add bridge=bridgeLocal comment=defconf interface=ether5 pvid=9
/interface bridge vlan
add bridge=bridgeLocal untagged=bridgeLocal,ether1,ether2 vlan-ids=1
add bridge=bridgeLocal tagged=bridgeLocal,ether1,ether2 untagged=ether5 vlan-ids=9
add bridge=bridgeLocal tagged=ether1,ether2 untagged=ether4 vlan-ids=41
add bridge=bridgeLocal tagged=ether1,ether2 untagged=ether3 vlan-ids=42
/ip dhcp-client
add comment=defconf disabled=no interface=VLAN9_SVI
and a few small changes to VyOS. We move the “WAN” dhcp to a VLAN, and change the outbound-interface for the NAT:
vyos@vyos:~$ show configuration
interfaces {
ethernet eth0 {
hw-id 8c:ec:4b:6d:dc:d6
vif 9 {
address dhcp
description WAN
}
vif 41 {
address 172.21.39.1/24
description HAPLAN
}
vif 42 {
address 192.168.39.1/24
description HEXLITELAN
}
}
loopback lo {
}
}
nat {
source {
rule 10 {
outbound-interface eth0.9
source {
address 172.21.39.0/24
}
translation {
address masquerade
}
}
rule 11 {
outbound-interface eth0.9
source {
address 192.168.39.0/24
}
translation {
address masquerade
}
}
}
}
service {
dhcp-server {
shared-network-name HAPDHCP {
subnet 172.21.39.0/24 {
default-router 172.21.39.1
dns-server 10.53.53.53
range 0 {
start 172.21.39.100
stop 172.21.39.200
}
}
}
shared-network-name HEXLITEDHCP {
subnet 192.168.39.0/24 {
default-router 192.168.39.1
dns-server 10.53.53.53
range 0 {
start 192.168.39.100
stop 192.168.39.200
}
}
}
}
ssh {
port 22
}
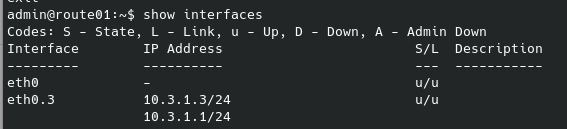
}And if we show our interfaces:
vyos@vyos:~$ show interfaces
Codes: S - State, L - Link, u - Up, D - Down, A - Admin Down
Interface        IP Address                        S/L  Description
---------        ----------                        ---  -----------
eth0             -                                 u/u
eth0.9           10.9.1.73/24                      u/u  WAN
eth0.41          172.21.39.1/24                    u/u  HAPLAN
eth0.42          192.168.39.1/24                   u/u  HEXLITELAN
lo               127.0.0.1/8                       u/u
                 ::1/128
Conclusion
That’s it! I’ve walked through going from a traditional network with 3 separate interfaces to a single interface carrying the traffic of all three networks.
On to the next!
]]>Introduction
To understand the kind of games I reach for when the nostalgia gets huge, you need to understand the mid-80s through the 90s.
Especially during the early part of this time period, there wasn’t much. If you got bored or stuck with a game, you couldn’t just reach out to the Internet for help or a different game. You could potentially dial up to BBSs, but even then, often these were absolute deserts of any useful information.
For me, this situation was further complicated by the fact that my household owned solely Macintoshes, which meant I had almost zero resources available to me if I ran into a puzzler.
I think this early training for troubleshooting has lead me to the person I am today.
In any case, my very first computer was the venerable Macintosh 512kE. In the mid-late 80s when we bought this, it was an amazing machine, especially since in the x86 world, Windows was still in its infancy and wouldn’t gain serious traction until version 3.0/3.1 was released after 1990.
Recently, I did manage to track down a normal 512k, and with a ROM upgrade, it turned it into a 512kE (essentially)

Upgrading the ROMs allows it to do new tricks:

I heard you like dem ROM things
Unfortunately, there was almost NO software for it. So the games I had were limited to a handful that we could trade between a few of friends, family, and enthusiasts that my pops knew.

Transylvania
An absolute staple of my youth was Transylvania. Some of my first computing memories were of trying to hack out that game’s secrets. And it was a… slow process.
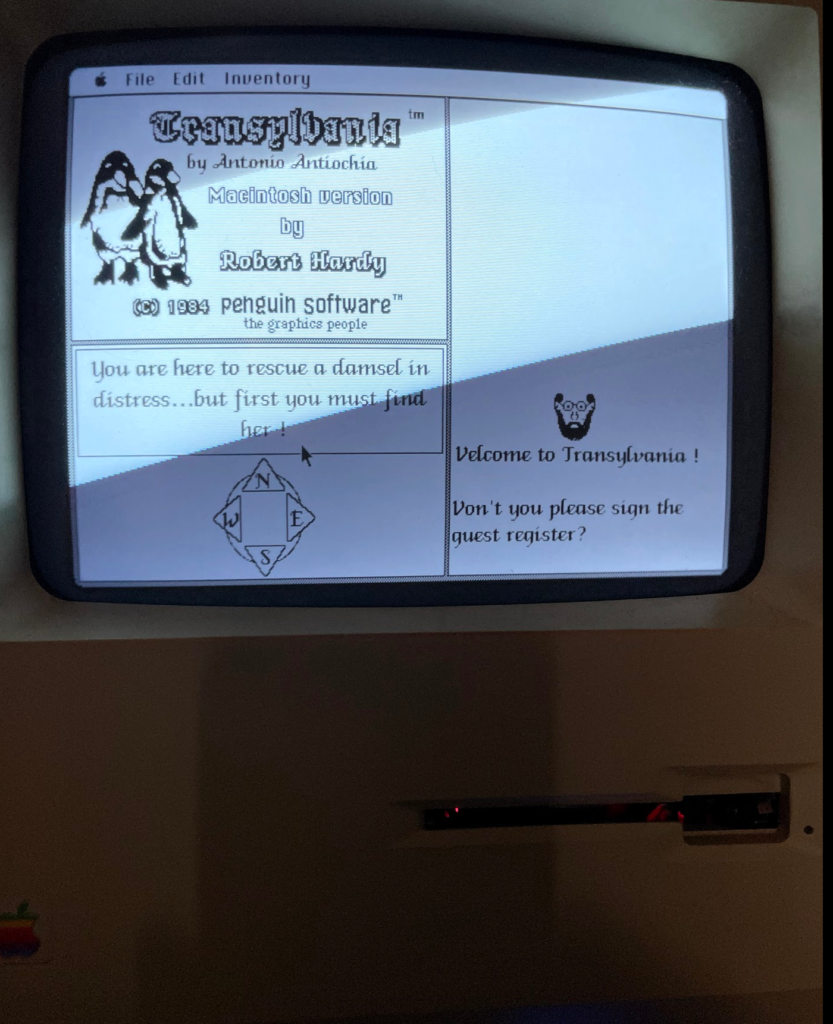
A few times a week I would plop down and spend 20 or 30 minutes hammering various commands into the console, usually without much luck. Funny enough, this is a game that can be conquered in less than 10 minutes if you know what you are doing.
Every once in a while I would have an epiphany moment, like realizing you could type things like go up or enter house, even though they weren’t represented as a direction in the text or in the GUI controls. This would open up a few more possibilities in the game, but ultimately I still was stuck.
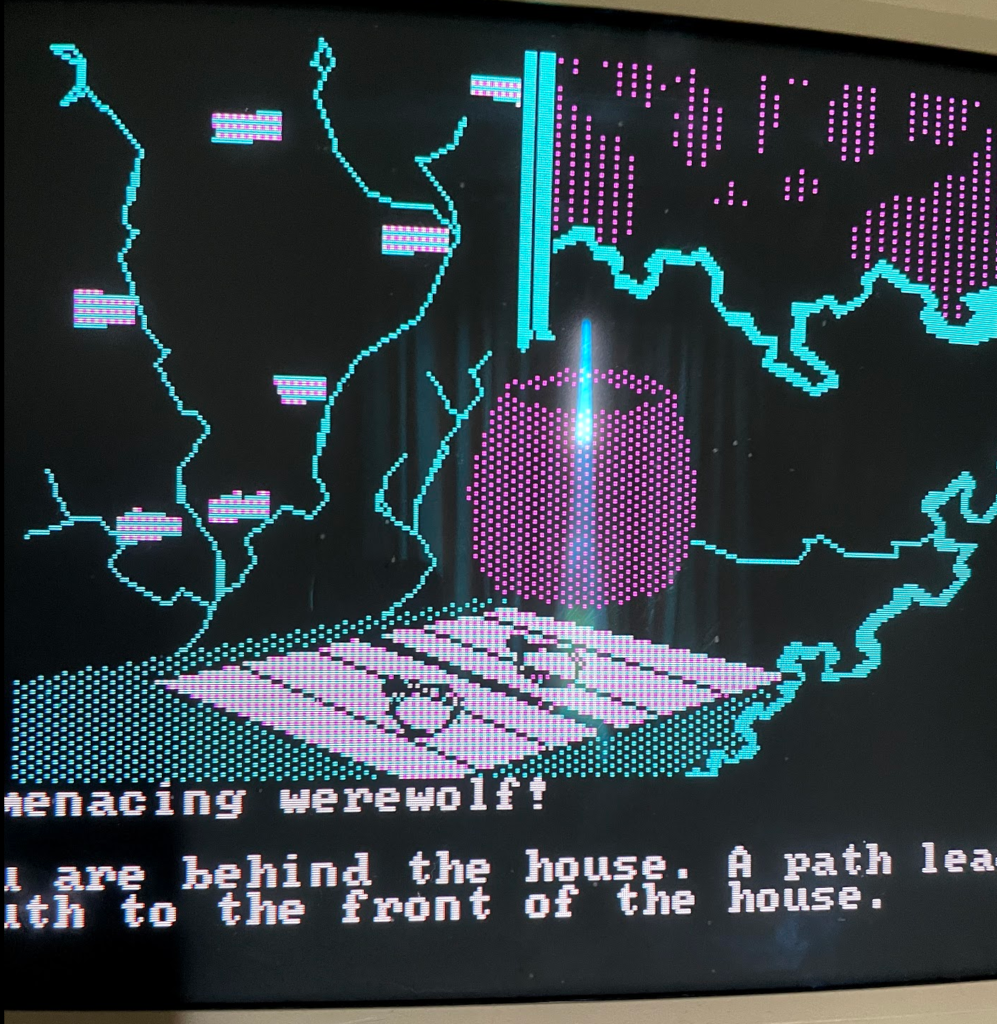
But killing that werewolf the first time was MAGICAL!
And this continued for at least 5+ years, until I eventually got MS-DOS based PCs and started gaming there, at which point I forgot about it for a while.
Transylvania DOS
Sometime in the middle of the 90s, I discovered the Transylvania DOS port, and was committed to conquering the stupid game once more.

Unfortunately, it didn’t take me too long to figure out that things were a bit different. For one, the cross, which you need to kill the vampire, is nowhere to be found:

And suddenly there’s a back to the house, which has a cellar that unless you know exactly what to type, you aren’t finding what you need:

And a nailed shut coffin, and inventory limits, which is a ton of fun until you hack out how to kill the werewolf that is constantly harassing you:

And finally, a super obscure command you need to type in the right place, and it’s something you have no way of knowing if you don’t have the original packaging:

But I eventually did beat it… after finding a book with solutions to old video games at the local library, which was sometime close to the year 2000.

And then finally this year, went back and beat the Macintosh version, which is a bit less exciting than the DOS version:

Of course, the Macintosh version has an advantage because you can carry the princess:

Remake 2010
Of course, what retrospective would be complete if I hadn’t actually remade the game in 2010 for iOS?

It’s not in the AppStore anymore, and I only ever sold a few dozen copies of it, but this game was my parody remake. I wanted to keep the spirit and feature some familiar locations, while coming up with something that was dramatically different.
The goal was to find your “beloved penguin” and then escape on the boat:

Your inventory became a fanny pack:

The cross existed and was in the same place, but not to kill the vampire.

It was to get out of the cell that locked behind you in the castle:

It acted like the eagle in the original game:
You wave the cross around in the air. You almost get it moving fast enough to make a pretty picture. It makes you a little dizzy and you almost pass out. Suddenly you find yourself someplace different. The cross disappears in a puff of smokeAlso a cheeky response if you tried to type the stupid “sing” stuff that spawned the cross in the DOS version:
Did you seriously just try to sing something? Did you think that if you just sung some random song, such as 'Some Enchanted Evening', someone would just magically appear and give you the key to saving your penguin. I mean seriously, back in my day, we stored our CROSSES out in the open, like in a graveyard.The vampire became “the slightly derpy vampire who wasn’t bloodthirsty until you touched his things”. This meant he would be in every castle room, but only kill you if you tried to pick something up.

The only way to deal with him was to eat garlic and acid at the same time and burp in his presence, before the counters on the acid and garlic ran out:
You let out a burp of epic proportions. The combination of acid and your stomach and garlic breath makes for a deadly cloud that turns the derpy vampire to dust.The werewolf existed in the form of the “werezombierabbit”. And was just as annoying.
A evil looking werezombierabbit jumps out of the bushes and menaces threateningly

and if you didn't move away fast enough:

The furry werezombierabbit eats one of your legs and runs away.  Unfortunately, you are in the middle of a dark forest all alone and you definitely need your legs.  You die a few minutes later from werezombierabbit poisoning (not to mention an amputated leg)

The only way to deal with him was a multi-part solution. The original game constantly whispered stuff, so in this game, it whispered “go over there” every once in a while. Which if you went “over there” from anywhere in the game:

You could move the bushes and find the knife.

The knife didn’t exist to kill the werezombierabbit. It existed to carve out a T-Bone from a loin. It always annoyed me that you couldn’t move the rocks in the original game, so I made them movable:

And when you did this, you got a rock in the your inventory. Which you would use to throw at the cart:
For no apparent reason, you throw the large rock at the cart. The rock goes through the cart and punches a hole in the coffin that is in the cart. A large beef loin falls out

Which you could then carve:
You carve the loin into a large T-Bone steak. You discard the rest of the loin and stuff the juicy steak into your fanny pack (kinda gross)and then “flavor” with a toadstool:

Which was actually a “magic mushroom”:
A large steak flavored with a toadstool, otherwise known as a stoolsteakWhich you can eat:
While the raw steak was tasty, it was also flavored with a hallucinogenic toadstool. You waste a couple of hours chasing a green fairy through the forestor
You feed the stoolsteak to the werezombierabbit. From the first lick, it is obvious the animal is seeing strange things. It runs off into the forest in a frollicky manner chasing imaginary puppiesThe main barrier to actually finding the penguin was getting the shovel. Which was locked up in the tower where the Princess normally would be. But you needed the ladder to get there, which was in the basement (why you needed to kill the vampire):

For the actual lock, you needed the key, which was in the same place as it was in the original game, but in a bit more of a cheeky manner. I HATED that stupid goblin, so I went a slightly different route:

With bonus LOTR reference:
You are standing in the middle of a sandy field. Using your incredible skills of deduction and analyzing the footprints, you can tell that a person of short stature, perhaps a hobbit or a goblin, recently stood here twirling a small object, perhaps a 'precious' golden thing. The only exit is WAnd if you searched the field:
You dig around in the sand for a bit. After a while, you find a small golden key buried in the sand. You place the key in your fanny pack.Once the shovel was retrieved, many locations could be dug, but they were all empty save one:

Inside the cave:

At the house (which was locked in my game):

This silly junction, which annoyed me in the original game because the exits didn’t make sense:

You are in another part of the forest. This part of the forest seems to serve absolutely no purpose. Going E or S could take you to some random location, but that doesn't make sense. Because of this, the only exit is back the way you came, NAnd of course where the penguin was actually buried, the screen where the statue and alien stuff happens in the original game:

As in the original game, the way to end the game was to sail away in the boat. And as in the original game, there was a frog living here:


The lake also had piranhas in it. And the frog was poisonous:
You now realize that kissing a brightly colored frog was probably a bad idea.  The frog was a poison frog and you die quickly and painfully from the poison on your lips

or

Unfortunately, the frog you have been carrying around was a poison frog.  The poison has been slowly seeping through your fanny pack and into your skin.  You die painfully, rolling around on the ground in the dirt, all alone
The solution was to use the golf club you picked up at some point:
Since it is such a nice night, you take a couple of swings with your golf club.
One of your practice swings clips the frog.  The frog takes an arching motion through the air and lands in the water.  The frog survives, but unfortunately the piranhas die quickly from the poison on the frog.
Once the fish are dead, you can sail away in the boat. Of course, a cheeky parody game wouldn’t be complete without an unceremonious ending:
You swim out to the boat with your penguin and sail off into the sunrise. Once you hit the ocean, an eagle swoops down and steals your stuffed penguin. Moments later a hurricane comes out of nowhere and sinks your boat. You die. Congratulations! You win! (I guess)Conclusion
Anyway, it’s been fun taking this trip down memory lane, especially the stuff about the parody/remake that I had basically forgotten about.
I’ve tossed all the resources for the game up in an imgur album so you can have a closer look if you want.
]]>This should be a fun one.
Routing has easily become one of my favorite lab tasks. Especially since at one point, it was such an incredibly cryptic thing to me.
So fair warning. This will be long.
I’m going to:
- Set up a VPS and an internal home router.
- Use WireGuard to connect the VPS and internal home router
- Set up multiple other internal routers and get the traffic flowing.
- Route traffic from a basic desktop through the VPS, all via BGP.
Routing
Routing, put most simply, is: “Where do I find this IP address I’m looking for”.
So if a host/server/device wants to get to an IP, it needs to know the path to get there. And it can only talk to devices that it’s locally connected to, which means a device on a local interface/subnet with it.
There are two main types of routing I’ll be talking about.
Static, which is “hey, I know what subnets are where, and I’ll map everything manually”, and dynamic, which is “I’m going to set up relationships with other routers and learn stuff automatically”.
BGP, or Border Gateway Protocol, is the type of dynamic routing I’ll be using here.
Let’s break down the main routing table on one of my primary routers (show ip route in VyOS):
B>* 0.0.0.0/0 [20/0] via 10.245.245.9, eth0.508, weight 1, 00:00:08
C * 10.0.11.0/24 is directly connected, eth0.11, 01w0d22h
C>* 10.0.11.0/24 is directly connected, eth0.11, 01w0d22h
C>* 10.0.35.0/30 is directly connected, eth0.35, 01w0d22h
C * 10.3.1.0/24 is directly connected, eth0.3, 01w0d22h
C>* 10.3.1.0/24 is directly connected, eth0.3, 01w0d22h
C * 10.9.1.0/24 is directly connected, eth0.9, 01w0d22h
C>* 10.9.1.0/24 is directly connected, eth0.9, 01w0d22h
C * 10.10.8.0/24 is directly connected, eth0.8, 01w0d22h
C>* 10.10.8.0/24 is directly connected, eth0.8, 01w0d22h
C * 10.10.51.0/24 is directly connected, eth0.51, 01w0d22h
C>* 10.10.51.0/24 is directly connected, eth0.51, 01w0d22h
C * 10.20.20.0/24 is directly connected, eth0.20, 01w0d22h
C>* 10.20.20.0/24 is directly connected, eth0.20, 01w0d22h
C * 10.21.21.0/24 is directly connected, eth0.21, 01w0d22h
C>* 10.21.21.0/24 is directly connected, eth0.21, 01w0d22h
C * 10.22.22.0/24 is directly connected, eth0.22, 01w0d22h
C>* 10.22.22.0/24 is directly connected, eth0.22, 01w0d22h
B>* 10.53.53.53/32 [20/0] via 10.3.1.252, eth0.3, weight 1, 01w0d22h
  *                       via 10.3.1.254, eth0.3, weight 1, 01w0d22h
B>* 10.53.53.54/32 [20/0] via 10.3.1.252, eth0.3, weight 1, 01w0d22h
  *                       via 10.3.1.254, eth0.3, weight 1, 01w0d22h
C>* 10.245.245.8/30 is directly connected, eth0.508, 01w0d22h
There is lots going on here, but hopefully most of it is pretty straightforward:
B>* 0.0.0.0/0: This route is learned from my main edge router via BGP. This is a CIDR that represents “Every address on the Internet”. That means any IP or subnet that this server doesn’t know about, will be forwarded to the device at10.245.245.9.C> * ...andC *all represent “directly connected”. This means these are all subnets that exist directly on this router. There are multiple entries here because I’m using VRRP and this router is currently holding the MASTER status for the redundant IP:
- I have two special entries here,
10.53.53.53/32and10.53.53.54/32. These are both learned from my DNS servers via BGP, for a type of “anycast DNS”. Meaning, if the 252 host is down, 10.53.53.53 and 10.53.53.54 will still both respond to DNS queries served from the 254 host. Vice versa with the 254 host. I can spin up extra DNS servers with zero effort and they would still respond to my custom DNS IPs. At one point my DNS range was10.3.1.248-254, which means I had a LOT of DNS servers all responding to the same two IPs. This prevents weirdness in how different operating systems handle primary and backup DNS. - Finally, another directly connected route. This is the
/30that talks to my main edge router
Let’s talk about CIDRs
CIDRs are a very important concept in routing. They represent the /24 after the network in the above descriptions. The smaller the CIDR number, the more IP addresses that network represents.
Most subnets have a network address and a broadcast address, neither which can be used for hosts in that subnet.
In my opinion, using a tool like sipcalc makes it super clear:
- A normal
/24. This is what people normally use for LAN subnets. A nice range of 254 usable. addresses. Many people would put their router at10.3.1.1or10.3.1.254, and reserve a DHCP range for somewhere in the middle. The .0 and .255 addresses are reserved for the network address and broadcast respectively.
❯ sipcalc 10.3.1.0/24
-[ipv4 : 10.3.1.0/24] - 0

[CIDR]
Host address            - 10.3.1.0
Host address (decimal)  - 167969024
Host address (hex)      - A030100
Network address         - 10.3.1.0
Network mask            - 255.255.255.0
Network mask (bits)     - 24
Network mask (hex)      - FFFFFF00
Broadcast address       - 10.3.1.255
Cisco wildcard          - 0.0.0.255
Addresses in network    - 256
Network range           - 10.3.1.0 - 10.3.1.255
Usable range            - 10.3.1.1 - 10.3.1.254
- A
/30. Often used for point-to-point links. Four addresses are represented, but only the middle two are available, again due to the network/broadcast addresses.
❯ sipcalc 10.245.245.8/30
-[ipv4 : 10.245.245.8/30] - 0

[CIDR]
Host address            - 10.245.245.8
Host address (decimal)  - 183891208
Host address (hex)      - AF5F508
Network address         - 10.245.245.8
Network mask            - 255.255.255.252
Network mask (bits)     - 30
Network mask (hex)      - FFFFFFFC
Broadcast address       - 10.245.245.11
Cisco wildcard          - 0.0.0.3
Addresses in network    - 4
Network range           - 10.245.245.8 - 10.245.245.11
Usable range            - 10.245.245.9 - 10.245.245.10
- Most people use the larger subnets as “summary networks”, such as with this
/8. It would include the10.3.1.0/24and10.245.245.8/30from above. Meaning if you wanted to target both, and didn’t want to have two routing entries, you could just use a single route:
❯ sipcalc 10.0.0.0/8
-[ipv4 : 10.0.0.0/8] - 0

[CIDR]
Host address            - 10.0.0.0
Host address (decimal)  - 167772160
Host address (hex)      - A000000
Network address         - 10.0.0.0
Network mask            - 255.0.0.0
Network mask (bits)     - 8
Network mask (hex)      - FF000000
Broadcast address       - 10.255.255.255
Cisco wildcard          - 0.255.255.255
Addresses in network    - 16777216
Network range           - 10.0.0.0 - 10.255.255.255
Usable range            - 10.0.0.1 - 10.255.255.254
- Finally, a few “special” subnets/CIDRs. We have a
/31, which is used for point-to-point links and not waste two addresses, and0.0.0.0/0, which is default route to represent the whole Internet. Note that the.0address in the/31is actually usable! Meaning the two usable addresses are10.42.42.0 / 10.42.42.1. This is an oddity if you aren’t accustomed to it:
❯ sipcalc 10.42.42.0/31
-[ipv4 : 10.42.42.0/31] - 0

[CIDR]
Host address            - 10.42.42.0
Host address (decimal)  - 170535424
Host address (hex)      - A2A2A00
Network address         - 10.42.42.0
Network mask            - 255.255.255.254
Network mask (bits)     - 31
Network mask (hex)      - FFFFFFFE
Broadcast address       - 10.42.42.1
Cisco wildcard          - 0.0.0.1
Addresses in network    - 2
Network range           - 10.42.42.0 - 10.42.42.1
❯ sipcalc 0.0.0.0/0
-[ipv4 : 0.0.0.0/0] - 0

[CIDR]
Host address            - 0.0.0.0
Host address (decimal)  - 0
Host address (hex)      - 0
Network address         - 0.0.0.0
Network mask            - 0.0.0.0
Network mask (bits)     - 0
Network mask (hex)      - 0
Broadcast address       - 255.255.255.255
Cisco wildcard          - 255.255.255.255
Addresses in network    - 4294967295
Network range           - 0.0.0.0 - 255.255.255.255
Usable range            - 0.0.0.1 - 255.255.255.254
So 10.53.53.0/24 encompasses 10.53.53.53/32. And in the routing world, if you were to have routes for both in your routing table, the more specific, /32, would be the one chosen to get to the 10.53.53.53 host.
I know all that was a bit of an information dump, but hopefully it illustrated a few things.
Home -> VPS Setup
I don’t want to get too bogged down with the details of how the Home and VPS routers are configured. But I’m using a relatively recent vyos-rolling build, and have spun up a cheap VPS at Vultr for this blog.
This diagram demonstrates what I am trying to achieve:
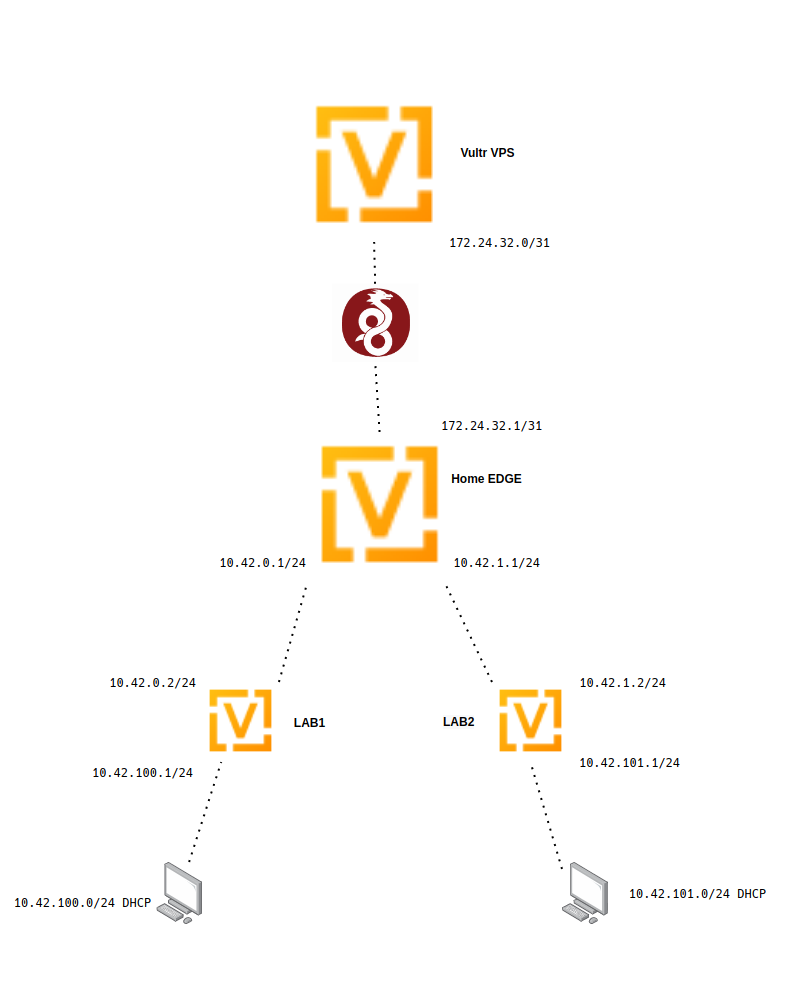
Home Setup
At home, I’ve buried a brand new VyOS VM deep within my network. So this is really going to represent the setup of someone that’s behind multiple layers of NAT, including carrier-grade, meaning they might not be able to port forward.
This is our edge router for this setup.
I’m assuming some familiarity with VyOS in general, but I’ll briefly touch over what’s in the attached config:
- Run
generate wireguard named-keypairs Vultrin op-mode. This creates the private key for putting in the following config. - Run
show wireguard keypairs pubkey Vultrto get the pubkey to put in the VPS config. - Set up the “WAN” connection. This is just some random static IP on an existing LAN.
- Set up a pair interfaces that are going to talk to a few other routers. These
10.42.0.0/16or10.42.0-255.0/24addresses are the main subnets that we are going to be playing with. - Do a little bit of source NAT. This will make anything behind this router on any subnet inside of
10.42.0.0/16be able to get to the Internet. - Set up a WireGuard connection to my VPS (this will be deleted before this blog is posted, which is why I’m keeping the IP).
- Set the description and local IP for this tunnel. I’m using a
/31as mentioned in the above CIDR section. - Set the
allowed-ips. This is the traffic we want to allow the traverse this tunnel. We are including both the tunnel/31subnet and the/16subnet. - Make sure we have the
persistent-keepalive 15set here. Since we aren’t doing a site-to-site, we need to make sure to have this, so the tunnel doesn’t timeout. The tunnel can ONLY be brought up when traffic attempts to go from Home->VPS and not vice-versa because we are emulating CGNAT here. - The address and the port of the VPS that WireGuard is configured to listen on
- The public key of the VPS. From running
show wireguard keypairs pubkey Homeon the VPS after generating it withgenerate wireguard named-keypairs Home
- Set the description and local IP for this tunnel. I’m using a
- Choosing the local private key to use for this connection. It should match the “generate …” you ran above.
- My default route for this router so I have Internet access
- turning on SSH and naming this router
vyos@vyoslab-edge:~$ show configuration commands
set interfaces ethernet eth0 address '10.21.21.10/24'
set interfaces ethernet eth0 description 'WAN'
set interfaces ethernet eth1 address '10.42.0.1/24'
set interfaces ethernet eth1 description 'LAB1'
set interfaces ethernet eth2 address '10.42.1.1/24'
set interfaces ethernet eth2 description 'LAB2'
set interfaces loopback lo
set nat source rule 10 description 'Outgoing NAT'
set nat source rule 10 outbound-interface 'eth0'
set nat source rule 10 source address '10.42.0.0/16'
set nat source rule 10 translation address 'masquerade'
set interfaces wireguard wg0 address '172.24.32.1/31'
set interfaces wireguard wg0 description 'lab-ptp-vps'
set interfaces wireguard wg0 peer VPS-Lab address '144.202.75.103'
set interfaces wireguard wg0 peer VPS-Lab allowed-ips '172.24.32.0/31'
set interfaces wireguard wg0 peer VPS-Lab allowed-ips '10.42.0.0/16'
set interfaces wireguard wg0 peer VPS-Lab persistent-keepalive '15'
set interfaces wireguard wg0 peer VPS-Lab port '8765'
set interfaces wireguard wg0 peer VPS-Lab pubkey 'lQWPCw1f+B15Au441P2qwue8/YIZ3FLTTW+6N3EzhWM='
set interfaces wireguard wg0 private-key 'Vultr'
set protocols static route 0.0.0.0/0 next-hop 10.21.21.1
set service ssh port '22'
set system host-name 'vyoslab-edge'
Hopefully this should demonstrate where the pubkeys come from:
vyos@vyoslab-edge:~$ show wireguard keypairs pubkey Vultr
vzJetiL/M5Ujkb5DiwaG1CMAMr1Ib6a4OGdvlIMNWXs=
VPS Setup
At Vultr, I’ve set up a very simple VyOS config with just the basics to get it online, and the complementary WireGuard config.
- This VPS’s static IP and default route
- Enable SSH
- Set the hostname
- Set up Wireguard
- Uses the opposite IP address, the .0, in the
/31subnet - Uses the pubkey from above.
- Uses the opposite IP address, the .0, in the
vyos@vyoslab-vps# run show configuration commands
set interfaces ethernet eth0 address '144.202.75.103/23'
set interfaces loopback lo
set interfaces wireguard wg0 address '172.24.32.0/31'
set interfaces wireguard wg0 description 'lab-ptp-home'
set interfaces wireguard wg0 peer HomeLab allowed-ips '172.24.32.0/31'
set interfaces wireguard wg0 peer HomeLab allowed-ips '10.42.0.0/16'
set interfaces wireguard wg0 peer HomeLab pubkey 'vzJetiL/M5Ujkb5DiwaG1CMAMr1Ib6a4OGdvlIMNWXs='
set interfaces wireguard wg0 port '8765'
set interfaces wireguard wg0 private-key 'Home'
set protocols static route 0.0.0.0/0 next-hop 144.202.74.1
set service ssh port '22'
set system host-name 'vyoslab-vps'
And the key, which will match the Home pubkey config:
vyos@vyoslab-vps:~$ show wireguard keypairs pubkey  Home
lQWPCw1f+B15Au441P2qwue8/YIZ3FLTTW+6N3EzhWM=
If you are paying attention, you’ll notice that there is no “endpoint” directive in the WireGuard config on the VPS side.
We are running WireGuard here as a server, instead of a site-to-site.
Even though to WireGuard, it doesn’t care much, it’s worth noting because it has important implications, as hinted above.
In this setup, if you are on the VPS and try and bring up the tunnel, nothing will happen. Because the VPS doesn’t know how to get to the other end. So any traffic needs to originate from the home side, and that’s also why we have the persistent-keepalive on the home side to make sure the tunnel stays up.
So some people may have noticed… I haven’t touched ANYTHING security-wise here.
Honestly, it’s probably outside of the scope of what I’m doing. The local “edge” router is buried so far in my homelab it doesn’t matter. And for the VPS router, I’m sure some people are screaming WHY WHY WHY?
It’s because I’m using Vultr’s firewall to block all traffic from everywhere that’s not me. So calm down.
Tunnels UP!
Assuming you’ve made it this far, your tunnel should be up. A ping should work to the opposite end of the tunnel (home is .1, so ping .0):
vyos@vyoslab-edge:~$ ping 172.24.32.0 count 4
PING 172.24.32.0 (172.24.32.0) 56(84) bytes of data.
64 bytes from 172.24.32.0: icmp_seq=1 ttl=64 time=19.9 ms
64 bytes from 172.24.32.0: icmp_seq=2 ttl=64 time=19.3 ms
64 bytes from 172.24.32.0: icmp_seq=3 ttl=64 time=19.3 ms
64 bytes from 172.24.32.0: icmp_seq=4 ttl=64 time=18.8 ms

--- 172.24.32.0 ping statistics ---
4 packets transmitted, 4 received, 0% packet loss, time 8ms
rtt min/avg/max/mdev = 18.768/19.333/19.887/0.419 ms
And a simple op-mode show command:
vyos@vyoslab-edge:~$ show interfaces wireguard wg0
interface: wg0
  description: lab-ptp-vps
  address: 172.24.32.1/31
  public key: vzJetiL/M5Ujkb5DiwaG1CMAMr1Ib6a4OGdvlIMNWXs=
  private key: (hidden)
  listening port: 37175

  peer: VPS-Lab
    public key: lQWPCw1f+B15Au441P2qwue8/YIZ3FLTTW+6N3EzhWM=
    latest handshake: 0:01:16
    status: active
    endpoint: 144.202.75.103:8765
    allowed ips: 172.24.32.0/31, 10.42.0.0/16
    transfer: 54 KB received, 251 KB sent
    persistent keepalive: every 15 seconds

    RX:   bytes  packets  errors  dropped  overrun       mcast
          56008      599       0        0        0           0
    TX:   bytes  packets  errors  dropped  carrier  collisions
         257096     5728       0        1        0           0
Route That!
But the goal here isn’t just to set up a tunnel. We actually want to get to LAB1/2 on the home edge router from the VPS.
vyos@vyoslab-edge:~$ show interfaces
Codes: S - State, L - Link, u - Up, D - Down, A - Admin Down
Interface        IP Address                        S/L  Description
---------        ----------                        ---  -----------
eth0             10.21.21.10/24                    u/u  WAN
eth1             10.42.0.1/24                      u/u  LAB1
eth2             10.42.1.1/24                      u/u  LAB2
lo               127.0.0.1/8                       u/u
                 ::1/128
wg0              172.24.32.1/31                    u/u  lab-ptp-vps
So let’s do that. From the VPS:
vyos@vyoslab-vps:~$ ping 10.42.0.1 count 4
PING 10.42.0.1 (10.42.0.1) 56(84) bytes of data.
^C
--- 10.42.0.1 ping statistics ---
4 packets transmitted, 0 received, 100% packet loss, time 87ms
What’s the problem here? Well look at the routing table:
vyos@vyoslab-vps:~$ show ip route
Codes: K - kernel route, C - connected, S - static, R - RIP,
       O - OSPF, I - IS-IS, B - BGP, E - EIGRP, N - NHRP,
       T - Table, v - VNC, V - VNC-Direct, A - Babel, D - SHARP,
       F - PBR, f - OpenFabric,
       > - selected route, * - FIB route, q - queued, r - rejected, b - backup

S>* 0.0.0.0/0 [1/0] via 144.202.74.1, eth0, weight 1, 1d00h17m
C>* 144.202.74.0/23 is directly connected, eth0, 1d00h17m
C>* 172.24.32.0/31 is directly connected, wg0, 1d00h17m
Since 10.42.0.1 doesn’t match any subnets in the routing table, it will try to go out the default 0.0.0.0/0 route. This won’t work because private IPs can’t be routed over the public Internet.
Static Routing, The Easy Way Out
There are a few ways around this. A simple static entry for each of the LAB subnets pointed at the home IP of the tunnel (VPS is .0, home is .1):
vyos@vyoslab-vps# set protocols static route 10.42.0.0/24 next-hop 172.24.32.1
[edit]
vyos@vyoslab-vps# set protocols static route 10.42.1.0/24 next-hop 172.24.32.1
[edit]
vyos@vyoslab-vps# commit
Done
[edit]
vyos@vyoslab-vps# run show ip route
Codes: K - kernel route, C - connected, S - static, R - RIP,
       O - OSPF, I - IS-IS, B - BGP, E - EIGRP, N - NHRP,
       T - Table, v - VNC, V - VNC-Direct, A - Babel, D - SHARP,
       F - PBR, f - OpenFabric,
       > - selected route, * - FIB route, q - queued, r - rejected, b - backup

S>* 0.0.0.0/0 [1/0] via 144.202.74.1, eth0, weight 1, 1d00h25m
S>* 10.42.0.0/24 [1/0] via 172.24.32.1, wg0, weight 1, 00:00:05
S>* 10.42.1.0/24 [1/0] via 172.24.32.1, wg0, weight 1, 00:00:05
C>* 144.202.74.0/23 is directly connected, eth0, 1d00h25m
C>* 172.24.32.0/31 is directly connected, wg0, 1d00h25m
[edit]
vyos@vyoslab-vps#
Of course, this is ugly, and since I deliberately designed the subnets I’m using here to be easily “summarizable”, there’s a VERY simple solution:
vyos@vyoslab-vps# delete protocols static route 10.42.0.0/24
[edit]
vyos@vyoslab-vps# delete protocols static route 10.42.1.0/24
[edit]
vyos@vyoslab-vps# set protocols static route 10.42.0.0/16 next-hop 172.24.32.1
[edit]
vyos@vyoslab-vps# commit
[edit]
vyos@vyoslab-vps# save
Saving configuration to '/config/config.boot'...
Done
[edit]
vyos@vyoslab-vps# run show ip route
Codes: K - kernel route, C - connected, S - static, R - RIP,
       O - OSPF, I - IS-IS, B - BGP, E - EIGRP, N - NHRP,
       T - Table, v - VNC, V - VNC-Direct, A - Babel, D - SHARP,
       F - PBR, f - OpenFabric,
       > - selected route, * - FIB route, q - queued, r - rejected, b - backup

S>* 0.0.0.0/0 [1/0] via 144.202.74.1, eth0, weight 1, 1d00h28m
S>* 10.42.0.0/16 [1/0] via 172.24.32.1, wg0, weight 1, 00:00:09
C>* 144.202.74.0/23 is directly connected, eth0, 1d00h28m
C>* 172.24.32.0/31 is directly connected, wg0, 1d00h28m
In both cases, a simple ping to either the LAB1 or LAB2 address of edge should work from the VPS:
vyos@vyoslab-vps# run ping 10.42.0.1 count 2
PING 10.42.0.1 (10.42.0.1) 56(84) bytes of data.
64 bytes from 10.42.0.1: icmp_seq=1 ttl=64 time=18.6 ms
64 bytes from 10.42.0.1: icmp_seq=2 ttl=64 time=19.2 ms

--- 10.42.0.1 ping statistics ---
2 packets transmitted, 2 received, 0% packet loss, time 3ms
rtt min/avg/max/mdev = 18.624/18.908/19.193/0.315 ms
[edit]
vyos@vyoslab-vps# run ping 10.42.1.1 count 2
PING 10.42.1.1 (10.42.1.1) 56(84) bytes of data.
64 bytes from 10.42.1.1: icmp_seq=1 ttl=64 time=19.5 ms
64 bytes from 10.42.1.1: icmp_seq=2 ttl=64 time=19.2 ms

--- 10.42.1.1 ping statistics ---
2 packets transmitted, 2 received, 0% packet loss, time 3ms
rtt min/avg/max/mdev = 19.164/19.338/19.512/0.174 ms
[edit]
Now that it’s working, delete it and get back to a clean slate so we can proceed to the BGP:
vyos@vyoslab-vps# delete protocols static route 10.42.0.0/16
[edit]
vyos@vyoslab-vps# commit
[edit]
vyos@vyoslab-vps# run show ip route
Codes: K - kernel route, C - connected, S - static, R - RIP,
       O - OSPF, I - IS-IS, B - BGP, E - EIGRP, N - NHRP,
       T - Table, v - VNC, V - VNC-Direct, A - Babel, D - SHARP,
       F - PBR, f - OpenFabric,
       > - selected route, * - FIB route, q - queued, r - rejected, b - backup

S>* 0.0.0.0/0 [1/0] via 144.202.74.1, eth0, weight 1, 1d00h56m
C>* 144.202.74.0/23 is directly connected, eth0, 1d00h56m
C>* 172.24.32.0/31 is directly connected, wg0, 1d00h56m
BGP, The Slightly Less Easy Way Out
So why not just static routing? It works right? Well it does… but has a number of notable problems:
- Requires planning. Especially if you want to judiciously use summary routes
- Could potentially require a lot of upkeep as your network grows and morphs.
- It’s not BGP, which is just cool.
With the first one, who ever plans? I know I don’t. I’d rather adjust config on one or two routers than all of them.
Regardless, we are here to BGP, so let’s do it.
If you don’t know what BGP is, you should Google it. There are 1000 different resources that will explain it better than me.
There are two main types, internal and external (eBGP), and we are going to be focusing on external, because it’s bit more plug-and-play.
An ASN, or Autonomous System Number, is an important concept when it comes to eBGP. When you are announcing public subnets, you need an officially blessed ASN from a place like ARIN, but for our uses, there are a number of for-private ranges we can use:
- 64512 to 65534 (16 bit)
- 4200000000 to 4294967294 (32 bit)
The ASNs are used both for identification and routing decisions. If I wanted to make a route take a shorter route sometimes and a longer one that others, I could have the ASN PATH in BGP set to “64512 64512 64512” on one peer versus just “64512” on a second. This would give preference to the shorter path.
Does it really matter if you use a non-private one? Probably not. And for our cases it will hurt even less than wrongly using non-RFC1918 addresses that people sometimes do in homelabs. But it’s still good practice to be a good netizen out of the gate.
Home Setup
I’ll be starting with the Home setup, since that will be kind of the central hub here. First, start with the basic peering:
vyos@vyoslab-edge:~$ show configuration commands
set protocols bgp local-as '4200000000'
set protocols bgp neighbor 172.24.32.0 remote-as '4200000001'
I’ll be going with a very basic setup here, just setting up the initial tunnel.
Let’s walk through here to see what’s going on:
- Set our local ASN. For
edge, I’ll be using the bottom 32bit private ASN - Set up our neighbor, this is the
vpsIP over wireguard, the next available 32bit ASN
VPS Setup
On the VPS, a similarly simple config, with everything swapped. We use the edge side of the WireGuard tunnel, and swap the appropriate local and remote ASN.
vyos@vyoslab-vps# run show configuration commands
set protocols bgp local-as '4200000001'
set protocols bgp neighbor 172.24.32.1 remote-as '4200000000'
With that, the tunnel should be up. In op-mode:
vyos@vyoslab-edge:~$ show bgp summary

IPv4 Unicast Summary:
BGP router identifier 172.24.32.1, local AS number 4200000000 vrf-id 0
BGP table version 0
RIB entries 0, using 0 bytes of memory
Peers 1, using 21 KiB of memory

Neighbor        V         AS   MsgRcvd   MsgSent   TblVer  InQ OutQ  Up/Down State/PfxRcd   PfxSnt
172.24.32.0     4 4200000001        15        15        0    0    0 00:12:27            0        0

Total number of neighbors 1
vyos@vyoslab-edge:~$
and
vyos@vyoslab-vps# run show bgp summary

IPv4 Unicast Summary:
BGP router identifier 172.24.32.0, local AS number 4200000001 vrf-id 0
BGP table version 0
RIB entries 0, using 0 bytes of memory
Peers 1, using 21 KiB of memory

Neighbor        V         AS   MsgRcvd   MsgSent   TblVer  InQ OutQ  Up/Down State/PfxRcd   PfxSnt
172.24.32.1     4 4200000000        16        16        0    0    0 00:14:00            0        0

Total number of neighbors 1
[edit]
The important things to note is that the ASN and neighbor IP get swapped on each host.
Of course, we need a few small modifications to actually get things advertising.
First, we need to tell the home edge to advertise its connected routes. This means that we want to redistribute any routes from this router that are attached to interfaces:
vyos@vyoslab-edge:~$ show configuration commands
set protocols bgp address-family ipv4-unicast redistribute connected
and then on the VPS router to pull any updates instantly:
vyos@vyoslab-vps# set protocols bgp neighbor 172.24.32.1 address-family ipv4-unicast soft-reconfiguration inbound
[edit]
vyos@vyoslab-vps# commit
With that done, if you look on the vps router, you can see stuff happening:
vyos@vyoslab-vps:~$ show bgp summary

IPv4 Unicast Summary:
BGP router identifier 172.24.32.0, local AS number 4200000001 vrf-id 0
BGP table version 8
RIB entries 9, using 1728 bytes of memory
Peers 1, using 21 KiB of memory

Neighbor        V         AS   MsgRcvd   MsgSent   TblVer  InQ OutQ  Up/Down State/PfxRcd   PfxSnt
172.24.32.1     4 4200000000        51        40        0    0    0 00:33:36            5        5

Total number of neighbors 1
So let’s look at our routing table on vps:
vyos@vyoslab-vps:~$ show ip route
Codes: K - kernel route, C - connected, S - static, R - RIP,
       O - OSPF, I - IS-IS, B - BGP, E - EIGRP, N - NHRP,
       T - Table, v - VNC, V - VNC-Direct, A - Babel, D - SHARP,
       F - PBR, f - OpenFabric,
       > - selected route, * - FIB route, q - queued, r - rejected, b - backup

S>* 0.0.0.0/0 [1/0] via 144.202.74.1, eth0, weight 1, 00:37:57
B>* 10.21.21.0/24 [20/0] via 172.24.32.1, wg0, weight 1, 00:13:12
B>* 10.42.0.0/24 [20/0] via 172.24.32.1, wg0, weight 1, 00:13:12
B>* 10.42.1.0/24 [20/0] via 172.24.32.1, wg0, weight 1, 00:13:12
C>* 144.202.74.0/23 is directly connected, eth0, 00:38:03
B   172.24.32.0/31 [20/0] via 172.24.32.1 inactive, weight 1, 00:13:12
C>* 172.24.32.0/31 is directly connected, wg0, 00:38:00
If everything is working, any route that exists on our edge‘s routing table as “directly connected”, should be found on our vps‘s routing table going over the WireGuard tunnel.
You can test this by adding a new dummy interface on the edge router:
vyos@vyoslab-edge# set interfaces dummy dum0 address 172.22.22.255/32
[edit]
vyos@vyoslab-edge# commit
Almost immediately, you should see it pop up in the routing table on the vps, but it won’t be pingable because it’s not part of the allowed-ips of the WireGuard tunnel:
vyos@vyoslab-vps:~$ show ip route 172.22.22.255/32
Routing entry for 172.22.22.255/32
  Known via "bgp", distance 20, metric 0, best
  Last update 00:00:36 ago
  * 172.24.32.1, via wg0, weight 1


vyos@vyoslab-vps:~$ ping 172.22.22.255
PING 172.22.22.255 (172.22.22.255) 56(84) bytes of data.
From 172.24.32.0 icmp_seq=1 Destination Host Unreachable
ping: sendmsg: Required key not available
From 172.24.32.0 icmp_seq=2 Destination Host Unreachable
ping: sendmsg: Required key not available
^C
--- 172.22.22.255 ping statistics ---
2 packets transmitted, 0 received, +2 errors, 100% packet loss, time 54ms
Now the real fun can start….
BGeeeeeP All The Things
So if you’ve been following along, we’ve completed the top part of our diagram here:
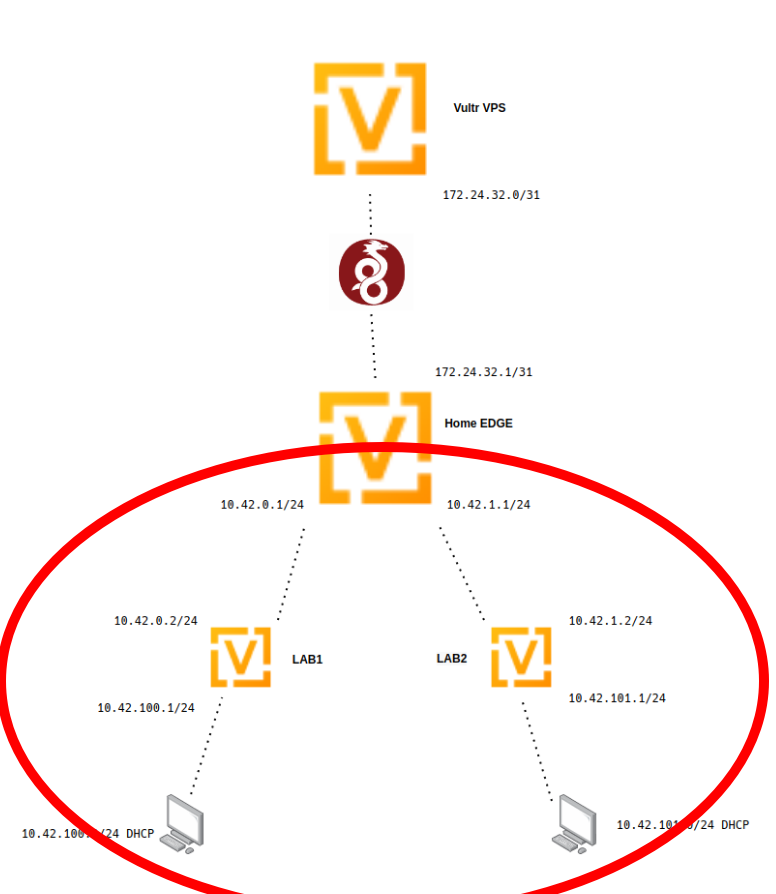
It’s time to get our LAB1 and LAB2 routers up.
A Pair of Internal-Internal Routers
The first thing I’ll be doing is preparing the edge router to connect to lab1 and lab2:
- Set up a neighbor pointing at
lab1. default-originatetells this router to automatically set the default route forlab1to this router- As before, pull updates from
lab1quickly - Set the next ASN in line
- Rinse and repeat for
lab2
set protocols bgp neighbor 10.42.0.2 address-family ipv4-unicast default-originate
set protocols bgp neighbor 10.42.0.2 address-family ipv4-unicast soft-reconfiguration inbound
set protocols bgp neighbor 10.42.0.2 remote-as '4200000002'
set protocols bgp neighbor 10.42.1.2 address-family ipv4-unicast default-originate
set protocols bgp neighbor 10.42.1.2 address-family ipv4-unicast soft-reconfiguration inbound
set protocols bgp neighbor 10.42.1.2 remote-as '4200000003'
The configs for these two are mostly identical. Note the changes in IP addresses and ASNs
- I’m using a slightly different method of advertising on
lab2. Instead of redistributing any connected network, I’m choosing the specific network to spit out. - I’ve set up some DHCP Servers. This is so I can just plug in a client and go for testing
- I’ve also ignored setting up any source NAT. This is so I can directly access the 100/101 networks from the VPS.
- Note that both of these are missing the
0.0.0.0/0default route/gateway. This is because they are learning it via BGP.
LAB1
vyos@vyoslab-lab1:~$ show configuration commands
set interfaces ethernet eth0 address '10.42.0.2/24'
set interfaces ethernet eth1 address '10.42.100.1/24'
set interfaces loopback lo
set protocols bgp address-family ipv4-unicast redistribute connected
set protocols bgp local-as '4200000002'
set protocols bgp neighbor 10.42.0.1 address-family ipv4-unicast soft-reconfiguration inbound
set protocols bgp neighbor 10.42.0.1 remote-as '4200000000'
set service dhcp-server shared-network-name LAB1 subnet 10.42.100.0/24 default-router '10.42.100.1'
set service dhcp-server shared-network-name LAB1 subnet 10.42.100.0/24 dns-server '1.1.1.1'
set service dhcp-server shared-network-name LAB1 subnet 10.42.100.0/24 dns-server '1.0.0.1'
set service dhcp-server shared-network-name LAB1 subnet 10.42.100.0/24 range 0 start '10.42.100.100'
set service dhcp-server shared-network-name LAB1 subnet 10.42.100.0/24 range 0 stop '10.42.100.200'
set service ssh port '22'
set system host-name 'vyoslab-lab1'
LAB2
vyos@vyoslab-lab2:~$ show configuration commands
set interfaces ethernet eth0 address '10.42.1.2/24'
set interfaces ethernet eth1 address '10.42.101.1/24'
set interfaces loopback lo
set protocols bgp address-family ipv4-unicast network 10.42.101.0/24
set protocols bgp local-as '4200000003'
set protocols bgp neighbor 10.42.1.1 address-family ipv4-unicast soft-reconfiguration inbound
set protocols bgp neighbor 10.42.1.1 remote-as '4200000000'
set service dhcp-server shared-network-name LAB2 subnet 10.42.101.0/24 default-router '10.42.101.1'
set service dhcp-server shared-network-name LAB2 subnet 10.42.101.0/24 dns-server '1.1.1.1'
set service dhcp-server shared-network-name LAB2 subnet 10.42.101.0/24 dns-server '1.0.0.1'
set service dhcp-server shared-network-name LAB2 subnet 10.42.101.0/24 range 0 start '10.42.101.100'
set service dhcp-server shared-network-name LAB2 subnet 10.42.101.0/24 range 0 stop '10.42.101.200'
set service ssh port '22'
set system host-name 'vyoslab-lab2'
Assuming everything is set up right, the BGP connections should pop up and be viewable from edge. Note the different counts in State/PfxRcd between lab1 and lab2. This is due to how I chose to advertise as mentioned above.
vyos@vyoslab-edge:~$ show ip bgp summary

IPv4 Unicast Summary:
BGP router identifier 172.24.32.1, local AS number 4200000000 vrf-id 0
BGP table version 18
RIB entries 11, using 2112 bytes of memory
Peers 3, using 64 KiB of memory

Neighbor        V         AS   MsgRcvd   MsgSent   TblVer  InQ OutQ  Up/Down State/PfxRcd   PfxSnt
10.42.0.2       4 4200000002       131       139        0    0    0 01:22:18            2        6
10.42.1.2       4 4200000003       129       143        0    0    0 01:21:56            1        6
172.24.32.0     4 4200000001       123       122        0    0    0 01:33:50            0        6
And the routing table all the way out on the vps should be populated and pingable with the two new subnets:
vyos@vyoslab-edge:~$ show ip route
Codes: K - kernel route, C - connected, S - static, R - RIP,
       O - OSPF, I - IS-IS, B - BGP, E - EIGRP, N - NHRP,
       T - Table, v - VNC, V - VNC-Direct, A - Babel, D - SHARP,
       F - PBR, f - OpenFabric,
       > - selected route, * - FIB route, q - queued, r - rejected, b - backup

S>* 0.0.0.0/0 [1/0] via 10.21.21.1, eth0, weight 1, 01:37:31
C>* 10.21.21.0/24 is directly connected, eth0, 01:37:33
C>* 10.42.0.0/24 is directly connected, eth1, 01:37:34
C>* 10.42.1.0/24 is directly connected, eth2, 01:37:33
B>* 10.42.100.0/24 [20/0] via 10.42.0.2, eth1, weight 1, 00:04:04
B>* 10.42.101.0/24 [20/0] via 10.42.1.2, eth2, weight 1, 01:25:05
C>* 172.24.32.0/31 is directly connected, wg0, 01:37:32

------------

vyos@vyoslab-edge:~$ ping 10.42.100.1 count 1
PING 10.42.100.1 (10.42.100.1) 56(84) bytes of data.
64 bytes from 10.42.100.1: icmp_seq=1 ttl=64 time=0.264 ms

--- 10.42.100.1 ping statistics ---
1 packets transmitted, 1 received, 0% packet loss, time 0ms
rtt min/avg/max/mdev = 0.264/0.264/0.264/0.000 ms

--------------

vyos@vyoslab-edge:~$ ping 10.42.101.1 count 1
PING 10.42.101.1 (10.42.101.1) 56(84) bytes of data.
64 bytes from 10.42.101.1: icmp_seq=1 ttl=64 time=10.7 ms

--- 10.42.101.1 ping statistics ---
1 packets transmitted, 1 received, 0% packet loss, time 0ms
rtt min/avg/max/mdev = 10.711/10.711/10.711/0.000 ms
Playing around with Clients
Whew… We’ve made it this far. So what can we do?
First off, a pair of basic Ubuntu installs. One behind lab1 and one behind lab2:
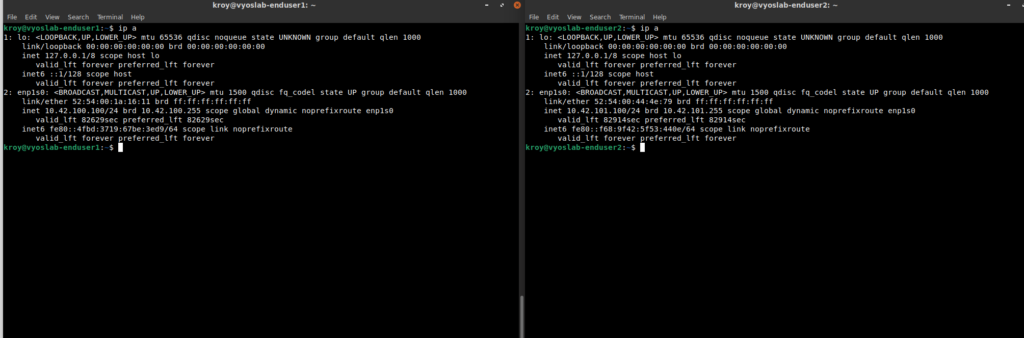
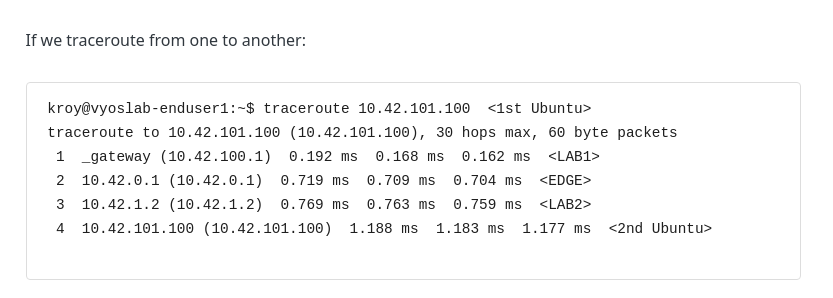
If we traceroute from one to another:
kroy@vyoslab-enduser1:~$ traceroute 10.42.101.100  <1st Ubuntu>
traceroute to 10.42.101.100 (10.42.101.100), 30 hops max, 60 byte packets
 1  _gateway (10.42.100.1)  0.192 ms  0.168 ms  0.162 ms  <LAB1>
 2  10.42.0.1 (10.42.0.1)  0.719 ms  0.709 ms  0.704 ms  <EDGE>
 3  10.42.1.2 (10.42.1.2)  0.769 ms  0.763 ms  0.759 ms  <LAB2>
 4  10.42.101.100 (10.42.101.100)  1.188 ms  1.183 ms  1.177 ms  <2nd Ubuntu>
What about if we go from the vps to one of the Ubuntu installs:
vyos@vyoslab-vps:~$ traceroute 10.42.101.100
traceroute to 10.42.101.100 (10.42.101.100), 30 hops max, 60 byte packets
 1  172.24.32.1 (172.24.32.1)  18.453 ms  18.367 ms  18.378 ms   <EDGE via WireGuard>
 2  10.42.1.2 (10.42.1.2)  18.343 ms  18.308 ms  18.275 ms   <LAB2>
 3  10.42.101.100 (10.42.101.100)  18.250 ms  18.211 ms  18.178 ms   <2nd Ubuntu>
To a well-known site:
kroy@vyoslab-enduser1:~$ traceroute 1.1.1.1
traceroute to 1.1.1.1 (1.1.1.1), 30 hops max, 60 byte packets
 1  _gateway (10.42.100.1)  0.220 ms  0.183 ms  0.176 ms   <LAB1>
 2  10.42.0.1 (10.42.0.1)  0.379 ms  0.372 ms  0.362 ms  <EDGE>
 3  10.21.21.3 (10.21.21.3)  1.206 ms  1.200 ms  1.193 ms  <An Internal Router>
 4  10.245.245.9 (10.245.245.9)  1.255 ms  1.249 ms  1.236 ms  <My Edge Router>
 5  xxxxxxxxxxxxxxxxxxxxxxxxxxx 2.658 ms  2.651 ms  2.639 ms
 6  xxxxxxxxxxxxxxxxxxxxxxxxxxx 5.195 ms  3.781 ms  4.081 ms
 7  xxxxxxxxxxxxxxxxxxxxxxxxxxx  4.069 ms  4.646 ms  4.626 ms
 8  xxxxxxxxxxxxxxxxxxxxxxxxxxx.191 ms  4.610 ms  4.600 ms
 9  100ge15-2.core1.mci3.he.net (184.105.65.165)  8.474 ms  9.064 ms  8.443 ms
10  cloudflare.grand1.kcix.net (206.51.7.34)  9.040 ms  10.013 ms  9.385 ms
11  one.one.one.one (1.1.1.1)  9.415 ms  8.984 ms  8.106 ms
A Policy Route
Of course, all we’ve really done here is set up basic communication between a number of subnets at multiple locations. So let’s toss some PBR (Policy Based Routing) into the mix.
The first step is to make sure vps is set up to NAT out. This is:
- Take all traffic from this subnet
- Masquerade it to the public IP of the VPS
eth0is the WAN interface of the VPS
vyos@vyoslab-vps:~$ show configuration commands
set nat source rule 10 source address '10.42.100.0/24'
set nat source rule 10 translation address 'masquerade'
set nat source rule 10 outbound-interface 'eth0'
Then, on edge is where all the magic happens. The goal here is to put all traffic from/to the 10.42.100.0/24 subnet, into a separate routing table. That way we can tell all the 0.0.0.0/0 traffic to leave this router via the WireGuard/VPS connection.
- Set up a policy route. This puts all traffic to and from in a separate routing table,
100 - Tie a specific route for
0.0.0.0/0to that table, and tell it to go out via thevpsWireGuard IP - Allow all traffic through WireGuard on this end. Otherwise WireGuard will deny traffic to everywhere
- Attach the new policy to the interface the traffic will be coming in on.
vyos@vyoslab-edge:~$ show configuration commands
set policy route OUTGOING-VPS rule 100 set table '100'
set policy route OUTGOING-VPS rule 100 source address '10.42.100.0/24'
set policy route OUTGOING-VPS rule 101 destination address '10.42.100.0/24'
set policy route OUTGOING-VPS rule 101 set table '100'
set protocols static table 100 route 0.0.0.0/0 next-hop 172.24.32.0
set interfaces wireguard wg0 peer VPS-Lab allowed-ips '0.0.0.0/0'
set interfaces ethernet eth1 policy route 'OUTGOING-VPS'
Once that is complete, you should be accessing the web through the VPS. Note the VPS IP in the curl, and the dramatically different path than the one it took above.
kroy@vyoslab-enduser1:~$ curl ifconfig.co
144.202.75.103

kroy@vyoslab-enduser1:~$ traceroute 1.1.1.1
traceroute to 1.1.1.1 (1.1.1.1), 30 hops max, 60 byte packets
 1  _gateway (10.42.100.1)  0.221 ms  0.195 ms  0.189 ms  <LAB1>
 2  10.42.0.1 (10.42.0.1)  0.421 ms  0.415 ms  0.406 ms    <EDGE>
 3  172.24.32.0 (172.24.32.0)  19.710 ms  20.094 ms  20.088 ms  <VPS WireGuard>
 4  * * *  <VPS Default Gateway>
 5  vl199-ds1-b5-02.05.dal4.constant.com (108.61.111.1)  23.403 ms  26.589 ms  29.625 ms
 6  * * *
 7  * * *
 8  ae-31.a01.dllstx09.us.bb.gin.ntt.net (128.241.219.53)  19.701 ms * 8-1-5.ear1.Dallas3.Level3.net (4.15.38.133)  19.719 ms
 9  ae-31.a01.dllstx09.us.bb.gin.ntt.net (128.241.219.53)  19.682 ms 8-1-5.ear1.Dallas3.Level3.net (4.15.38.133)  19.726 ms  19.721 ms
10  ae11.cr8-dal3.ip4.gtt.net (213.200.115.30)  19.877 ms ip4.gtt.net (208.116.142.210)  19.950 ms ae-6.r10.dllstx09.us.bb.gin.ntt.net (129.250.5.4)  19.623 ms
11  ip4.gtt.net (208.116.142.210)  20.130 ms  20.148 ms cloudflare-ic328260-dls-b23.ip.twelve99-cust.net (62.115.61.243)  20.989 ms
12  one.one.one.one (1.1.1.1)  19.788 ms  20.716 ms  20.428 ms
Once this is working, you could set up a web server on this IP and access it via the VPS.
OOOPS…
Unfortunately, we’ve create a bit of a mistake. Remember this from above?
The path looks waaaay different now:
kroy@vyoslab-enduser1:~$ traceroute 10.42.101.100   <1st Ubuntu>
traceroute to 10.42.101.100 (10.42.101.100), 30 hops max, 60 byte packets
 1  _gateway (10.42.100.1)  0.215 ms  0.201 ms  0.196 ms   <LAB1>
 2  10.42.0.1 (10.42.0.1)  0.357 ms  0.700 ms  0.694 ms  <EDGE>
 3  172.24.32.0 (172.24.32.0)  19.082 ms  19.076 ms  19.142 ms   <VPS???>
 4  172.24.32.1 (172.24.32.1)  19.135 ms  19.129 ms  19.264 ms   <EDGE AGAIN WOT?>
 5  10.42.1.2 (10.42.1.2)  19.504 ms  19.494 ms  19.488 ms  <LAB2>
 6  10.42.101.100 (10.42.101.100)  19.717 ms  19.680 ms  19.654 ms <2nd Ubuntu>
The policy based routing has created a bit of a weird path. In fact, we are a bit lucky it can find a path at all.
Fortunately, this is easily fixable on edge:
- When traffic from our “re-routed” network tries to hit anything in the
10.0.0.0/8network (another summary route for the networks I use here and in the rest of my lab), put the traffic back in themainrouting table.
vyos@vyoslab-edge:~$ show configuration commands
set policy route OUTGOING-VPS rule 90 destination address '10.0.0.0/8'
set policy route OUTGOING-VPS rule 90 set table 'main'
And once more the traceroute looks normal AND the rest of the traffic is still being routed though the VPS:
kroy@vyoslab-enduser1:~$ traceroute 10.42.101.100
traceroute to 10.42.101.100 (10.42.101.100), 30 hops max, 60 byte packets
 1  _gateway (10.42.100.1)  0.286 ms  0.233 ms  0.227 ms
 2  10.42.0.1 (10.42.0.1)  0.429 ms  0.423 ms  0.413 ms
 3  10.42.1.2 (10.42.1.2)  0.732 ms  0.726 ms  0.720 ms
 4  10.42.101.100 (10.42.101.100)  0.964 ms  0.949 ms  0.937 ms

kroy@vyoslab-enduser1:~$ curl ifconfig.co
144.202.75.103
Caveats
Even though I’m at almost 5000 words on this post already, I fully acknowledge this will end with a LOT of basics missing:
- At any point in this whole thing,”insert security”. This is all very wide open and would be a bad idea to implement without some security controls in place.
- You would need to set up access/as-path/communities/prefix -lists and route-maps to fine tune what you are announcing and accepting. Right now, everything that was built is basically “Announce Everything and Accept Everything!”. This is bad in so many ways, and on the public Internet, has actually broken big parts of the Internet because some network engineer announced or accepted a prefix they shouldn’t have.
- None of this even scratches the surface of what BGP can do. You can build up failover and redundancy, make routing decisions based on tons of factors and more.
- I could write 20 more posts of equal or more length and still barely demonstrate beyond the basics, especially when it comes to best-practices (of which there weren’t many here), or capabilities of BGP.
Conclusion
Even with the caveats mentioned, hopefully this post will set some people on the path of learning and enjoying routing. It’s been a long one, but I’ve enjoyed labbing it out.
]]>Introduction
A huge and defining part of my youth was trolling all the BBSes I could find. At the time, there was no Internet, so BBSing was my window to the world. It was basically the only place to find all the new shareware, images, door games, and more. And later on, it even become possible to exchange messages with BBSes around the world through the use of FidoNet.
In any case, there was nothing more exciting than checking into your favorite BBS and playing a bit of TradeWars, or spotting the newest Commander Keen (4 to be specific), and waiting ALLLLL night for it to download. Of course it was ONLY 600KB, but that took upwards of 6 hours to download.

“Dialing Up”
Although I was casually aware that BBSes still existed via telnet, a recent post on Reddit’s r/VintageApple subreddit really caught my eye.
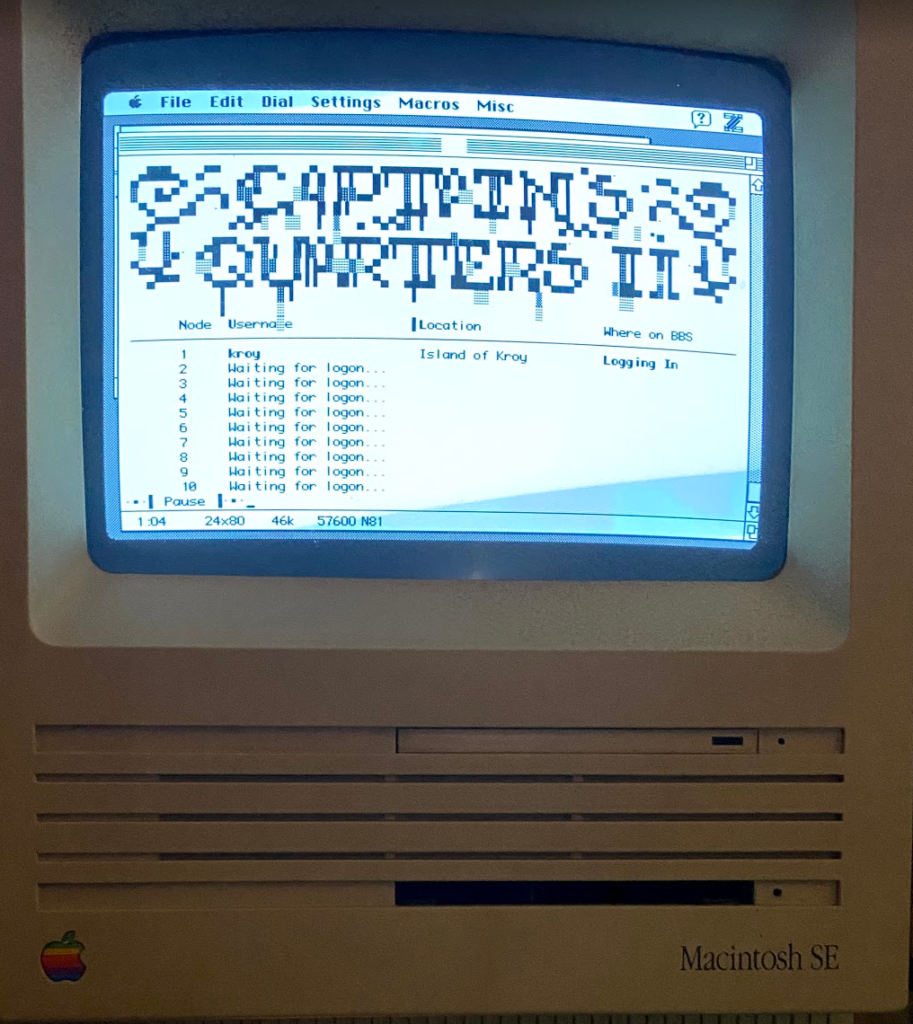
It didn’t take much work to get my PowerMac 7200/75 connected via telnet to the Captain’s Quarters II, and I was immediately hooked!

Of course, that was only the beginning…
Jacking In
But this wasn’t enough. In my original BBS days, i was using either some sort of all-in-one Monochrome Macintosh, or BananaCOM on MS-DOS something on an 8088 Acer, both with some 1200/14.4k/38.4k modems.
As I’ve mentioned in the past, when I do something, I do it up big. So I immediately knew I needed to get my Mac SE connecting to this BBS!
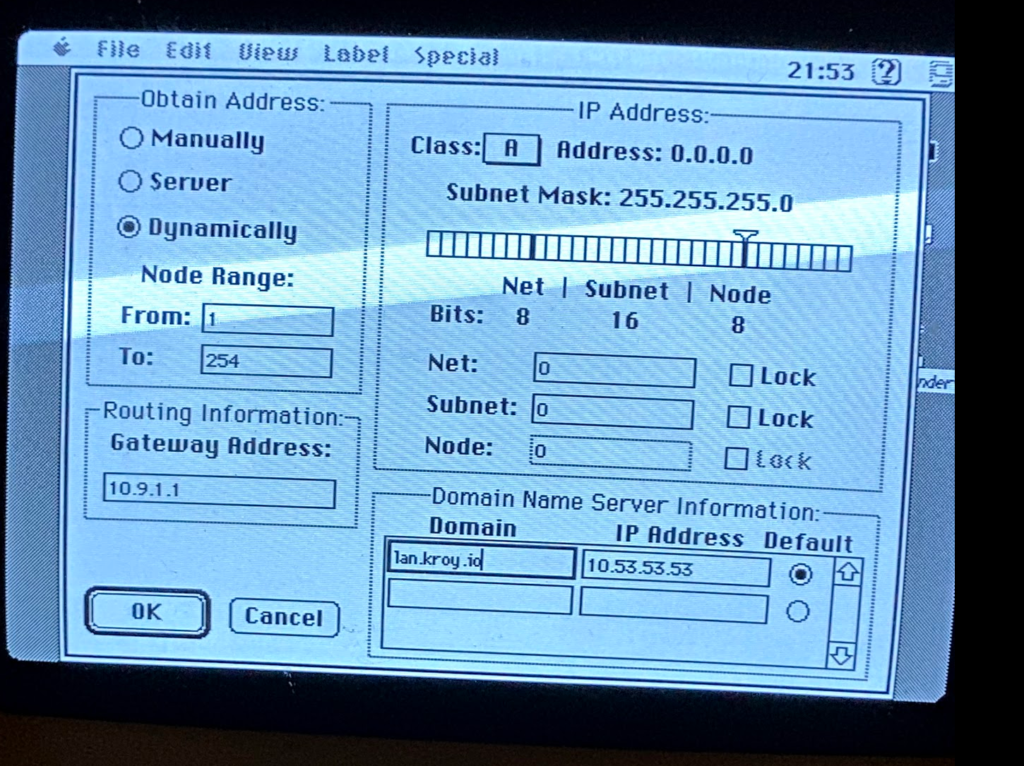
My first attempt was hooking together the Mac SE and PowerMac 7200 via a serial cable, and sharing the PowerMac’s Internet connection with IPNetRouter.
Unfortunately, I was never able to get this working, though I did finally get an AppleTalk share set up between the two hosts.
But MacTCP failed me…
I was starting to get a little disappointed, until I decided to get a “real” modem.
A Real Modem
Of course, anybody that follows tech knows that modems have been entirely obsolete for a very long time. Even though I do have some old Mac modems somewhere, the simple fact is I don’t even have a phone line to plug them into, let alone a number to dial that would be valid in 2021.
That’s about when I discovered the WiModem232.
To make a long story short, it’s a device that connects via WiFi and acts like an actual Hayes compatible modem. Of course, you don’t dial phone numbers, but in my case, telnet addresses.
It. Was. Perfect.
I was smart, or so I thought, and ordered up a couple of cables. One for my Mac Fleet, and one for my 486 running DOS.
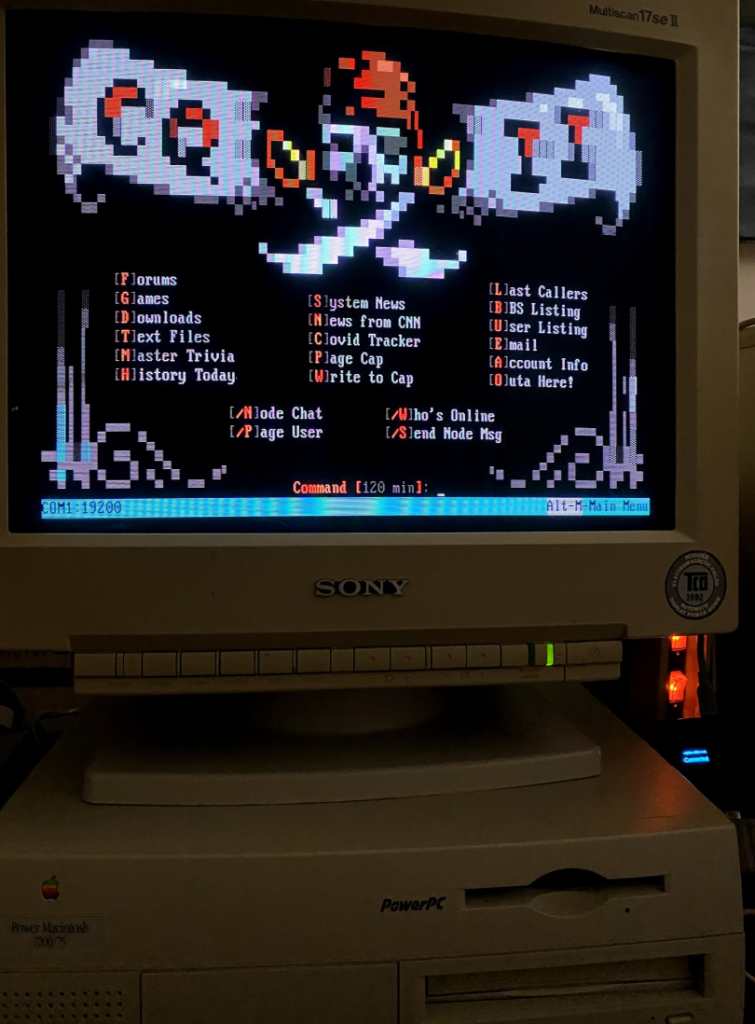
It arrived quickly and did exactly what it promised to do.
Unfortunately, the Mac cable took a few extra days to arrive, so I was forced to “slum” it on my 486 and Bananacom. And Captain’s Quarters II looks and runs great there too:
A few days later when the Mac cable arrived, I realized the horrible mistake I had made.
The Mac SE goes Online
The mistake, of course, was that the cable I ordered was for hooking up an ImageWriter printer, and not a modem. But amazingly, in the never ending treat-bag of old Mac “stuffs”, I discovered I had a DIN8->DB25 cable for hooking up a modem.
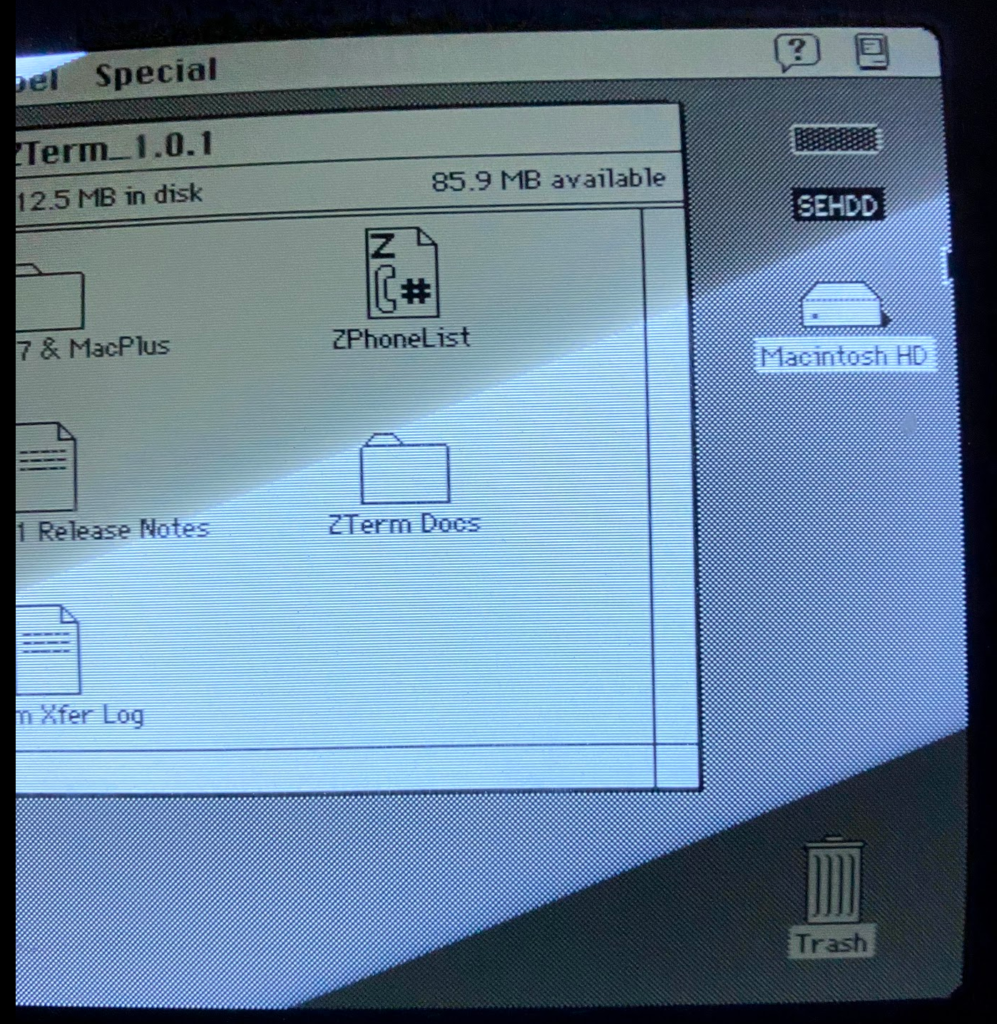
It didn’t take long to hook it up, but unfortunately things were… not well.
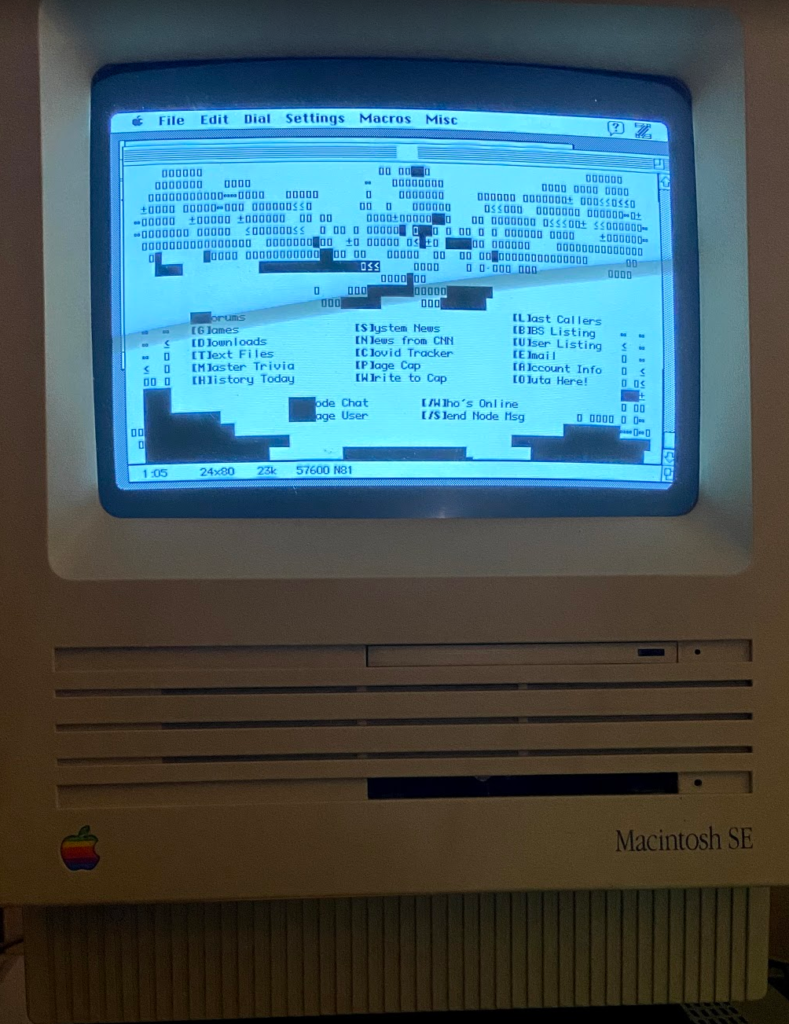
Fortunately, that was just due to the ANSI colors, which I was able to turn off with a simple checkbox in ZTerm
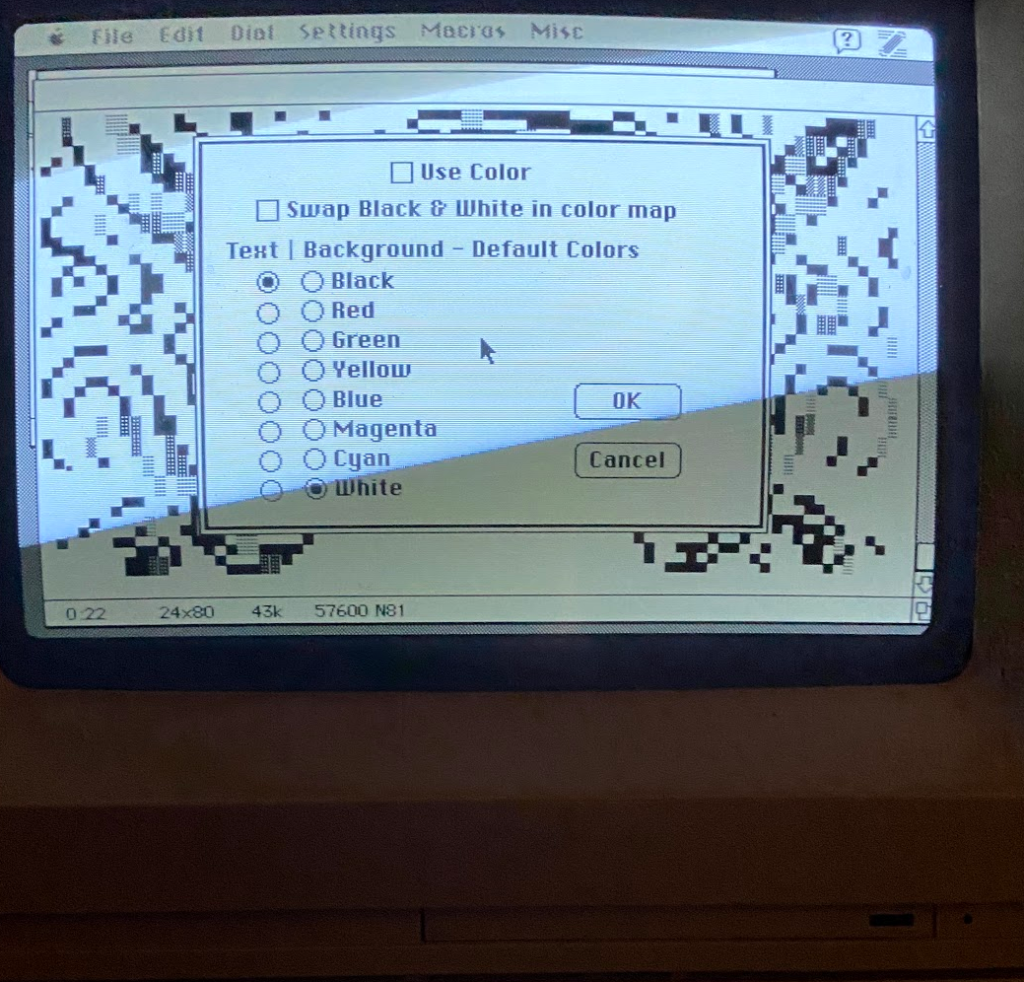
And everything looks great:

And in attempting to download an old game, the memories of the dreaded “CRC Error” came flooding back to me:
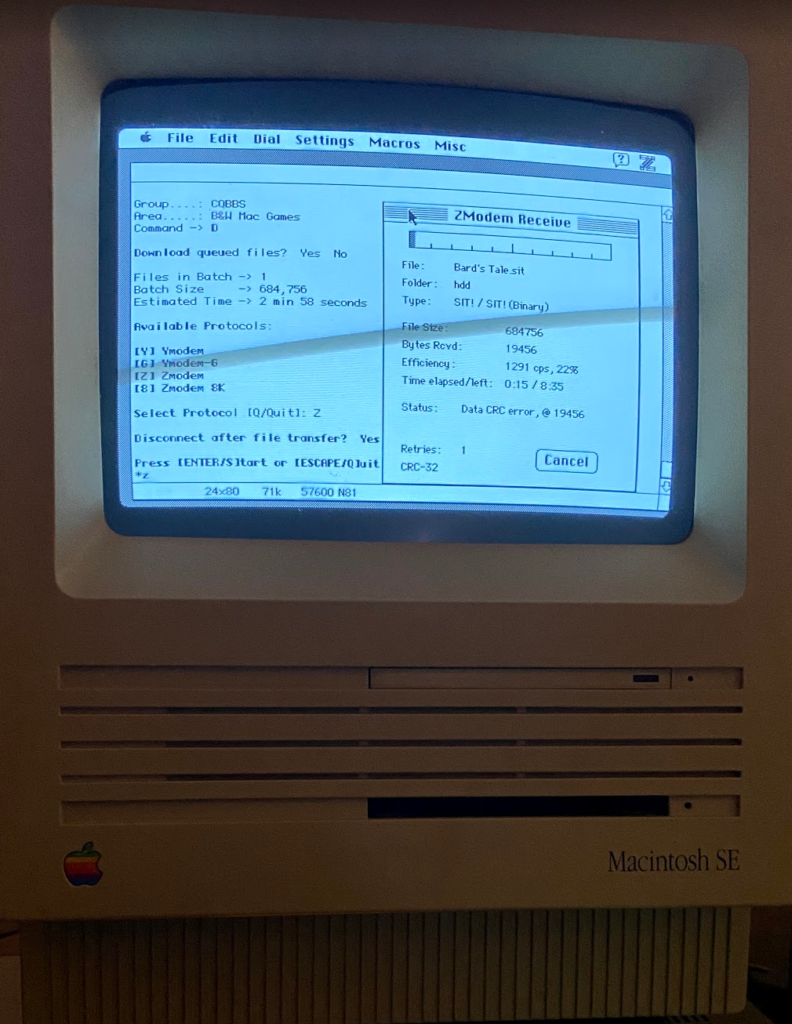
That’s what ZModem is for.
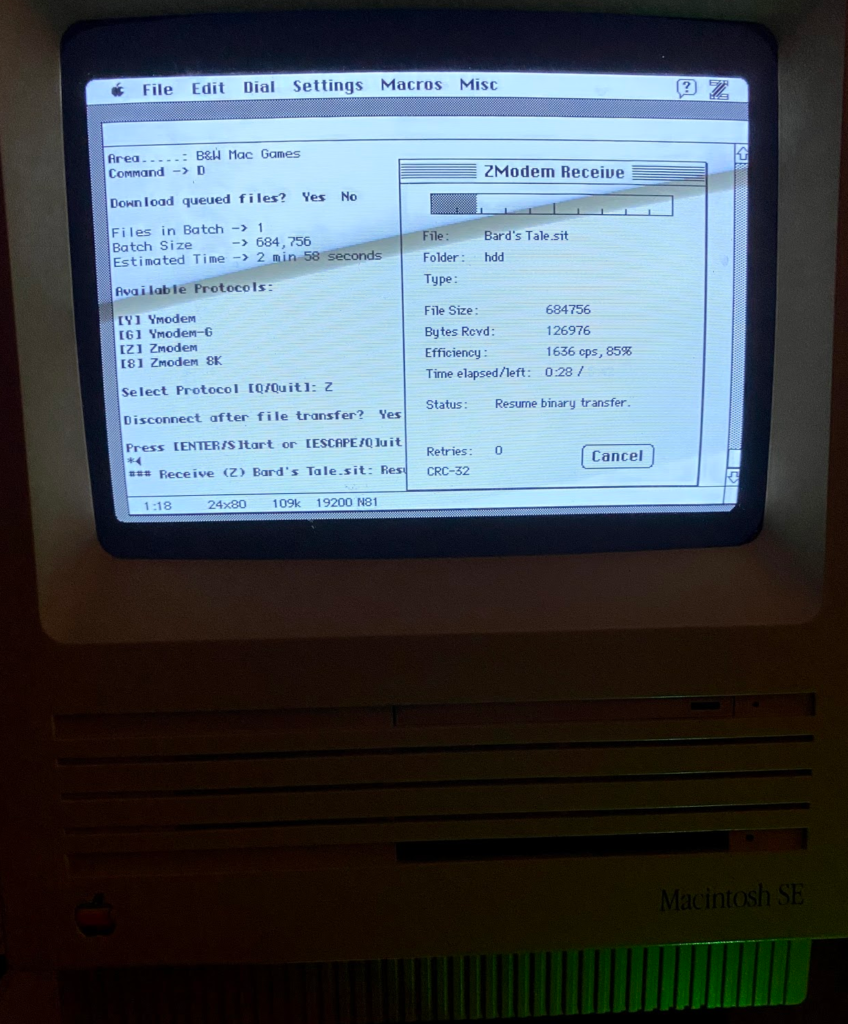
What I discovered is that this old Mac isn’t particularly stable over the serial port going past 19,200. Knocking down the baud rate made it download just fine (and slowly):
Conclusion
Of course, what’s the point here?
I can access Captain’s Quarters II and other BBSes just fine over telnet from my laptop or workstation. And since I have a Floppy EMU, there’s obviously better ways to transfer files to the Mac SE.
For me, it’s the nostalgia. Doing the things I used to do, on the hardware (or similarly enough) to the hardware I used to do it on. I love this hardware and rediscovering BBSes has opened up a whole new world to me.
]]>Introduction
On the Internet, you know you’ve made it when you have a subnet to announce.
Either you paid an exorbitant sum to buy one yourself, or are leasing/borrowing a subnet from a LIR/RIR (local or regional Internet Registry), having your own subnet in your homelab is definitely a bit of a status symbol.
Of course, once you have the subnet, what do you do with it? You announce it with BGP of course!
Announcement
To put simply, announcement is you telling the world where and how to get to your subnet. Whether you have an IPv4 subnet, IPv6, or both, the procedure is the identical.
If you’ve got some sort of business-class Internet, you just need to send your ISP the LOA (letter of authorization from your LIR/RIR), and they should begin announcing for you.
Now if you are just a regular homelab user with a conventional residential ISP, congrats! You are just like me.
A residential ISP won’t even talk to you, so you need to trackdown a VPS that will do your announcing for you.
I prefer Vultr (this is a referral link or click HERE for non-referral link). For $5 a month, you can get a VPS that will have no problem announcing one or many subnets.
I’m also just going over basics here, as there are TONS of things that go into this to complicate it further. As mentioned, announcing IPv6 subnets is identical to IPv4. And different LIR/RIRs have different rules about what you are required to do with the subnet, like multi-homing.
VPS Setup
I don’t want to waste TOO much time on the non-BGPy parts of VPS. But if you read my first article on this, the basic setup is straightforward:
firewall {
    all-ping enable
    broadcast-ping disable
    config-trap disable
    ipv6-receive-redirects disable
    ipv6-src-route disable
    ip-src-route disable
    log-martians enable
    name WAN-LOCAL {
        rule 10 {
            action accept
            destination {
                port ssh
            }
            protocol tcp
            source {
                address homeIP/32
            }
        }
        rule 20 {
            action drop
        }
    }
    receive-redirects disable
    send-redirects enable
    source-validation disable
    state-policy {
        established {
            action accept
        }
        invalid {
            action drop
        }
        related {
            action accept
        }
    }
    syn-cookies enable
    twa-hazards-protection disable
}
interfaces {
    ethernet eth0 {
        address VultrPublicIP/23
        firewall {
            local {
                name WAN-LOCAL
            }
        }
    }
    loopback lo {
    }
    tunnel tun0 {
        address 172.27.114.1/30
        encapsulation gre
        local-ip VultrPublicIP
        remote-ip HomeIP
    }
}

protocols {
    static {
        route 0.0.0.0/0 {
            next-hop VultrGateway {
            }
        }
    }
}
service {
    ssh {
        disable-password-authentication
        port 22
    }
}


system {
    config-management {
        commit-revisions 100
    }
    host-name vyos
    login {
        user kroy {
            authentication {
                public-keys kroy@home {
                    key ****************
                    type ssh-ed25519
                }
            }
        }
    }
    name-server 1.1.1.1
    name-server 1.0.0.1
    ntp {
        server 0.pool.ntp.org {
        }
        server 1.pool.ntp.org {
        }
        server 2.pool.ntp.org {
        }
    }
    syslog {
        global {
            facility all {
                level info
            }
            facility protocols {
                level debug
            }
        }
    }
}
Most of this should be fairly straightforward:
- A firewall to drop all packets, except for SSH from my home IP
- My public ethernet setup for the VPS
- A simple GRE tunnel to my Home IP. This is where the BGP session is going to transit to actually contact the public servers on my homelab.
- A static route to define the default route for the VPS. Not strictly necessary since I’ll be BGP peering with Vultr, but it makes it easier to configure everything over SSH.
- Making SSH accessible on port 22 and forcing key-auth.
- Some system-y setup things. System name-servers, key-based ssh auth, etc.
BGP
The next step is to look up your BGP on Vultr. After Vultr has accepted your LOA, you’ll have a new BGP tab in your VPS settings
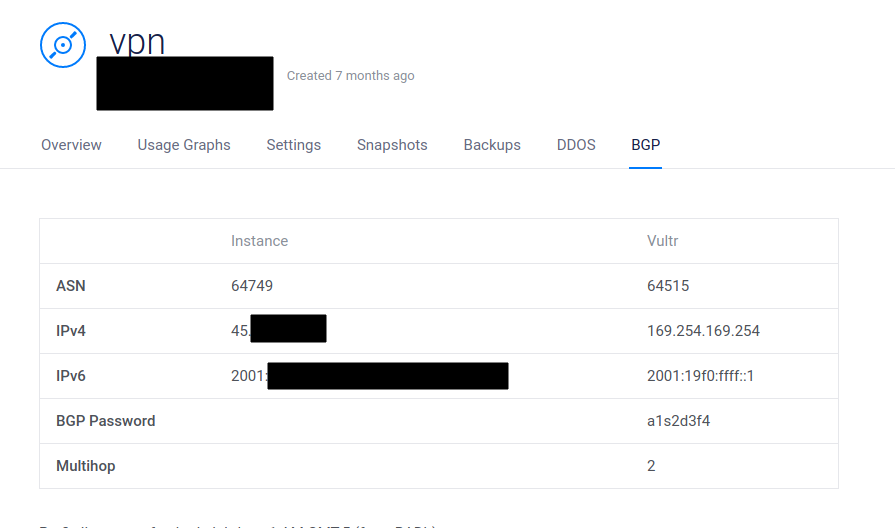
These are basically all the things you’ll need to know to hook up a BGP session to Vultr.
Throughout this document, I’m going to pretend to advertise 10.100.0.0/22, even though that’s a private subnet per RFC1918 and could never be advertised.
This is all for example and WILL NOT WORK if you try and do this for real.
So what does this look like on the VPS in the protocols bgp config?
The numbers like 64537 are what are known as ASNs, or Autonomous System Numbers. In the real world, you’d get your own individual number that would tie the ASN to you or your company.
If you don’t have your own ASN, you’ll be using what are known as “Private ASN Numbers”, per RFC6996.
For my example, I chose at random, while a few of them need to line up to what Vultr provided.
protocols {
    bgp 64537 {
        address-family {
            ipv4-unicast {
                aggregate-address 10.100.0.0/22 {
                }
            }
        }
        neighbor 169.254.169.254 {
            address-family {
                ipv4-unicast {
                    nexthop-self {
                        force
                    }
                    prefix-list {
                        import IPV4DENYALL
                    }
                    remove-private-as
                    route-map {
                        export V4-VULTR-ANNOUNCE
                    }
                }
            }
            ebgp-multihop 255
            local-as 64749 {
            }
            password a1s2d3f4
            remote-as 64515
        }
        parameters {
            router-id VultrPublicIP
        }
    }
As mentioned, a few of things items are just “fill in the dots” to create a session with Vultr. The ebgp-multihop is just a number that must be “at most this many hops away”. So as long as it’s >=2 that Vultr provided, 255 is fine.
I chose to advertise a /22 here for a reason. This means I could have a /24 from one location, and a /23 from a different location, and advertise them both from a single spot.
The remove-private-as will be important when we set up our connection to home. Otherwise, Vultr will fail to accept our advertisement, because it sees an ASN in the path that it doesn’t recognize.
The route-map and prefix-list are part of being a good netizen and only accepting and advertising the prefixes you want. There have been some MAJOR Internet outages because some network engineer messed up routes it was accepting or advertising somehow.
Route maps and Prefix lists
It’s important to focus on what the route maps and prefix lists are doing here. As mentioned, they control what your in and out announcements are going to be. It’s worth noting that someone like Vultr probably won’t let you do anything too bad, it’s still good to learn how to set it up somewhat securely first.
policy {
    prefix-list IPV4DENYALL {
        rule 10 {
            action deny
            prefix 0.0.0.0/0
        }
    }
    prefix-list V4-VULTR {
        rule 10 {
            action permit
            prefix 10.100.0.0/22
        }
        rule 20 {
            action deny
            le 32
            prefix 0.0.0.0/0
        }
    }
    prefix-list VULTR {
        rule 10 {
            action permit
            prefix 10.100.0.0/24
        }
        rule 20 {
            action deny
            prefix 0.0.0.0/0
        }
    }
    route-map V4-VULTR {
        rule 10 {
            action permit
            match {
                ip {
                    address {
                        prefix-list V4-VULTR
                    }
                }
            }
        }
    }
}
Where these are positioned in relation to the export/import in the peer config above, control what happens. So in this case we want to:
- IPV4DenyAll: ignore anything from Vultr. You can tell them to give you full tables, but unless you have an instance with slightly more RAM, full tables would probably be a bit too much for this VPS. This would basically be the routes for EVERY network on the Internet.
- VULTR Route maps and prefix lists: Advertise ONLY the subnet we want. This is for when you want to advertise different subnets to different peers. It also stops you from leaking your routes in case of a misconfiguration somewhere.
Now in op-mode, showing the BGP neighbors should give you a bunch of information:
admin@vyos:~$ show ip bgp neighbors 169.254.169.254 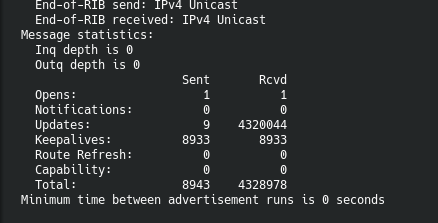
and you should see the subnet being advertised:
admin@vyos:~$ show ip bgp neighbors 169.254.169.254 advertised-routes
BGP table version is 7, local router ID is 45.xx.xx.xx, vrf id 0
Default local pref 100, local AS 64537
Status codes:  s suppressed, d damped, h history, * valid, > best, = multipath,
               i internal, r RIB-failure, S Stale, R Removed
Nexthop codes: @NNN nexthop's vrf id, < announce-nh-self
Origin codes:  i - IGP, e - EGP, ? - incomplete

   Network          Next Hop            Metric LocPrf Weight Path
*> 10.100.0.0/24   0.0.0.0                       100      0 i

Total number of prefixes 1
BGP at Home
The final bit of this puzzle is completing the BGP session to your home, and getting up some hosts:
We can add another neighbor, which uses the opposite end of the GRE tunnel for the BGP peer. Still on the VPS:
protocols {
    bgp 64537 {
        neighbor 172.27.114.2 {
            address-family {
                ipv4-unicast {
                    prefix-list {
                        export IPV4DENYALL
                    }
                    route-map {
                        import V4-VULTR
                    }
                    soft-reconfiguration {
                        inbound
                    }
                }
            }
            remote-as 64537
        }

    }
}
Note that there are a few important things going on here:
- The
export/importare reversed, so I can reuse the same policies. That means, I want to make sure I’m importing only the subnet I want from home, and not exporting anything. - The
soft-reconfiguration inbound. This is the statement that tells VyOS to accept the routes that the home server is advertising. - The
bgp 64537andremote-as 64537are the same. This triggers the use of IBGP instead of EBGP (internal vs external). This becomes important as you add more hosts and want to advertise from more locations, but is beyond the scope of this post.
At this point, all the prep work on the VPS should be done, and once the home router is configured, you should be advertising your subnet.
Home
At home, the first thing is to get the GRE tunnel working. You can use almost any transport, like WireGuard or an L3 OpenVPN, but for advertising a simple subnet, GRE is about as easy as it gets, plus it avoids some potential MTU shenanigans.
You might need to add appropriate firewall rules:
WAN->LOCAL firewall:

 rule 2 {
     action accept
     description "GRE to VPS"
     protocol gre
     source {
         address VultrPublicIP
     }
     state {
         invalid enable
         new enable
     }
 }

interfaces:
tunnel tun2 {
     address 172.27.114.2/30
     description vultr-gre
     encapsulation gre
     local-ip HomePublicIP
     multicast disable
     remote-ip VultrPublicIP
 }
Depending on your firewall config, you might want to drop (in my case) tun2 in the appropriate zone, Barring any issues, pinging to the other end of the tunnel should immediately start working:
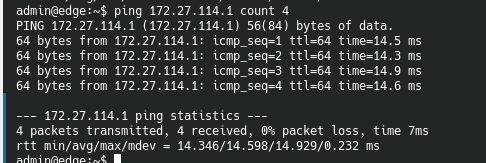
Home Config
Now there are a number of different directions one can take for advertising the subnet from your home to the VPS. OSPF, static routes, or my favorite, BGP.
For just running a simple subnet out of your home, you’ll want to assign an IP in that subnet to your home VyOS install. In my case, I assign it to a vlan, but you could assign it to a separate interface like eth4:
admin@edge# show interfaces ethernet eth0 vif 146
 address 10.100.0.1/24
 policy {
     route VULTRSTUFF
 }
Now, anything on that VLAN that gets assigned a 10.100.0.0/24 address can use 10.100.0.1 for its gateway and have access on the advertised subnet (once we set up BGP at home).
You’ll also note I have a policy route here. This is to ensure that the traffic doesn’t leak out my WAN, which will result in an asymmetric routing situation where my advertised subnet doesn’t work.
Policy based routing sets up rules that say: “Take any traffic that matches these rules, and put them in different routing tables to ensure they can’t go out the wrong interface”.
policy route VULTRSTUFF {
    rule 9 {
        destination {
            group {
                network-group PRIVATE-NETWORKS
            }
        }
        set {
            table main
        }
        source {
            address 10.100.0.0/24
        }
    }
    rule 10 {
        set {
            table 146
        }
        source {
            address 10.100.0.0/24
        }
    }
    rule 20 {
        destination {
            address 10.100.0.0/24
        }
        set {
            table 146
        }
    }
}
So with above:
- Rule 9: Any traffic from our announced subnet trying to get to the local private networks, put back in the main routing table. This is so my announced hosts can access my LAN. This is known as “leaking routes”.
- Take any traffic from my announced subnet and put it in a different table. The number is arbitrary but in this case
146. - Take any traffic destined TO my announced subnet to put it in the different table. Again
146.
Now that we have traffic in a separate routing table, we need to have a way for the traffic to actually go somewhere useful, namely, our GRE tunnel:
protocols static table 146 {
     interface-route 0.0.0.0/0 {
         next-hop-interface tun2 {
         }
     }
 }
This just tells VyOS to put ALL traffic on table 146 over the tun2 interface, which is the GRE connection to the VPS. With a recent version of rolling VyOS, this can all be done with some VRF antics as well.
BGP
The final piece of this puzzle is setting up BGP on the server at home. It looks much like the setup on the VPS, just with the opposite neighbor address and reversed route/prefixes, so we are accepting none, and only advertising the appropriate subnet. This is important because you won’t always have control of both ends of the BGP link, so you don’t want to trust someone else’s work.
 bgp 64537 {
     address-family {
         ipv4-unicast {
             network 10.100.1.0/24 {
             }
         }
     }
  neighbor 172.27.114.1 {
         address-family {
             ipv4-unicast {
                 prefix-list {
                     import DENY-ALL-V4
                 }
                 route-map {
                     export V4-VULTR
                 }
                 route-server-client
             }
         }
         remote-as 64537
         update-source 172.27.112.2
     }
}
As before, we are using IBGP (the 64537 matches both locally and the remote), denying any incoming advertisements, and only allowing our outgoing advertisement:
admin@homeserver# show policy
 prefix-list DENY-ALL-V4 {
     rule 10 {
         action deny
         le 32
         prefix 0.0.0.0/0
     }
 }
 prefix-list V4-VULTR {
     rule 10 {
         action permit
         prefix 10.100.0.0/24
     }
     rule 20 {
         action deny
         le 32
         prefix 0.0.0.0/0
     }
 }
It’s also important to note, this server is only advertising 10.100.0.0/24. Meaning you could advertise 10.100.1-3.0/24 on other hosts or locations, and aggregate at the VPS.
Once complete, the BGP session should pop up and you should see via advertised-routes:
admin@homeserver:~$ show ip bgp neighbors 172.27.114.1 advertised-routes
BGP table version is 19601, local router ID is 10.0.20.254, vrf id 0
Default local pref 100, local AS 64537
Status codes:  s suppressed, d damped, h history, * valid, > best, = multipath,
               i internal, r RIB-failure, S Stale, R Removed
Nexthop codes: @NNN nexthop's vrf id, < announce-nh-self
Origin codes:  i - IGP, e - EGP, ? - incomplete

   Network          Next Hop            Metric LocPrf Weight Path
*> 10.100.0.0/24   0.0.0.0                  0    100  32768 i

Total number of prefixes 1
admin@edge:~$
and on the VPS via received-routes and the show ip route bgp
admin@vps:~$ show ip bgp neighbors 172.27.114.2 received-routes
BGP table version is 0, local router ID is 45.x.x.x.x, vrf id 0
Default local pref 100, local AS 64537
Status codes:  s suppressed, d damped, h history, * valid, > best, = multipath,
               i internal, r RIB-failure, S Stale, R Removed
Nexthop codes: @NNN nexthop's vrf id, < announce-nh-self
Origin codes:  i - IGP, e - EGP, ? - incomplete

   Network          Next Hop            Metric LocPrf Weight Path
*> 10.100.0.0/24   172.27.114.2             0    100      0 i

Total number of prefixes 1


admin@vps:~$ show ip route bgp
Codes: K - kernel route, C - connected, S - static, R - RIP,
       O - OSPF, I - IS-IS, B - BGP, E - EIGRP, N - NHRP,
       T - Table, v - VNC, V - VNC-Direct, A - Babel, D - SHARP,
       F - PBR, f - OpenFabric,
       > - selected route, * - FIB route, q - queued route, r - rejected route

B>* 10.100.1.0/24 [200/0] via 172.27.114.2, tun0, 2d03h42m
Once all this happens, your subnet should be available from the external world! At this point you can assign a static host on like 10.100.1.100/24, or set up DHCP for that subnet.
Conclusion
Of course this is VERY quick and dirty. There is plenty of room for improvement, and more importantly, needing things like appropriate firewalls, and potentially more routing.
So where do you go from here? Of course you don’t have to use BGP just for announcing a subnet. You could just it just for distributing private subnets dynamically locally or across geographically diverse sites. Much of the BGP that happens on my local network, doesn’t even leave my edge.
Hopefully this write-up gave you a good head start though.
]]>Introduction
It’s safe to say that I’ve gotten extremely nostalgic for some of the computers of my youth. Old macs, 486s, and all the games from that time period constantly itched at the back of my head.
Sure, you can emulate this stuff, but it’s just not the same. Especially on a modern 4K screen, you end up looking at a game/emulator/etc that is like 3 inches tall. And if you try to upscale it, it just doesn’t look right.
There’s also something to be said about a computer where you can’t just flip away to a web browser, Discord, or other distractions.
The Beginning
Like so many other things, this all started on YouTube. I found myself watching a ton of retro YouTubers like LGR and the 8-Bit Guy. It didn’t take too long for the nostalgia to kick in hard, and I rearranged my office, and made a trip to the local Goodwill.
Unfortunately, I’m probably a few years too late for the kind of gear I’m looking for. All I was able to find was a PS/2 keyboard and mouse, a 4×3 LCD, and a fancy old power “strip” to fit the retro theme.
That’s when I remembered “the pile”. A stack of old computer stuff (mainly Macs), at my parent’s house.

So over the course of a few weeks, I brought home almost a dozen different machines. Unfortunately, these Macs have had a long hard life, and I was lucky to put together a few working machines from the parts of all. Some had dead PSUs, others had corroded logic boards from batteries/caps. Some the CD/Floppy drives were dead in various manners.
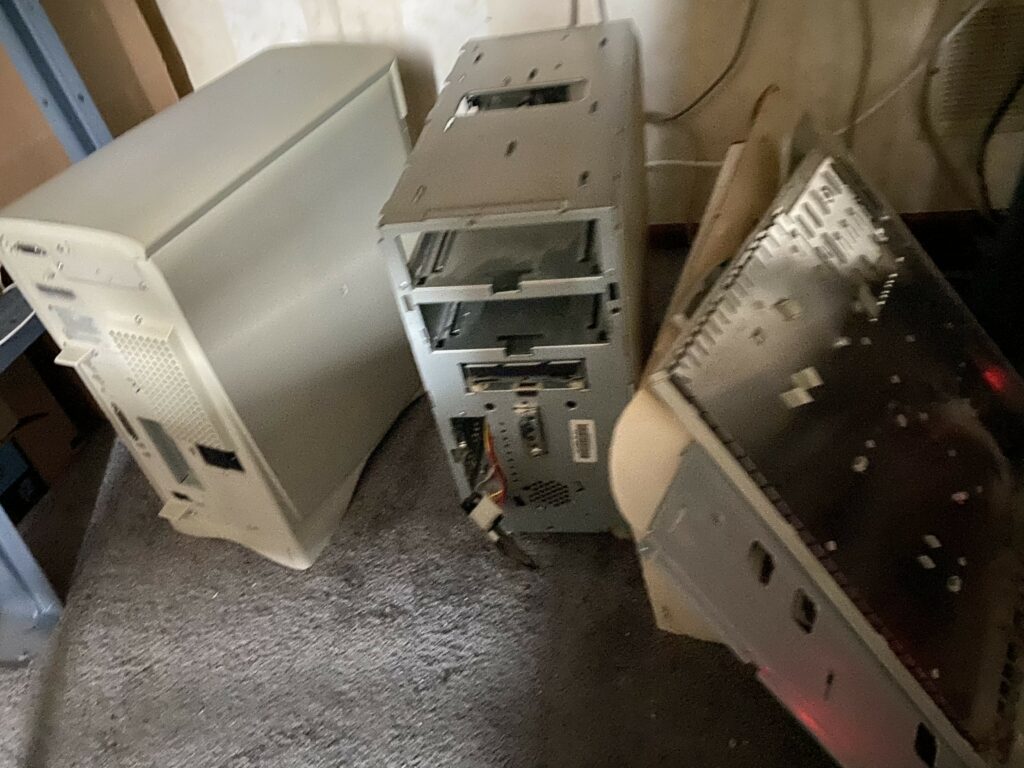
The holy grail of the haul was a 17″ Trinitron Monitor. It even has the old style BNC connections that I’ll never use:
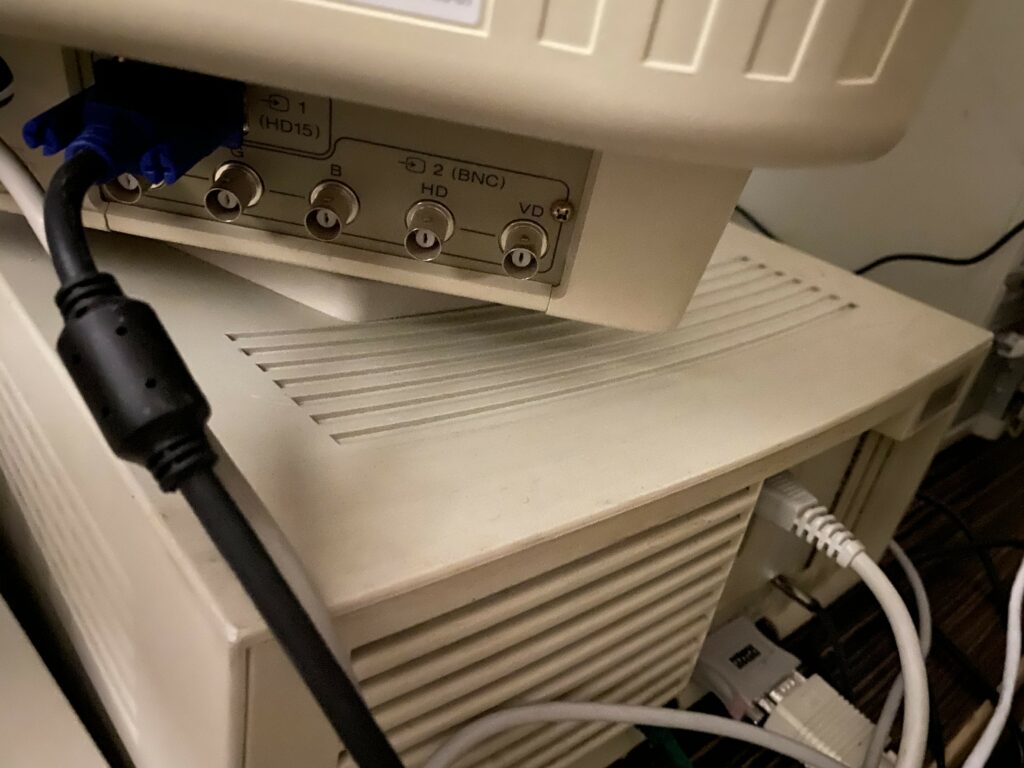
In the end, the haul from the parents house resulted in:
- The 17″ Sony Trinitron Monitor
- 512K Mac
- One working Performa 6400/180
- One working Power Macintosh 6400/75
- A Mac SE (the pictured Mac Classic was ruined due to leaky caps)
- An array of parts like serial mice (important for the 486 later), IDE DVD Drive, random PCI cards like a Realtek 8139
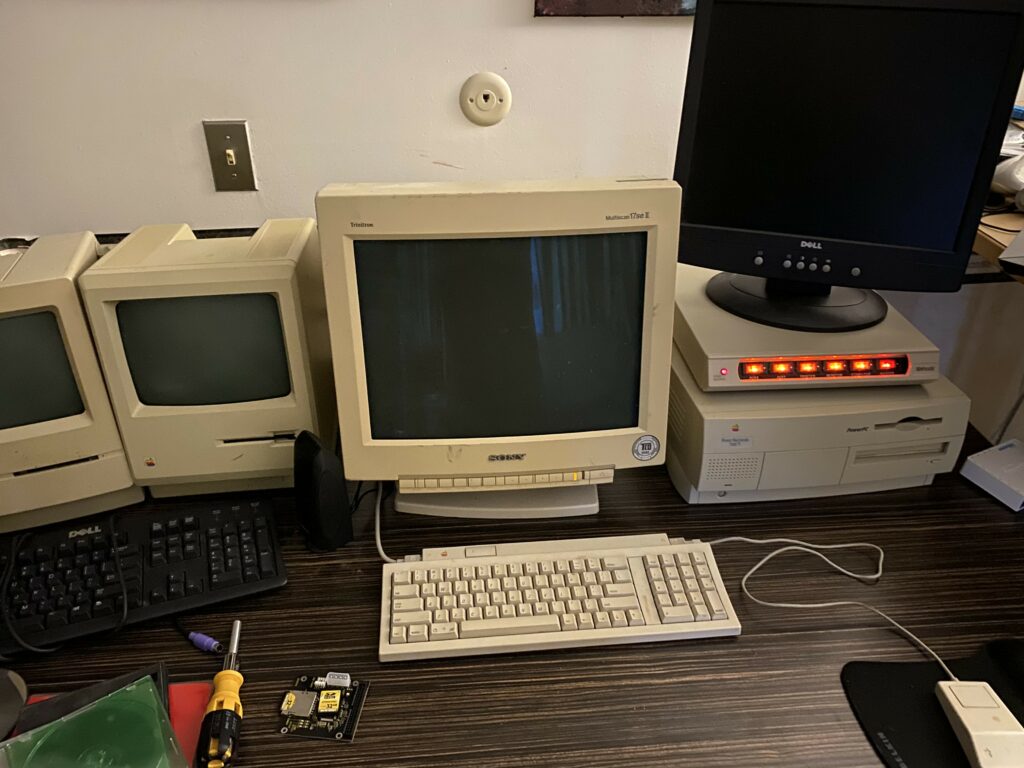
Mac Land
Of course, dealing with old hard drives and floppy drives is a horrible experience, so there were a number of things to make it easier (where I could). The Macs that have SCSI are a bit more of a pain.
- SD Card to IDE adapter. In the 6400/180.
- Gotek USB Floppy Emulator. Can’t be used on the Macs, but for later use.
- IDE to SATA adapter and a $10 cheapo SSD. I bought this just in case the SD card didn’t perform as well as I would have liked.
- A fancy VGA+Sound switcher. Not quite as good as an actual KVM switch, but it works great.
- A wide array of cables, adapters, and more.
After getting the 6400 75 and 180 going, I immediately played a few games I loved:
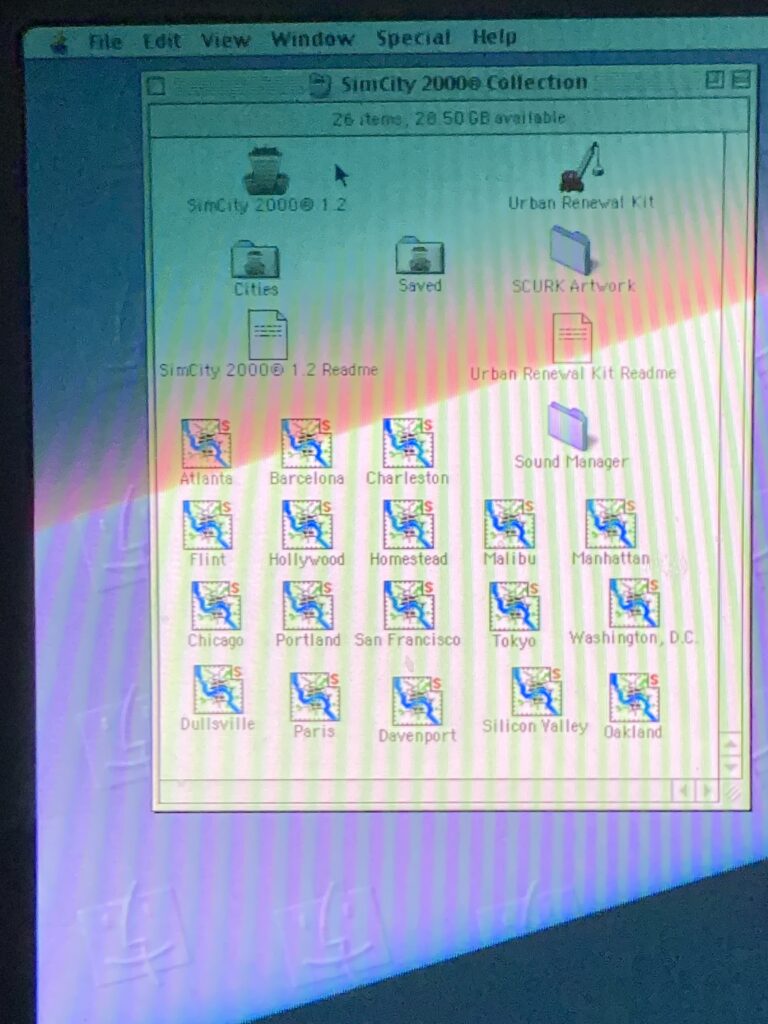
512K Blues
Of course, the REALLY old Macs were the ones I wanted. The 512K in particular was one of my very first computers, and there were a number of games I was itching to play again on that natively. As mentioned, the Classic II I had was dead from leaky capacitors, so I was on a quest to make the 512K boot.
Unfortunately there was a problem. The initial rendition of the 512K only supported 400K disks, and you can’t just turn a double sided high density density into a standard density disk that the 512K can read. So it was off to BMOW and grabbed one of their Floppy Emulators for Mac.
As usual, Murphy’s Law kicked in, and I realized the 512K Mac wasn’t able to boot from “HD20” hard drive images that the Floppy Emulator can support. But I was in luck, and my Grandpa saved the day.
You see, years ago after he passed, I adopted a box of his random stuff. And in this box, there were a number of old standard density disks. So with my Floppy Emulator and one of those random disks, I was able to make an “HD20” boot disk. This basically just allowed the 512K to boot from a floppy and bootstrap into a disk image from the Floppy Emulator.
Success!!!
One of the very first games I ever remembered playing was Transylvania on a 512K Mac. And with the help of Grandpa’s disk, a hard drive shared out from the Floppy Emu, I was playing Transylvania on a Mac again!
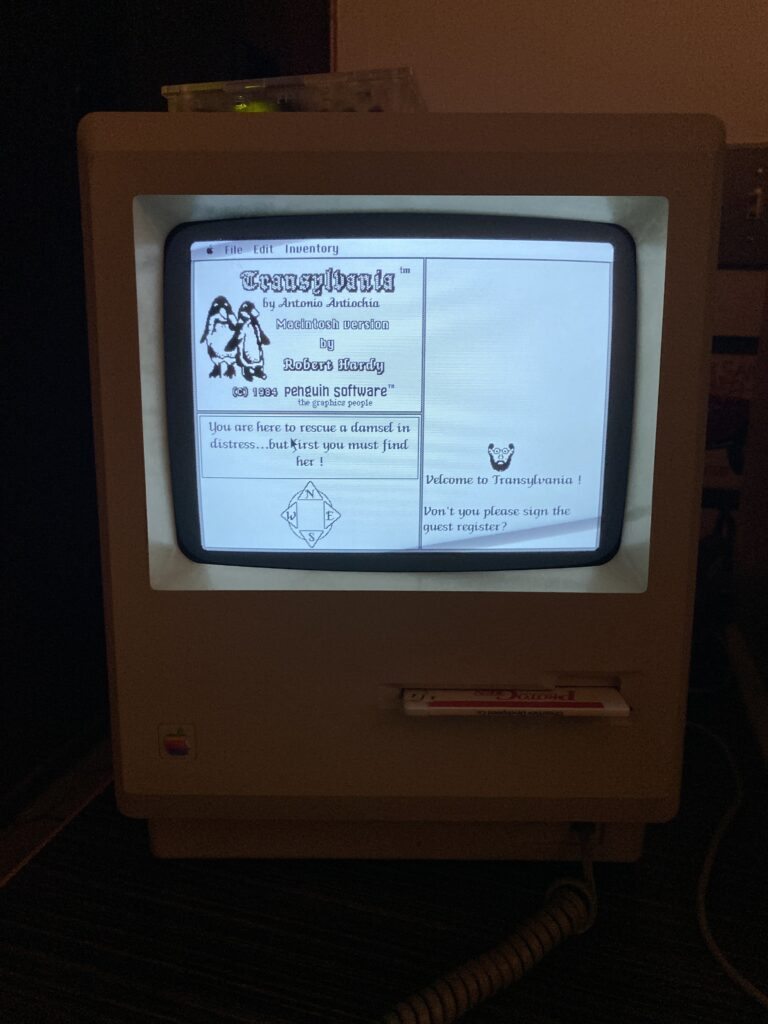
Again, Murphy’s Law kicked in, as this solution was unsustainable. All the standard density disks that were in Grandpa’s box were ancient. I was lucky to get one boot per 5 attempts. So after a bit of research, I discovered I could replace the ROM chips in the 512K, and it would boot from the HD20 virtual disk image without the boot floppy.
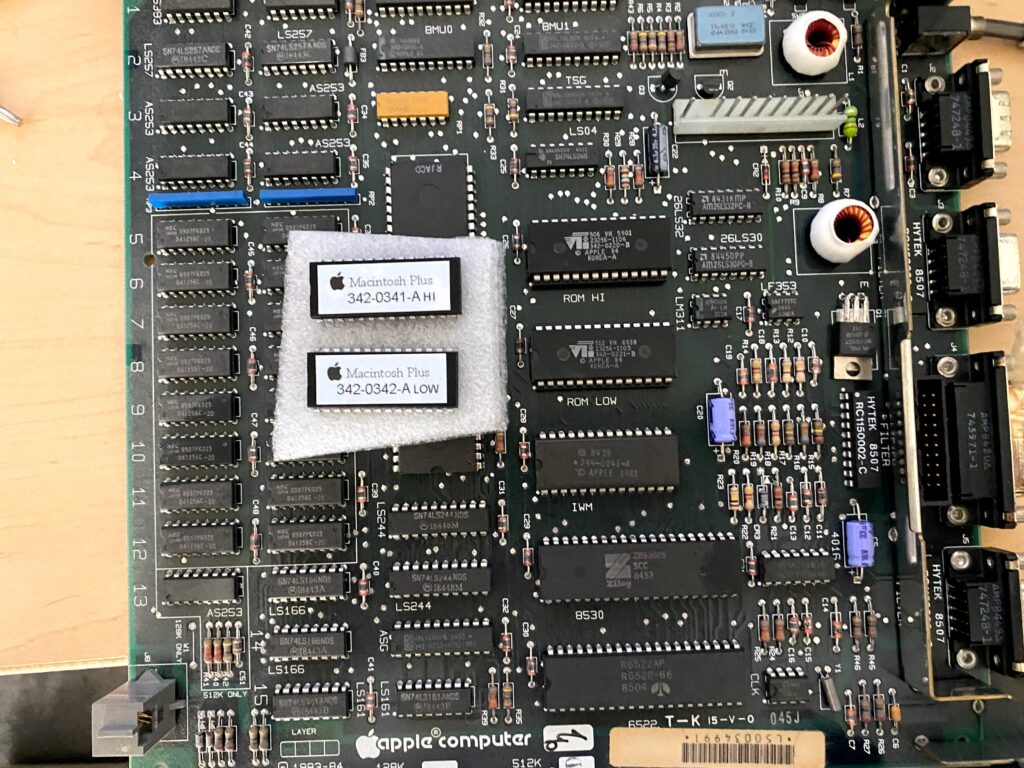
Mac SE
Of course, about 18 hours after ordering the replacement ROM chips, I discovered a Mac SE. Marginally better specs, doesn’t need any hacking to boot from hard disk images on the Floppy Emu. The only thing it need was replacing the soldered barrel battery with a button battery:
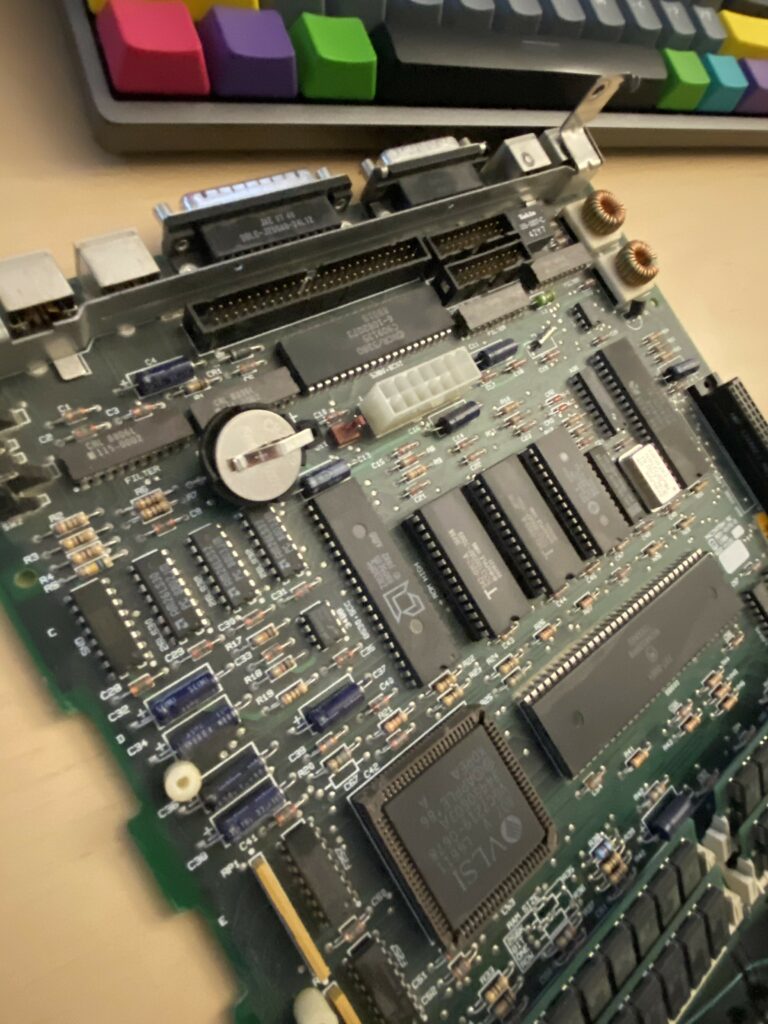
Using Mini vMac and hooking up the SD card from the floppy emu can help with some initial setup (ignore the SE30 name, didn’t look at the box when I named the disk)
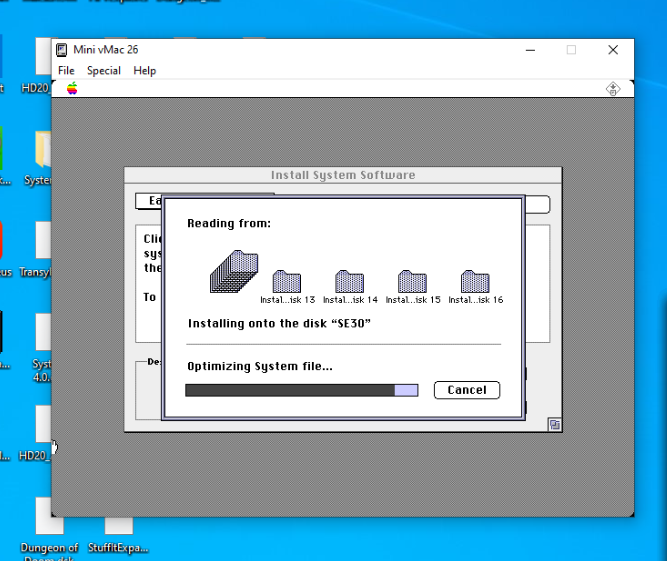
Look ma, no disks!
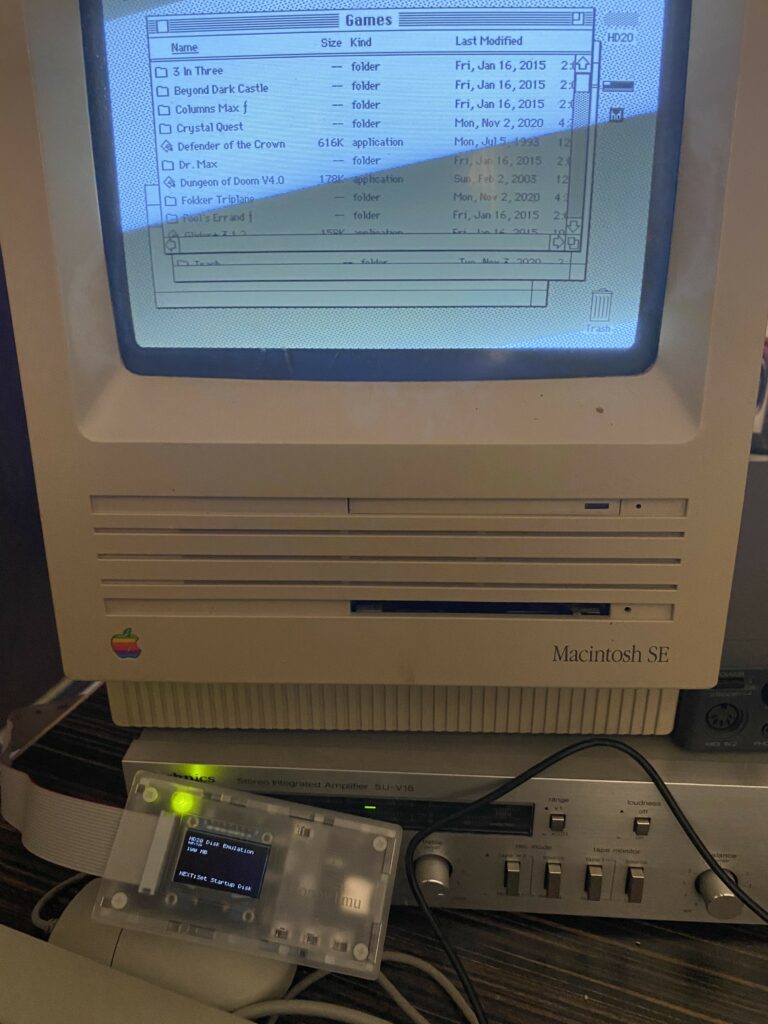
Being the banker almost feels like cheating… but I made it, and only one person died!
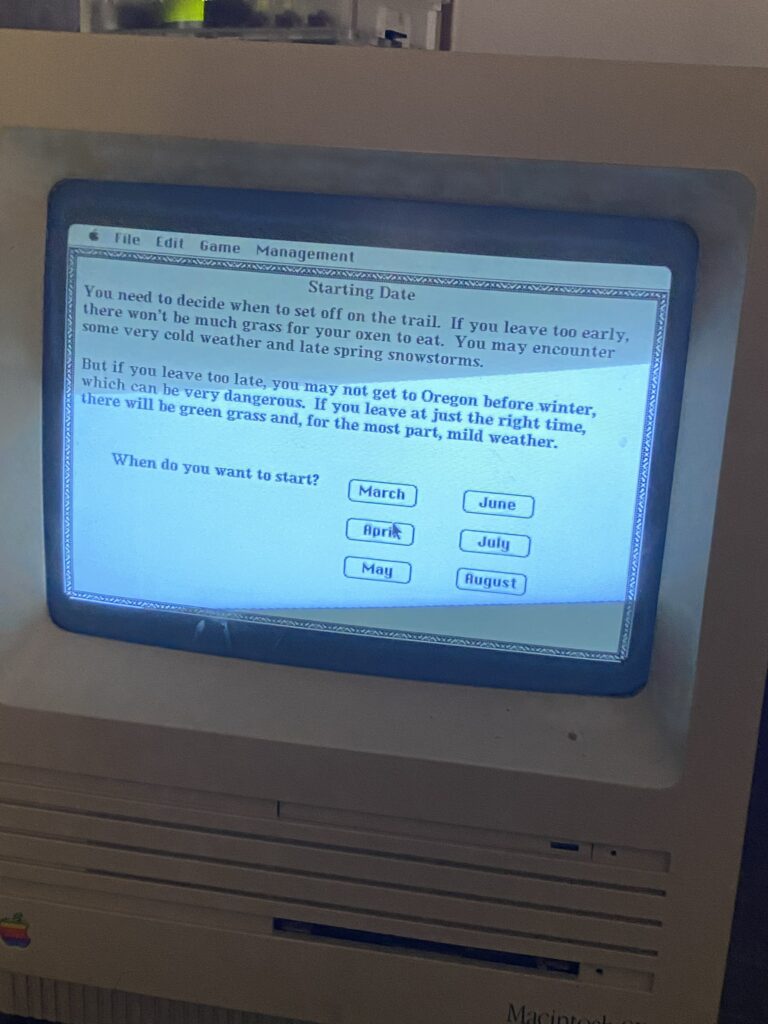
Unfortunately, the itch was only slightly scratched…
The PC Conversion
By far, my most nostalgic gaming years were the 80s/90s/00s. In particular, Classic Sierra and Lucasarts Adventure games are something I adore, and I still didn’t have a solution for that. So it was off to eBay for something that I could run old DOS games one.
The Micron
The end result was an old Micron tower, with a SE440BX2, PIII 500 MHz, 256MB of RAM, nice video card, and onboard Yamaha audio. The Micron didn’t come with a drive, so I dropped in my IDE->SSD adapter. MAN is that FAST.

I initially had Windows 98 installed (now it’s XP), and was able to play some old classics, like Leisure Suit Larry 1 VGA Edition.

In this image you can see the ugliness of the stock Gotek Floppy Emulator. More on upgrading this later:
Discord on Windows XP? Absolutely!!
This is also where I learned the hard lesson of speed-sensitive games, and the mess that old sound cards are. A lot of the games I wanted to play just didn’t work, or sounded terrible. So after a bunch more research, it was back to eBay.
The Holy Grail
After a few days of search, I was able to find what, for me, was the holy grail:
- A motherboard with a button cell battery. No leaky barrel batteries allowed!
- Came with a 486dx2. Fast enough for everything I wanted to play from that era. Anything else can be done on the Micron.
- Motherboard was full of cache
- Came with some RAM, though I ditched that and upgraded to a whopping 32MB
- PCI and ISA
Because the board came with PCI, I was able to reuse an old S3 Virge Graphics card, and Realtek 8139 card I found at my parents.
Plus, I found a pre-ATX 1.2 PSU, which supports -5 volts, which some ISA require. It might not be strictly required and I’ll probably upgrade it with a modern ATX PSU at a later date. I also just used my old Fractal R5 case that was leftover from other projects.
Not to mention an array of adapters and cables, like a 20 pin ATX to AT cable, a CF->IDE adapter, a PC Speaker (gotta have that sweet tingy sound in some games), some power splitters, and and array of other cables and adapters (a 3.5->5.25 bay adapter for example).
The motherboard arrived like a month later (it came from Ukraine), and it was everything I wanted in more. As a super bonus, from the BIOS, the cache can be disabled, which makes sound like in Indy256 work, and I can even play super speed sensitive games.
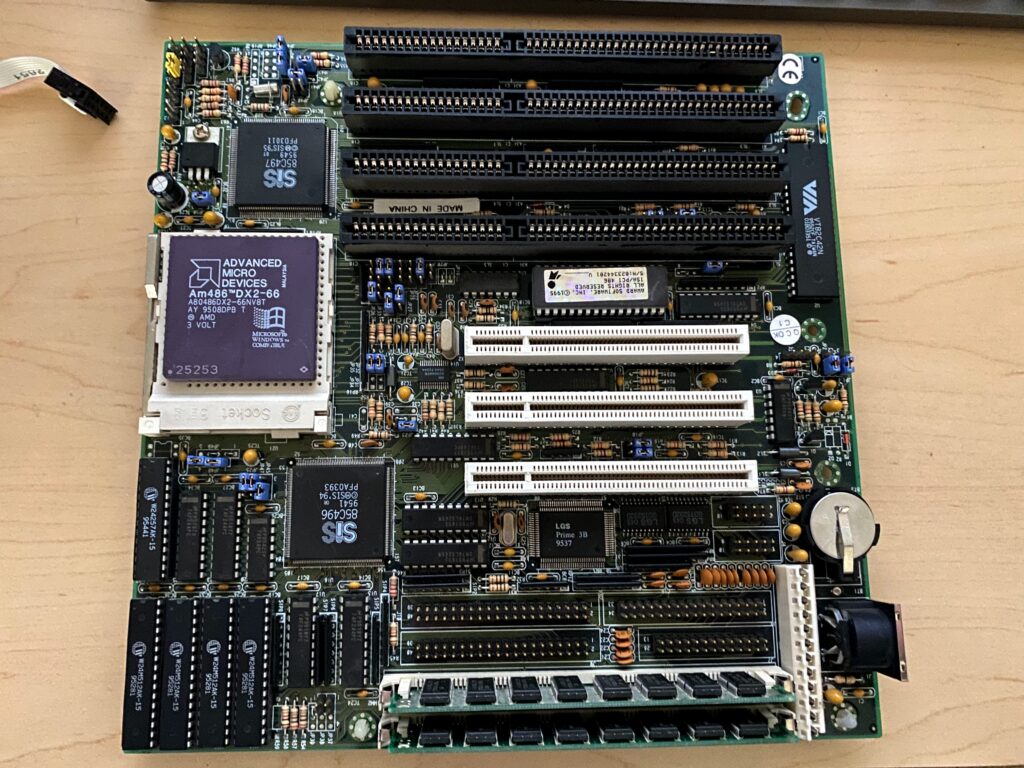
The assembly was easy, but not very pretty. All those converters, splitters, and ribbon cables are hell:

The Gotek
This is also when I took the opportunity to flash my Gotek with the FlashFloppy firmware. It requires VERY minimal soldering (soldering header pins, and jumpers), and a USB-A to USB-A cable. And with a cheap OLED screen (soldering a few more header pins and some jumpers), you can have something that’s INFINITELY more usable.
You just create a fat32 USB stick and drop floppy images on it, or create a floppy as below. My motherboard BIOS supports 2.88MB disks:
cp rtl8139.img /media/kroy/GOTEK/Drivers/or
mkfs.msdos -C TRANSFER288.img 2880
sudo mount /media/kroy/GOTEK/TRANSFER/TRANSFER288.img /mnt/disk
cp files /mnt/disk
The 486
It didn’t take long for me to track down everything I needed to start installing my system. I chose MS-DOS 7.1, because I had an 8GB CF card and wanted to be able to use it all:
And with QEMMU, I’m able to get 631K of conventional memory with mouse, DVD, and other drivers all loaded, something 90s me could only dream of:
Getting on IRC from a 486dx2 and MS-DOS:
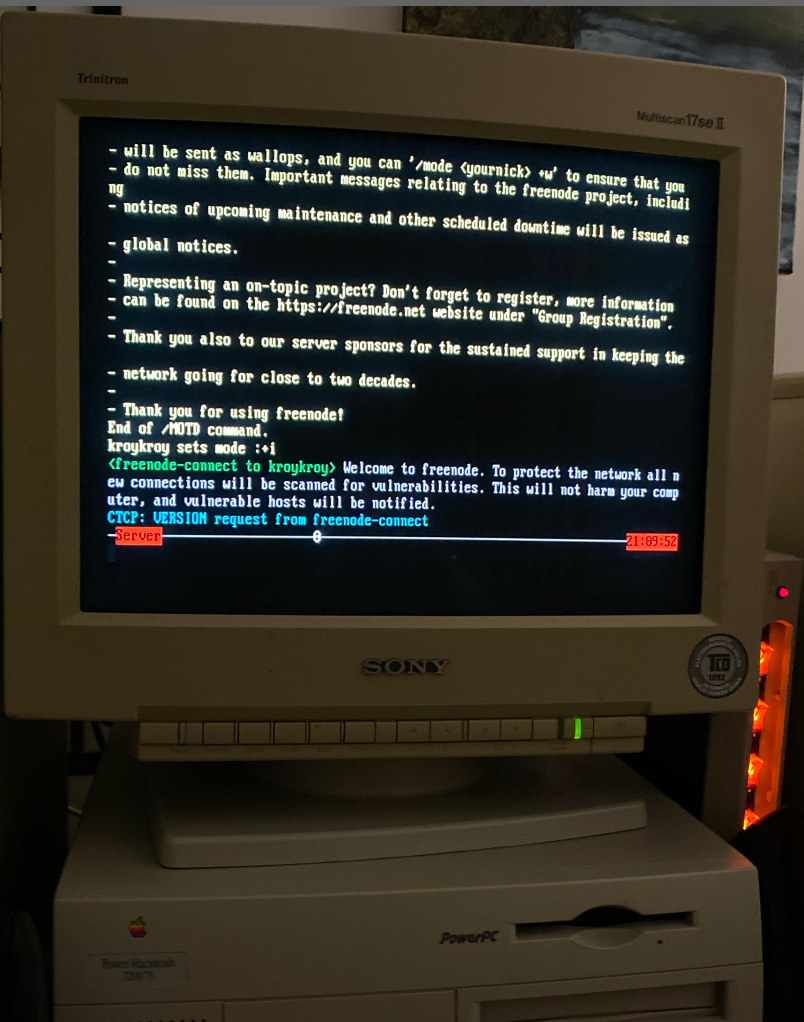
and running the disk test. I love the flatline of the hard drive graph:

Windows 95
And because of the CF card, it’s easy to swap out and install Windows 95.
You know it’s been a long time when TCP/IP isn’t installed by default:
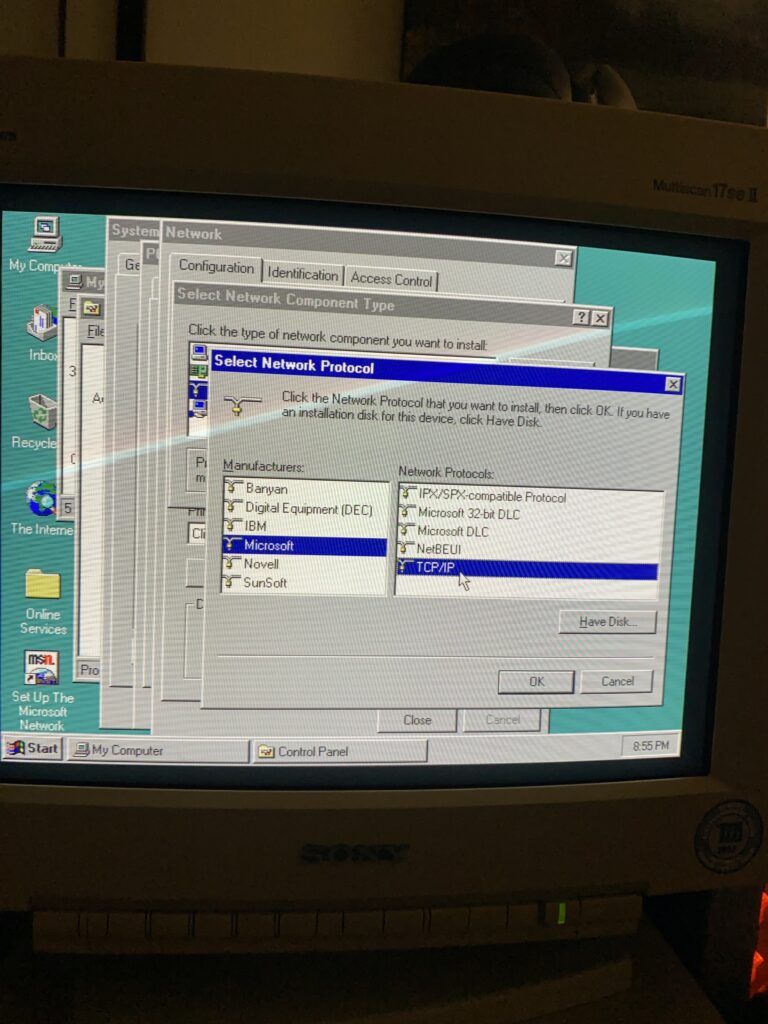
Can you imagine a game in 2020 telling you to do this?
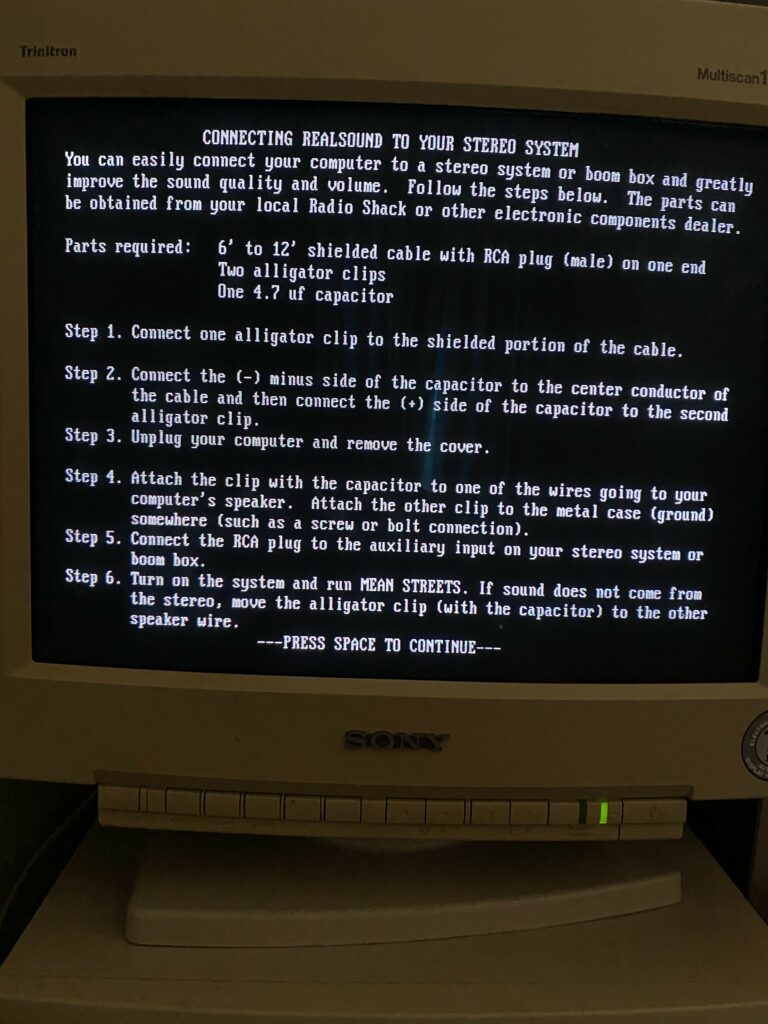
Or reminding you that the CD needs to go in “shiney” side down (does anybody even know what a CD is in 2020??):
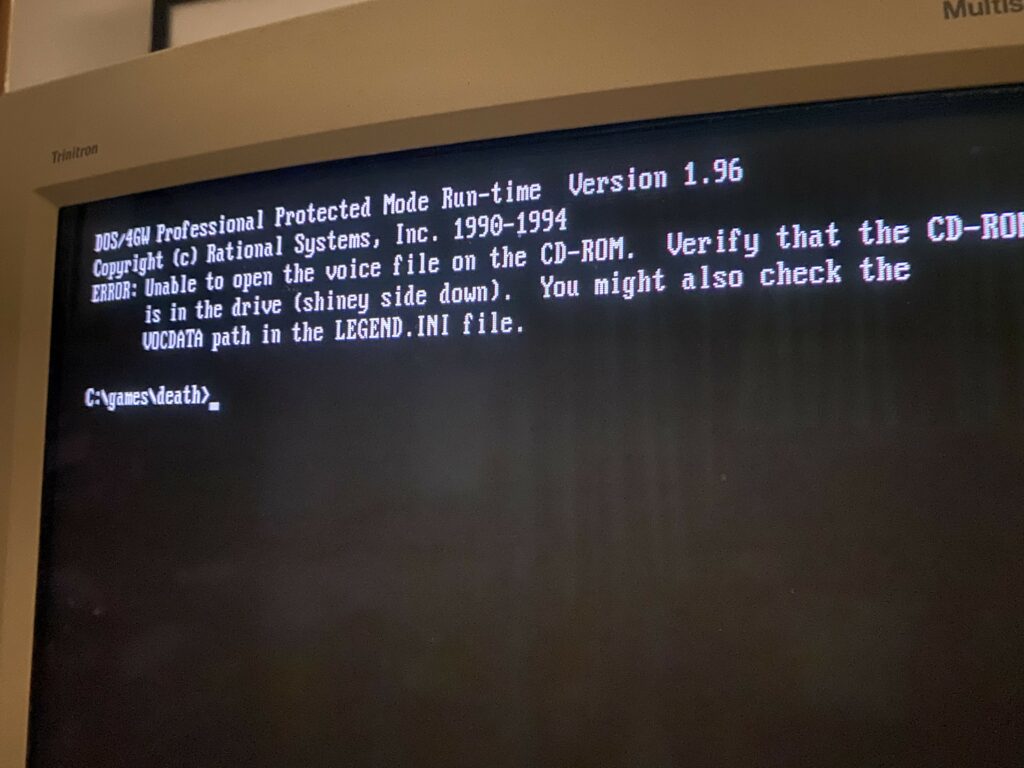
and revisiting Transylvania, the DOS version, in full CGA bliss:

The Sound Conundrum
As mentioned, sounds on DOS are… interesting. It didn’t take me long to realize… I NEEDED MIDI!!
Back in the last 80s/early 90s, MIDI was the stuff of legends for most people. Without it, most games just sounded sort of meh. Soundblasters and compatibles were okay, but not the best.
When I started this process, I had an old S3 PCI soundcard. It was just terrible on DOS. So I ordered an ESS1868, which according to Vogons, wasn’t terrible, especially for the price.
This was fine. Until I heard the Monkey Island Intro on MIDI…. life changed. Sure, the CD Audio version is “better”, but there’s a charm to midi version. So it was back to eBay for an SC-55 and a card that has a proper MPU-401 out. I landed on some ISA Yamaha thing, I think an Audician 32 clone, that sounds great. And somehow in the pile at my parent’s house, I found a gameport->5PIN Midi cable. Who the heck knows why I had that. At best I probably hooked up an old time electronic keyboard to a soundcard.
With the MIDI hooked up, all I can say is WOW. WHY DIDN’T I DO THIS EARLIER!?!? Especially when coupled with an old Technics amp I inherited from gramps (who knew he would be so helpful in this retro build!)

Of course, it’s not exactly perfect. There are some major changes in the sound between an MT-32 and an SC-55. But I’m not exactly ready to give up a kidney for an MT-32 yet, and slightly newer games that can use general midi/SC, sound AMAZING.

Conclusion
Here is the “final” retrolab for now. I say final in quotes, because things are always evolving. I think I want to upgrade the Micron to 768MB of RAM and a faster processor.
- Mac SE + Floppy Emu
- Power Macintosh 7200/75 with stock everything
- Performa 6400/180, drive replaced with IDE->SD, has ATI PCI Graphics and PCI 10/100 Networking
- Micron PIII 500Mhz, running on IDE->SSD
- 486DX2 66, 32MB of RAM, S3 Virge Graphics, RT8139 networking, Yamaha ISA sound card, IDE->CF card for storage, flashed Gotek for floppy disks.
I did pick up a serial/PS2 Intellimouse that I’m still not sure if I want to open, since it’s sealed and new-in-box.

In all, this has become a new passion for me. And thanks to some foresight of my parents, I didn’t end up spending too much.

Introduction
For some reason, it seems I am never happy with my lab. For years now, I’ve constantly tore it up, started from scratch, migrated, migrated back, and more. Up until recently, I had ESXi, Proxmox, libvirt, and even some HyperV in another VM for testing. All these systems played different roles, even if they are just for learning.
By far, I’ve been running ESXi+vCenter the longest, and it would be considered my “primary” cluster. When you have multiple hosts, heavy networking with stuff like vDS, want HA (high availability), it’s hard to argue that the vSphere suite doesn’t automate it and make it somewhat painless.
But now things have changed. I’m looking to combine and contract my lab, and more tightly integrate LXD/C and automation. I decided it was time to complete the migration completely away from VMWare products, especially since I’ve already sold/powered down/eliminated 3 out of the original 5 hosts in my cluster.
Don’t get me wrong, with VMUG, VMWare is great and affordable, but I’m more interested in automation now than I am with HA, so a single host or two with a ton of CPU and RAM is a better fit.

Automation
Automation has always been something that has been near and dear to my heart. Put quite frankly, manually installing VMs, configuring to my liking, realizing I messed something up and starting over, is absolutely not fun.
I’ve also focused heavily on making all my VMs “pure compute”. This means something like Ansible or Docker, with all data stored on an NFS share or iSCSI export. The end result is being able completely nuke a VM, hit a button, and have it back up and running exactly where it left off within a few minutes. It also means you don’t need to back up individual VMs, just a few basic text files, the main NAS, etc. I’ve talked about some pieces of how I accomplish this in an older post here. I just now deploy a similar config with Ansible.
Prior Automation
I’ve actually done a lot of automation in the past. Chef, Salt, but my first serious implementation was Foreman + Puppet.
Does Foreman work? Absolutely. It gives you the ability to automatically create and deploy fresh VMs with PXE and Puppet. Is Foreman nice to use? Absolutely not. It’s just an absolute disaster to set up and maintain. And forget trying to upgrade even minor versions. I was religious about regularly snapshotting and backing up that Foreman virtual machine because usually an upgrade would require me to completely start from scratch.
Current Automation
For at least a year now, my main automation has been a combination of Terraform and Ansible. Terraform talked to the vCenter API and cloned “gold master” VMs, and Ansible configured them to my liking. I also have MAAS integrated for deploying the bare metal hosts, but that’s beyond the scope of this post.
This really has been a great solution, but I dislike needing to use “gold master” VMs, since they are something that I have to go back and renew and update every once in a while. And like mentioned, I’m really wanting to get away from VMWare completely.
So I killed one of my ESXi hosts, and fired up Ubuntu.
The Hypervisor
Since this post will probably end up getting pretty long and with lots of code examples, I don’t want to waste too much time on describing the host setup. But I’ll try and give the important pieces:
- Ubuntu 20.04 Server. Why Ubuntu? Mostly because the driver support isn’t horrible. At the time of this writing, I tried 20.10, but the communication between 20.10 virtio guest tools and Terraform is broken.
- Setting up SSH key auth. If you are using virsh, virt-manager remotely, it’s easiest to use SSH to communicate with libvirt. Also, I store all my terraform configs on my workstation and terraform and ansible communicates via SSH.
- Installing libvirt and other important stuff .
sudo apt install qemu-kvm libvirt-daemon-system libvirt-clients bridge-utils- Installing Network Manager. On my hypervisors, I trunk everything, so nmcli is just a WAAAAY easier method of configuring a bunch of bridges. I’ve provided working examples of my configuration of the
/etc/NetworkManager/system-connectionsdirectory in a github repo.- Note that the main interface (the slave), the main bridge (vmbr0), and the VLAN5 bridge all have the MTU set to 9000. I use VLAN5 as my storage network, and this setup allows me to easily pass a 9000 MTU link into a VM.
- Installing Network Manager requires you to change netplan and re-configure your networking. The changing of Netplan involves removing the existing
yamlfile, creating a new one that looks like this example from github, and doing asudo netplan apply.
- Both my central ISO storage and main VM storage happen via NFS. So with Ubuntu, first I need to
sudo apt install nfs-common, and then add them as storage pools.- Even on systems without selinux, libvirt enforces it. So if you add a new storage pool and get weird errors like “permission denied”, adding
security_driver = "none"to your/etc/libvirt/qemu.conffile and restarting libvirt is a quick fix, though probably not the best fix from a security perspective.
- This is easiest done with
virt-manageron your local PC, and then connecting via SSH to the libvirt host. Then just add pools
- Even on systems without selinux, libvirt enforces it. So if you add a new storage pool and get weird errors like “permission denied”, adding
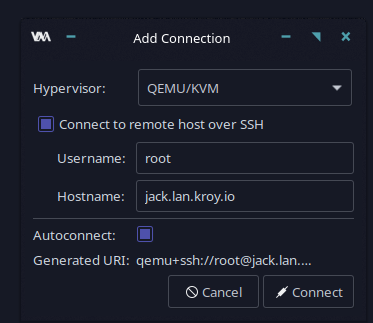

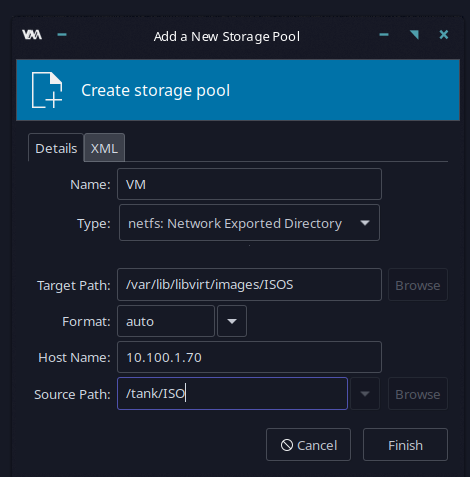
Terraform/Grunt
The two main tools I want to talk about here are terraform and terragrunt. A layperson’s definition of terraform is to define “infrastructure as code”. That means, instead of clicking buttons to make a VM, choosing the amount of RAM, etc, you define it in the terraform domain specific language or DSL outlined here. With terraform, you create a directory and put text files in it that define resources.
Of course that’s a pretty dry definition, so all the examples that follow will outline how all this fits together.
terragrunt is just a minor wrapper to terraform that extends it in a few nice ways. You can drop different projects in different folders and apply changes to all or none, plus have pre/post hooks to run things. I’ll have examples of this as well.
It’s very important to note that ALLLL terraform is concerned with is state. If something is out of state, it does its best to non-destructively move it, but that depends on the module you are using.
Most of the time it’s just as happy to just delete everything and start over. Plans and applies will inform/warn you, but it’s really easy to get cocky and purge some data.
Keep that in mind as you begin your terraform journey.
All of this is just happening on my local Linux workstation. As terragrunt and terraform are both just Go programs, that means to install them you just download and run.
Install Terraform
With terraform, there were some MAJOR changes in the .13 version, and that’s the version I’ll be using. Something like this can be used to install it on Linux:
wget https://releases.hashicorp.com/terraform/0.13.5/terraform_0.13.5_linux_amd64.zip | unzip terraform_0.13.5_linux_amd64.zip && sudo mv terraform /usr/local/bin && rm terraform_0.13.5_linux_amd64.zip 
Similar methodology can be used to install terragrunt
Basic Layout
As mentioned, I’m doing all this on my Linux workstation. This will later allow me to easily shove this all into a git repo, make available from anywhere, etc.
Note that I’m not trying to make a comprehensive terraform guide here.
So I probably won’t be touching much on stuff like .tfvars files, which act sort of like env files, and things will be overly verbose so as to demonstrate what I’m doing.
There are plenty of opportunities for code reuse and further templating. Also, you can lay things out however you like. There’s not really any specific rules on how things need to be mapped out
Lets look at the basic layout for my infra:
❯ terraformroot
├── diskimages
│   └── focal-server-cloudimg-amd64.img
├── terragrunt.hcl
└── vms
    └── terragrunt.hcl

3 directories, 3 files
This layout leverages the best of terraform and terragrunt. It allows me to separate out different types of resources (VMs, and in the future LXC and networking), and access them separately (with normal terraform), or globally (with terragrunt).
The base directory terragrunt.hcl file is just empty. It’s just a placeholder to allow you to use terragrunt from that level, meaning everything below it, like in vms would work on a terragrunt apply-all.
I also have a diskimages directory with the Ubuntu 20.04 cloud-init enabled image, found at this link. You can download this from Ubuntu every time, but it’s much quicker to store a copy locally and just use that, plus you are being a better netizen.
The vmsdirectory terragrunt.hcl contains a “post hook”. This updates my DNS via a script whenever VMs are added, updated, or deleted. This is a file that you may or may not need and may want to remove or skip creating.
Setting up a VM
Let’s start by creating a simple VM.
The first layout we are working on ends up looking like this:
vms
├── terragrunt.hcl
└── testvm.lan.kroy.io
    ├── cloud_init.cfg
    ├── global.tf
    ├── network_config.cfg
    ├── terragrunt.hcl
    └── vm.tf

1 directory, 6 files
Here I’ve created a directory named after the destination VM for organization, and put the files main.tf and terragrunt.hcl in it.
You can name the actual terraform files whatever you want as long as it ends with .tf, but they are processed in alphabetical order. Usually this won’t make too much of a difference, but in some scenarios it can.
The Config Files
- The first file is the
global.tf. This defines some of the basic pieces of our resource.
 terraform {
    required_version = ">= 0.13"
    required_providers {
        libvirt = {
            source  = "dmacvicar/libvirt"
            version = "0.6.2"
        }
        mikrotik = {
          source = "ddelnano/mikrotik"
          version = "0.3.6"
        }
    }
}

# instance the providers

provider "libvirt" {
    uri = "qemu+ssh://[email protected]/system"
}

provider "mikrotik" {
    host = "crs354.lan.kroy.io:8728"
    username = "admin"
    password = ""
}

resource "libvirt_volume" "os_tmpl" {
  name = "focal_os_tmpl"
  pool = "VM"
  source = "file:///home/kroy/Documents/infra/terraform/libvirt/diskimages/focal-server-cloudimg-amd64.img"
  format = "qcow2"
}
Breaking this down:
- The
terraformsection describes the module versions I want to pull. In this case, I’m pulling thelibvirtandmikrotikmodules. Themikrotikmodule is used to automatically set a static DHCP lease on my CRS. This versioning is a the major change in terraform .13 I mentioned earlier. - The
libvirt“provider” section sets up the connection via ssh to the host running libvirt. Userkroyis in the libvirt group on the host. - The
mikrotikprovider section connects via the Mikrotik API to my switch that runs my DHCP. - The final block set up a template disk image using the cloud-init enabled image that was downloaded earlier.
- The next file is the
cloud_init.cfg. This file runs some “initial setup” tasks in the new VM.
#cloud-config
hostname: ${hostname}
fqdn: ${fqdn}
manage_etc_hosts: true
users:
  - name: root
    ssh-authorized-keys:
      - ${file("/home/kroy/.ssh/id_ed25519.pub")}
      - ${file("/home/kroy/Documents/infra/terraform/keys/id_ansible.pub")}
  - name: kroy
    sudo: ALL=(ALL) NOPASSWD:ALL
    groups: users, admin
    home: /home/kroy
    shell: /bin/bash
    lock_passwd: false
    ssh-authorized-keys:
      - ${file("/home/kroy/.ssh/id_ed25519.pub")}
      - ${file("/home/kroy/Documents/infra/terraform/keys/id_ansible.pub")}
# only cert auth via ssh (console access can still login)
ssh_pwauth: false
disable_root: false
chpasswd:
  list: |
     kroy:test
  expire: False
packages:
  - qemu-guest-agent

growpart:
  mode: auto
  devices: ['/']
  ignore_growroot_disabled: false

runcmd:
  - [ systemctl, daemon-reload ]
  - [ systemctl, enable, qemu-guest-agent.service ]
  - [ systemctl, start, --no-block, qemu-guest-agent.service ]
If you’ve got any sort of familiarity with Linux, most of what happens in this file should be somewhat self-explanatory, even if you are unfamiliar with the layout and formatting.
- Set up hostname, fqdn from variables that will be set from
vm.tf. - Make the
/etc/hostsfile match the proper config. - Setup ssh keys and a separate user. Set the ssh keys to my local ssh keys and ansible keys on my workstation
- Change the password on the
kroyuser - Install the QEMU Guest Agent. This is what allows the host and the VM to communicate.
- Grow the partition to the max size possible. This makes it so you can easily create a 5GB or 500GB VM from your
vm.tf. - Make sure the guest agent is running. I was having an issue with it not autostarting, but this series of
runcmdallows it to work.
- The
network_config.cfgfile. Somewhat self-documenting. There are other ways to do this, but I’ve found this is easiest for my setup:
version: 2
ethernets:
  ens3:
     dhcp4: true
This is just a standard netplan config that gets dropped on the new VM.
- The final piece is the
vm.tf. As my naming here suggests, this is the actual config for the VM.
# variables that can be overriden
variable "hostname" { default = "bgp" }
variable "domain" { default = "lan.kroy.io" }
variable "memoryGB" { default = 2 }
variable "cpu" { default = 2 }
variable "network" { default = "vibr20" }
variable "disksizeGB" { default = 20 }


resource "libvirt_volume" "os_image" {
  name = "${var.hostname}-os_image"
  pool   = "VM"
  base_volume_id = libvirt_volume.os_tmpl.id
  size = var.disksizeGB * 1024 * 1024 * 1024
}

# Use CloudInit ISO to add ssh-key to the instance
resource "libvirt_cloudinit_disk" "commoninit" {
  name = "${var.hostname}-commoninit.iso"
  pool = "VM"
  user_data = data.template_file.user_data.rendered
  network_config = data.template_file.network_config.rendered
}


data "template_file" "user_data" {
  template = file("${path.module}/cloud_init.cfg")
  vars = {
    hostname = var.hostname
    fqdn = "${var.hostname}.${var.domain}"
  }
}

data "template_file" "network_config" {
  template = file("${path.module}/network_config.cfg")
}


# Create the machine
resource "libvirt_domain" "domain-vm" {
  qemu_agent = true
  name = "${var.hostname}.${var.domain}"
  memory = var.memoryGB * 1024
  vcpu = var.cpu
  cloudinit = libvirt_cloudinit_disk.commoninit.id

  disk {
       volume_id = libvirt_volume.os_image.id
  }
  network_interface {
       wait_for_lease = true
       bridge = var.network
  }

  graphics {
    type = "spice"
    listen_type = "address"
    autoport = "true"
  }
  provisioner "local-exec" {
    environment = {
        IP = join("",slice([for ip in flatten(libvirt_domain.domain-vm.*.network_interface.0.addresses) : ip if substr(ip,0,8) == "10.20.20"],0,1))
    }
    command = "ANSIBLE_HOST_KEY_CHECKING=False ansible-playbook -i $IP, --key-file=~/Documents/infra/terraform/keys/id_ansible -u root ~/Documents/infra/terraform/ansible/docker/deploy-docker_ubuntu.yml"

  }

}


resource "mikrotik_dhcp_lease" "dhcp" {
  address = join("",slice([for ip in flatten(libvirt_domain.domain-vm.*.network_interface.0.addresses) : ip if substr(ip,0,8) == "10.20.20"],0,1))
  macaddress = upper(join("",libvirt_domain.domain-vm.*.network_interface.0.mac))
  comment = "${var.hostname}.${var.domain}"
  hostname = var.hostname
}
There’s obviously a lot going on here, but the short of it is I’ll be creating multiple resources. A cloud-init “boot disk”, some templates for passing into the cloud-init disk, the actual VM, and the DHCP record on my Mikrotik, which will read the IP of the created VM, and turn it into a static DHCP lease.
- The first part of this config is just some variables. As I create a new VM, assuming I just want a fairly basic VM, all I need to do is change some things here. To create a new VM, this is all that needs to be changed. Note that these can be stored in a
.tfvarsfile too for further separation. - The first resource is the actual VM disk. Note that the size is multipled by 1024*1024*1024 to translate the size from bytes to gigabytes, for ease of use.
- The next resource and following templates resources pulls in the cloud-init and network configs to build a cloud init image for initial booting and setup.
- The next resource defines the VM. Most of it should be self-explanatory. Things like making sure the guest agent is enabled, setting up the hostname and fqdn from the variables, vcpus, memory, disk. When you want to use data from a different resource, the format is “resource_type.resource_name.id”. So to later refer to this VM, you’d used
libvirt_domain.domain-vm.id.- We set up a spice console, important for connecting to it via something like
virt-manager. - The
network_interfaceresource here tells it to wait for a lease. This is necessary since I want my Mikrotik resource below to be have access to the IP that the VM was issued via DHCP. This saves me from having to hard-code IPs. - I have a
local-execprovisioner here. This is how I call Ansible to configure the VM. In this case I’ll be setting this host up as one of my Docker VMs. Note that I’m doing some severe hacky stuff to make sure I only grab the IP in the subnet that I want.
- We set up a spice console, important for connecting to it via something like
- Finally, the Mikrotik resource. As mentioned a few times, this sets a static DHCP lease on my main DHCP server, using the same hacky IP pulling code as above.
Terraforming the Virtual Machine
Now that all the resources and config are declared, it’s time to actually create the VM.
The first step is to initialize the terraform repo here. This causes it to pull the required modules and prepare for deployment.
❯ terraform init

Initializing the backend...

Initializing provider plugins...
- Finding latest version of hashicorp/template...
- Finding dmacvicar/libvirt versions matching "0.6.2"...
- Finding ddelnano/mikrotik versions matching "0.3.6"...
- Installing hashicorp/template v2.2.0...
- Installed hashicorp/template v2.2.0 (signed by HashiCorp)
- Installing dmacvicar/libvirt v0.6.2...
- Installed dmacvicar/libvirt v0.6.2 (unauthenticated)
- Installing ddelnano/mikrotik v0.3.6...
- Installed ddelnano/mikrotik v0.3.6 (self-signed, key ID DDBA1674AA3EA0EE)

Partner and community providers are signed by their developers.
If you'd like to know more about provider signing, you can read about it here:
https://www.terraform.io/docs/plugins/signing.html

The following providers do not have any version constraints in configuration,
so the latest version was installed.

To prevent automatic upgrades to new major versions that may contain breaking
changes, we recommend adding version constraints in a required_providers block
in your configuration, with the constraint strings suggested below.

* hashicorp/template: version = "~> 2.2.0"

Terraform has been successfully initialized!

You may now begin working with Terraform. Try running "terraform plan" to see
any changes that are required for your infrastructure. All Terraform commands
should now work.

If you ever set or change modules or backend configuration for Terraform,
rerun this command to reinitialize your working directory. If you forget, other
commands will detect it and remind you to do so if necessary.❯ terraform init

Initializing the backend...

Initializing provider plugins...
- Finding dmacvicar/libvirt versions matching "0.6.2"...
- Installing dmacvicar/libvirt v0.6.2...
- Installed dmacvicar/libvirt v0.6.2 (unauthenticated)

Terraform has been successfully initialized!

You may now begin working with Terraform. Try running "terraform plan" to see
any changes that are required for your infrastructure. All Terraform commands
should now work.

If you ever set or change modules or backend configuration for Terraform,
rerun this command to reinitialize your working directory. If you forget, other
commands will detect it and remind you to do so if necessary.
Assuming you get a success message there and some green text, you can proceed to plan or even apply.
plan shows you want it’s going to do. apply will do it (with confirmation by default, but it can be overridden).
❯ terraform plan
Refreshing Terraform state in-memory prior to plan...
The refreshed state will be used to calculate this plan, but will not be
persisted to local or remote state storage.

data.template_file.network_config: Refreshing state...
data.template_file.user_data: Refreshing state...

------------------------------------------------------------------------

An execution plan has been generated and is shown below.
Resource actions are indicated with the following symbols:
  + create

Terraform will perform the following actions:

  # libvirt_cloudinit_disk.commoninit will be created
  + resource "libvirt_cloudinit_disk" "commoninit" {
      + id             = (known after apply)
      + name           = "testvm-commoninit.iso"
      + network_config = <<~EOT
            version: 2
            ethernets:
              ens3:
                 dhcp4: true
        EOT
      + pool           = "VM"
      + user_data      = <<~EOT
            #cloud-config
            hostname: testvm
            fqdn: testvm.lan.kroy.io
            manage_etc_hosts: true
            users:
              - name: root
                ssh-authorized-keys:
                  - ssh-ed25519 key key1
                  - ssh-ed25519 key ansible

              - name: kroy
                sudo: ALL=(ALL) NOPASSWD:ALL
                groups: users, admin
                home: /home/kroy
                shell: /bin/bash
                lock_passwd: false
                ssh-authorized-keys:
                  - ssh-ed25519 key key1
                  - ssh-ed25519 key ansible

            # only cert auth via ssh (console access can still login)
            ssh_pwauth: false
            disable_root: false
            chpasswd:
              list: |
                 kroy:test
              expire: False
            packages:
              - qemu-guest-agent

            growpart:
              mode: auto
              devices: ['/']
              ignore_growroot_disabled: false

            runcmd:
              - [ systemctl, daemon-reload ]
              - [ systemctl, enable, qemu-guest-agent.service ]
              - [ systemctl, start, --no-block, qemu-guest-agent.service ]
        EOT
    }

  # libvirt_domain.domain-vm will be created
  + resource "libvirt_domain" "domain-vm" {
      + arch        = (known after apply)
      + cloudinit   = (known after apply)
      + disk        = [
          + {
              + block_device = null
              + file         = null
              + scsi         = null
              + url          = null
              + volume_id    = (known after apply)
              + wwn          = null
            },
        ]
      + emulator    = (known after apply)
      + fw_cfg_name = "opt/com.coreos/config"
      + id          = (known after apply)
      + machine     = (known after apply)
      + memory      = 2048
      + name        = "testvm.lan.kroy.io"
      + qemu_agent  = true
      + running     = true
      + vcpu        = 2

      + graphics {
          + autoport       = true
          + listen_address = "127.0.0.1"
          + listen_type    = "address"
          + type           = "spice"
        }

      + network_interface {
          + addresses      = (known after apply)
          + bridge         = "vibr20"
          + hostname       = (known after apply)
          + mac            = (known after apply)
          + network_id     = (known after apply)
          + network_name   = (known after apply)
          + wait_for_lease = true
        }
    }

  # libvirt_volume.os_image will be created
  + resource "libvirt_volume" "os_image" {
      + base_volume_id = (known after apply)
      + format         = (known after apply)
      + id             = (known after apply)
      + name           = "testvm-os_image"
      + pool           = "VM"
      + size           = 21474836480
    }

  # libvirt_volume.os_tmpl will be created
  + resource "libvirt_volume" "os_tmpl" {
      + format = "qcow2"
      + id     = (known after apply)
      + name   = "focal_os_tmpl"
      + pool   = "VM"
      + size   = (known after apply)
      + source = "file:///home/kroy/Documents/infra/terraform/libvirt/diskimages/focal-server-cloudimg-amd64.img"
    }

  # mikrotik_dhcp_lease.dhcp will be created
  + resource "mikrotik_dhcp_lease" "dhcp" {
      + address    = (known after apply)
      + blocked    = "false"
      + comment    = "testvm.lan.kroy.io"
      + dynamic    = false
      + hostname   = "testvm"
      + id         = (known after apply)
      + macaddress = (known after apply)
    }

Plan: 5 to add, 0 to change, 0 to destroy.

------------------------------------------------------------------------

Note: You didn't specify an "-out" parameter to save this plan, so Terraform
can't guarantee that exactly these actions will be performed if
"terraform apply" is subsequently run.
Note the bottom line where is says it’s going to add 5, change 0, destroy 0.
Keep remembering that all terraform is concerned with is state. So it will happily delete and nuke everything to get it to make the state that you want. So if a plan or apply says it’s going to delete a bunch of stuff and that’s not what you wanted, escape now!
Finally, terraform apply looks much like the plan above, and adds a few extra lines to confirm the operation (if you haven’t passed the option to skip it).
Plan: 5 to add, 0 to change, 0 to destroy.

Do you want to perform these actions?
  Terraform will perform the actions described above.
  Only 'yes' will be accepted to approve.

  Enter a value: yes

...

Apply complete! Resources: 5 added, 0 changed, 0 destroyed
This should hopefully complete without error, and if you do a virsh list on the libvirt host, you’ll see something like:
# virsh list
 Id   Name                 State
------------------------------------
 1    testvm.lan.kroy.io   running
In my terraform apply output, I have libvirt_domain.domain-vm (local-exec): ok: [10.20.20.79], which means I should be able to ssh there
❯ ssh [email protected]
Warning: Permanently added '10.20.20.79' (ECDSA) to the list of known hosts.
Welcome to Ubuntu 20.04.1 LTS (GNU/Linux 5.4.0-51-generic x86_64)

 * Documentation:  https://help.ubuntu.com
 * Management:     https://landscape.canonical.com
 * Support:        https://ubuntu.com/advantage

  System information as of Mon Nov  2 17:55:54 UTC 2020

  System load:              0.0
  Usage of /:               11.0% of 19.21GB
  Memory usage:             15%
  Swap usage:               0%
  Processes:                121
  Users logged in:          0
  IPv4 address for docker0: 172.17.0.1
  IPv4 address for ens3:    10.20.20.79


41 updates can be installed immediately.
15 of these updates are security updates.
To see these additional updates run: apt list --upgradable


The programs included with the Ubuntu system are free software;
the exact distribution terms for each program are described in the
individual files in /usr/share/doc/*/copyright.

Ubuntu comes with ABSOLUTELY NO WARRANTY, to the extent permitted by
applicable law.

To run a command as administrator (user "root"), use "sudo <command>".
See "man sudo_root" for details.

kroy@testvm:~$
SUCCESS!
Terragrunt
Even though we’ve only got a single resource so far, I want to touch on what terragrunt accomplishes for you.
Terraform only works on single directories. So say I wanted to add a second VM.
I would do something like:
cd terraformroot
cp -pr vms/testvm.lan.kroy.io vms/doubletest.lan.kroy.io
rm vms/doubletest.lan.kroy.io/terraform.tfstate*
sed -i -e 's/testvm/doubletest/' vms/doubletest.lan.kroy.io/vm.tf
Hopefully that is mostly self-explanatory:
- Change into our terraform directory.
- Copying the existing config to a new VM directory.
- Remove all the old terraform state files. This is VERY important if you are going to be using terraform like this. This is basically the main “database” for terraform and if you want to create a new resource, you don’t want the old database in the new resource directory.
- A not-so-fancy one-liner to change the hostname of the new VM.
Now you would have a few options to determine how you want to apply this configuration:
- Switch to
terraformroot/vms/doubletest.lan.kroy.io, do aterraform apply. This would only apply the state for this VM. - Switch to
terraformroot/vms, do aterragrunt apply-all. This would apply the state fortestvm.lan.kroy.ioanddoubletest.lan.kroy.io. - Switch to
terraformroot, and again,terragrunt apply-all. This would apply the state for all resources undervms, and any future projects, like networking configs, LXC, etc.
In all that, you can also do plan-all on terragrunt to see what it’s going to change.
In the directory for these VMs resources, I’ve got a terragrunt.hcl. The contents of this are simply:
include {
  path = find_in_parent_folders()
}
This says “look in any parent folders, and execute the actions of their terragrunt.hcl.”
This is powerful because you can have specific actions for just the vms directory or everything. That’s why the content of my terragrunt.hcl in the vms directory contains:
terraform {
  after_hook "after_hook" {
    commands     = ["apply"]
    execute      = ["/bin/bash","/home/kroy/Documents/infra/terraform/updatedns.sh"]
    run_on_error = true
  }
}
As is implied, this runs after you type terragrunt apply or apply-all.
Being in the vms sub-directory, when would this run?
- In the individual VM resource directory due to the
find_in_parent_folderswhen you run terragrunt with apply or apply-all. - In the
vmssub-directory when running apply all. You can’t run apply because that only looks in the current directory. - In the main
terraformrootdirectory.
So running a terragrunt apply-all in the vms directory:
[terragrunt] 2020/11/02 12:13:11 Stack at /home/kroy/Desktop/esxitolibvirt-blog/terraform/vms:
  => Module /home/kroy/Desktop/esxitolibvirt-blog/terraform/vms/doubletest.lan.kroy.io (excluded: false, dependencies: [])
  => Module /home/kroy/Desktop/esxitolibvirt-blog/terraform/vms/testvm.lan.kroy.io (excluded: false, dependencies: [])
[terragrunt] 2020/11/02 12:13:11 [terragrunt]  Are you sure you want to run 'terragrunt apply' in each folder of the stack described above? (y/n)
The output of this shows that the new VM was created (and the original VM was at least looked at), and my post-hook is run once:
Apply complete! Resources: 0 added, 1 changed, 0 destroyed.
[terragrunt] [/home/kroy/Desktop/esxitolibvirt-blog/terraform/vms/testvm.lan.kroy.io] 2020/11/02 12:14:52 Detected 1 Hooks
[terragrunt] [/home/kroy/Desktop/esxitolibvirt-blog/terraform/vms/testvm.lan.kroy.io] 2020/11/02 12:14:52 Executing hook: after_hook
[terragrunt] [/home/kroy/Desktop/esxitolibvirt-blog/terraform/vms/testvm.lan.kroy.io] 2020/11/02 12:14:52 Running command: /bin/bash /home/kroy/Documents/infra/terraform/updatedns.sh
[terragrunt] [/home/kroy/Desktop/esxitolibvirt-blog/terraform/vms/testvm.lan.kroy.io] 2020/11/02 12:14:52 Module /home/kroy/Desktop/esxitolibvirt-blog/terraform/vms/testvm.lan.kroy.io has finished successfully!
Conclusion
Well, there you have it. Is this the perfect layout? Probably not. Is there room for improvement? Absolutely.
I have put up a git repo HERE, containing all of the examples from above.
Of course this is far from complete. With this setup, all you have are fairly blank and basic VMs. You’d want to hit them with Ansible or something to finish configuring them. But that’s a post for another day.
Enjoy!
]]>As a VyOS evangelist, maintainer, and more, I’ve been meaning to write a simple series of “how-to” guides for VyOS for a while. Sure, there are plenty of guides out there, but I think a lot of them fall short in demonstrating WHY you are entering specific commands.
VyOS is capable, but it’s much more helpful if you can fully understand what it’s doing.
This initial guide will walk through the basic setup steps in replacing something like pfSense or some other consumer router with a simple and secure system running VyOS.
This is also going to be a very very long post, so buckle in!
Who is this For
Anybody that wants to use VyOS of course!
The nice thing about running VyOS is that if you set up it, and understand WHAT it’s doing, then you’ve actually learned something about networking.
Does something like pfSense work?
Sure, but it also doesn’t teach you much about what’s actually going on. And the knowledge learned in VyOS will easily translate to almost any other vendor like Cisco, Arista, and more. At that point, the concepts are the same, you are just learning the different dialects.
Environment
VyOS really doesn’t take much in resources.
8GB of storage and 2-4GB of RAM will be overkill for most basic setups.
CPU-wise, even small Pentium Silver CPUs can handle gigabit and beyond, even over VPN . Anything like an i3/i5 or a Xeon won’t break a sweat except in all but the most demanding scenarios.
If you virtualize, it can be helpful to set up a test environment. This could consist of a simple:
- WAN Network. For testing this could be your existing LAN network.
- A new “LAN” Network. For testing this could just be a separate port group or bridge, and it wouldn’t even need an uplink.
- A simple VM with a GUI (or without), to run some testing.
If virtualization isn’t an option, VyOS can run on almost any device that is x86_64. I’ve run it on everything from:
- NUCs with single NICs and USB/USB-C NICs.
- WYSE 5070/3040 Thin Clients.
- A variety of Dells, including R710s/R620s/R630s.
- Anything Supermicro from 1U to 4U devices.
Finally, for this guide, I’ll be working with two NICs.
One is a WAN, connected to my current LAN. I’ll be creating a “network inside a network”. The second will be our new “LAN”. This is separate from my existing LAN so I can pretend like it’s a second private network. These interfaces can be anything:
- Physical NICs.
- VLANs.
- Virtual NICs from ESXi, Proxmox, etc.
Install
The first step is to grab yourself a copy of the installer ISO.
Most people will want the Rolling Release. You can also build it yourself, via the Docker image, which is helpful if there are some extra packages you want to add.
If you want access to the LTS version, it requires self-building (an easy process), contributing, or a subscription. I highly recommend contributing, as even writing or cleaning up some documentation will get you access to the LTS prebuilt versions.
You can also support and get access via Patreon or BuyMeACoffee.
Note that for these guides, I will be using a recent version of rolling. This is important as some configuration nodes have changed locations and format between 1.3+ and the existing LTS versions (DHCP and IPv6 RAs are two things that come to mind).
Every once in a while, some broken functionality is pushed, but it is almost always fixed quickly. A broken upgrade is not a show-stopper and it is trivial to boot back into the working version with the built-in Image Management.
I have no issues running rolling releases in many production locations.
Install Steps
Installation is trivial:
- Burn ISO to CD/DVD/USB stick, or boot ISO via remote management (iDrac, iLo, IPMI)
- Login with
vyos/vyos - Type
install image - Answer the install steps
- Reboot and remove installation media
- The installer ISO is a fully functional VyOS image. That means if you skip the install image step, you can configure the system, and it will work as intended… until you reboot. Don’t be me. Make sure to install if you want a permanent installation.
- Some systems that lack a serial port get stuck on a black screen on the installer ISO. The simple fix is to edit the grub boot option line and remove the console=ttyS0,115200 option from the kernel boot arguments. Then just boot with CTRL-X as directed.
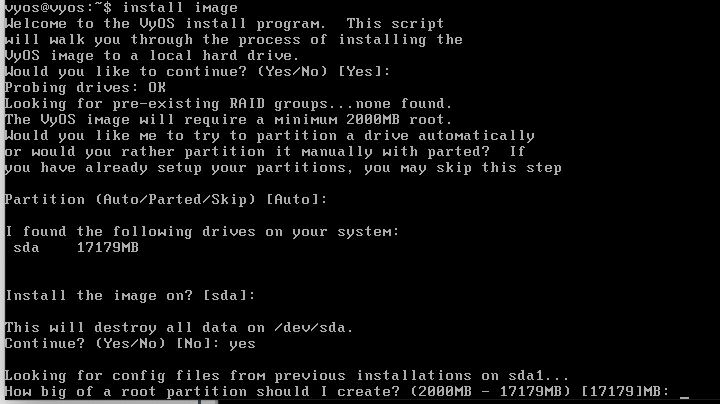

Basic Configuration
Once installed, you’ll be staring at the login screen. Login with vyos and the password you set up during install:
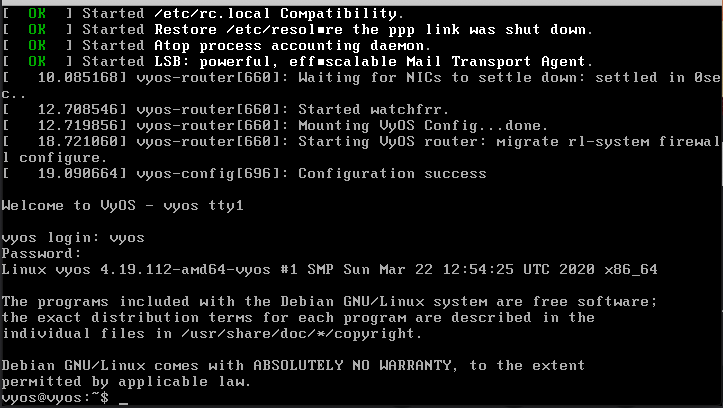
Decision Time!
Before you go any further, you need to make a decision. You need to pick out the subnet (or later subnets) where your network will live. Or, if you are converting over your existing network, just reuse it.
These should be RFC1918 addresses. You generally want a /24, which is 254 usable addresses.
So, there are three main groups of these private addresses you can choose from:
10.X.Y.1-254, whereXandYare any number between 0 and 255. For the last number, 0 would be your “network” address, and 255 would be your broadcast address. You could then assign all your hosts to 1-254.172.X.Y.1-254, in this caseXwould be between 16 and 31, andYcould be 0 to 255.192.168.X.1-254, whereXis between 0 and 255.
Many routers around the world off-the-shelf use a subnet like 10.0.0.0/24 or 192.168.0.0/24.
While you can use these subnets, future-you will hate yourself if you ever want to access your network remotely or access other networks when both sides are using the same subnet.
I would highly recommend:
- Choose a subnet away from the norm. For example, 10.32.47.0/24.
- If you want to plan ahead and are planning to break things out on VLANs, use a subnet like 10.32.X.0/24. That way, in the future, X can represent your VLAN number, and you can do a summary route like 10.32.0.0/16. I’ll be showing some examples of where this can be used later on in this post.
Configuring the LAN and Remote access
After the subnet is chosen, the first step is to get the router on the LAN and accessible via SSH. This makes it much easier to configure, as you are no longer tethered to a keyboard/monitor, VM console, can copy/paste, etc.
LAN IP
Goals:
- Enter configure mode
- Add address to the correct interface
- Commit and save
The first step is to enter configure mode. This allows you to make changes to the system configuration. Type configure. VyOS also supports shortcuts and tab completion, so typing conf or conf<TAB> will do the same thing.
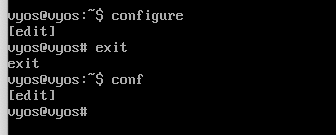
The prompt will change to include #, and the [edit] line will appear to designate that you are in configure mode.
Next, you need to add your LAN IP. You can check your interfaces by typing run show interfaces. This tells VyOS to show all the interfaces in operational mode (the mode you were in before you typed conf).

In my case, eth1 is attached to my LAN here. I’m going to use the subnet from above, 10.32.0.0/24. I prefer to use .1 for my routers, but you can use any IP in that range.
There are two methods to assign it once in conf mode. Either with the full path, or by drilling-down.
Full path:
configure
set interfaces ethernet eth1 address 10.32.0.1/24
set interfaces ethernet eth1 description LAN
commit
save
Drill down:
configure
edit interfaces ethernet eth1
set address 10.32.0.1/24
set description LAN
commit
save
Committing makes the configuration active, and saving saves it to disk so it will persist on a reboot.
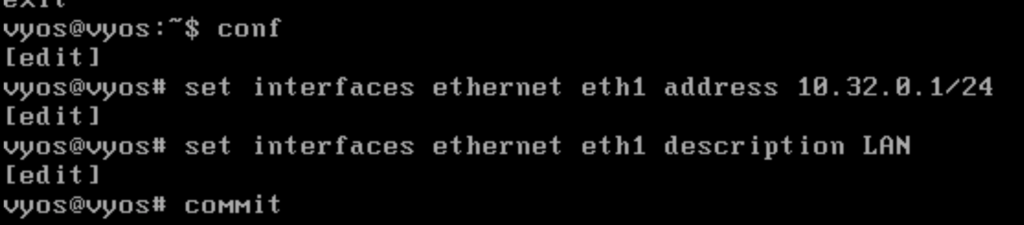
Or:

You can show your work with show interfaces and run show interfaces
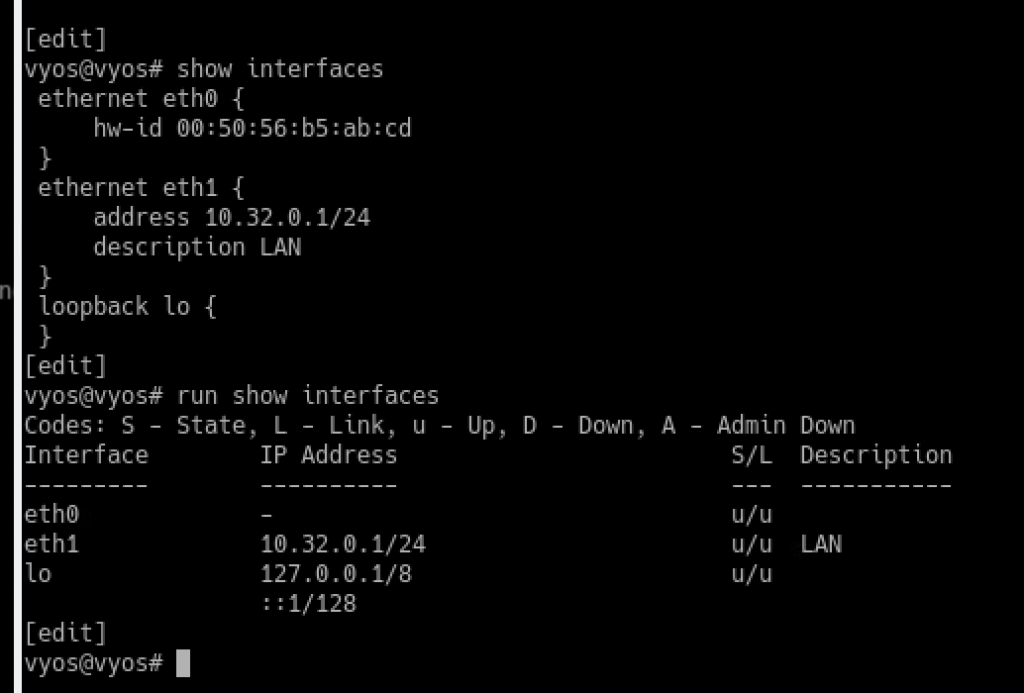
Set up DHCP
Now that that router has a LAN IP, it’s time to connect your laptop/desktop/etc up to it.
You can assign it a static IP in the chosen subnet (10.32.0.10/24 for example), but I imagine you are also going to want to assign a DHCP range for automatic configuration of clients.
Goals:
- Enter configure mode
- Set up DHCP ranges
- commit and save
Let’s talk about the following config.
We are going to make two DHCP ranges, and leave some holes. This would allow us to assign the IP addresses between .2 and .49 for static or other uses, as well as .126-199 and .251-254.
While this is a non-standard usage, it demonstrates the capabilities. Many people would just have a single range.
set service dhcp-server shared-network-name LAN subnet 10.32.0.0/24 range 0 start 10.32.0.50
set service dhcp-server shared-network-name LAN subnet 10.32.0.0/24 range 0 stop 10.32.0.125
set service dhcp-server shared-network-name LAN subnet 10.32.0.0/24 range 1 start 10.32.0.200
set service dhcp-server shared-network-name LAN subnet 10.32.0.0/24 range 1 stop 10.32.0.250
Some other important config options follow.
You want to tell the DHCP server to hand out the router’s IP address as the default gateway and DNS. This will make it so (eventually), your LAN devices will have DNS and routing to the Internet:
set service dhcp-server shared-network-name LAN subnet 10.32.0.0/24 dns-server 10.32.0.1
set service dhcp-server shared-network-name LAN subnet 10.32.0.0/24 default-router 10.32.0.1This would also be the place to insert something like your pi-hole or active directory DNS server. In the above example, your pi-hole/ADDNS address or addresses would be where the dns-server option is.
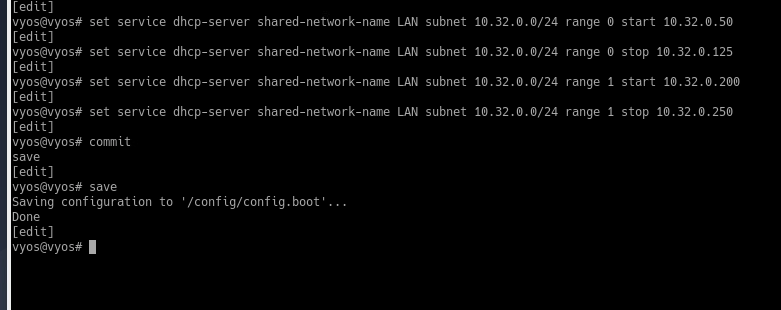
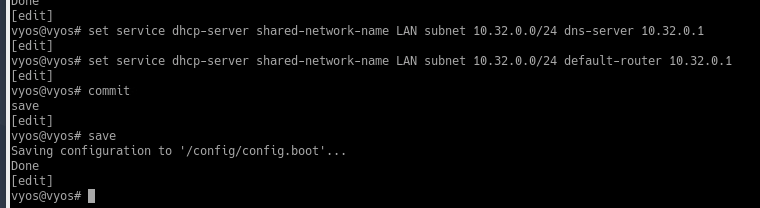
SSH
The final step before we can access the router over SSH is to actually enable SSH:
set service ssh port 22
commit
save
At this point you ought to be able to hook up a LAN client, and verify that you have an IP, gateway, and DNS.
This is a fairly stock Debian VM I set up. As you can see, my IP is in one of my DHCP ranges, and my DNS and default route are the router’s IP.
This is on Linux, but the same thing could be confirmed on Windows or MacOS:
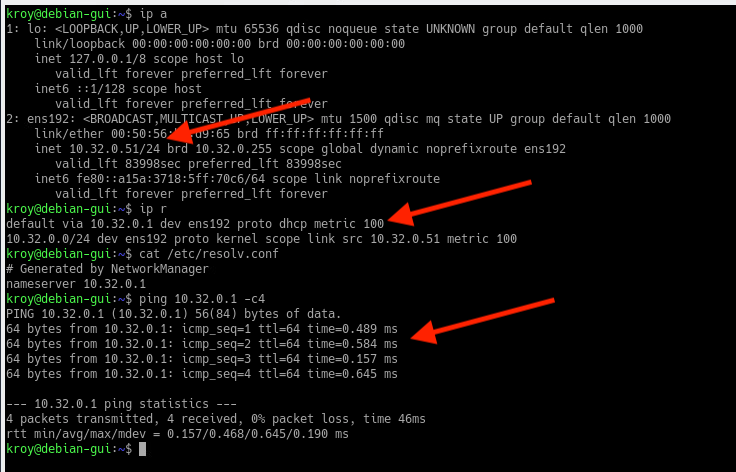
From there, you should be able to ssh into the router with the username vyos and password you set up during install:
And typing show configuration (in op mode), should show you the work done so far. VyOS also comes with a few defaults, like NTP servers configured.
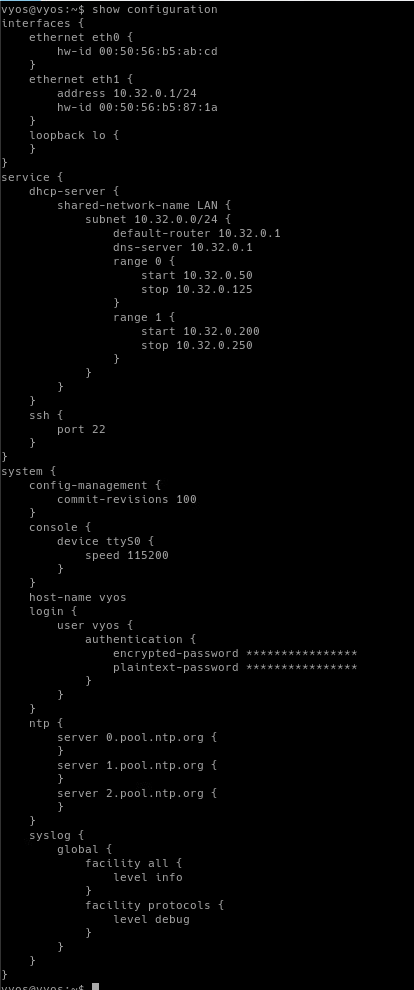
NAT & DNS
NAT
The next important duty for a router and firewall is to be able to NAT. NAT allows all your private LAN devices to access the Internet.
Unfortunately, because of the numbering scheme used, there are only 4.2 billion of these address, at least in IPv4, and the transition to IPv6 is far from complete.
Because of this, every device on your network needs to be able to “pretend” that it is your router to access the Internet. Your router keeps track of which requests belong to which device.
Source NAT is what allows you to do this.
This is also where the above mentioned “summary route” can come into play. Instead of creating three separate NAT rules for 10.32.1.0/24, 10.32.2.0/24, and 10.32.3.0/24, you can create a single rule for 10.32.0.0/16.
For this setup, it’s important to identify which network interface will eventually be your WAN interface, even though it’s not configured yet.
Goals:
- As before, enter configuration mode.
- Set up a source NAT rule to target our LAN or LAN subnets.
- Define the outgoing WAN interface on the rule.
- Set the translation type of the rule to
masquerade.
The type of NAT we will be using is called SOURCE NAT. This type of NAT is going to have three components:
- Target all traffic from our LAN or LANs…
- … when the traffic is going out to the Internet through this outgoing interface…
- … Change the IP address from the LAN IP to the WAN IP
To do this:
set nat source rule 100 source address '10.32.0.0/24'
set nat source rule 100 outbound-interface 'eth0'
set nat source rule 100 translation address masquerade
commit
save
In the above example, the 100 is an arbitrary number (between 1-9999). The eth0 is my eventual WAN interface. masquerade translates the internal LAN IP to your public WAN IP.
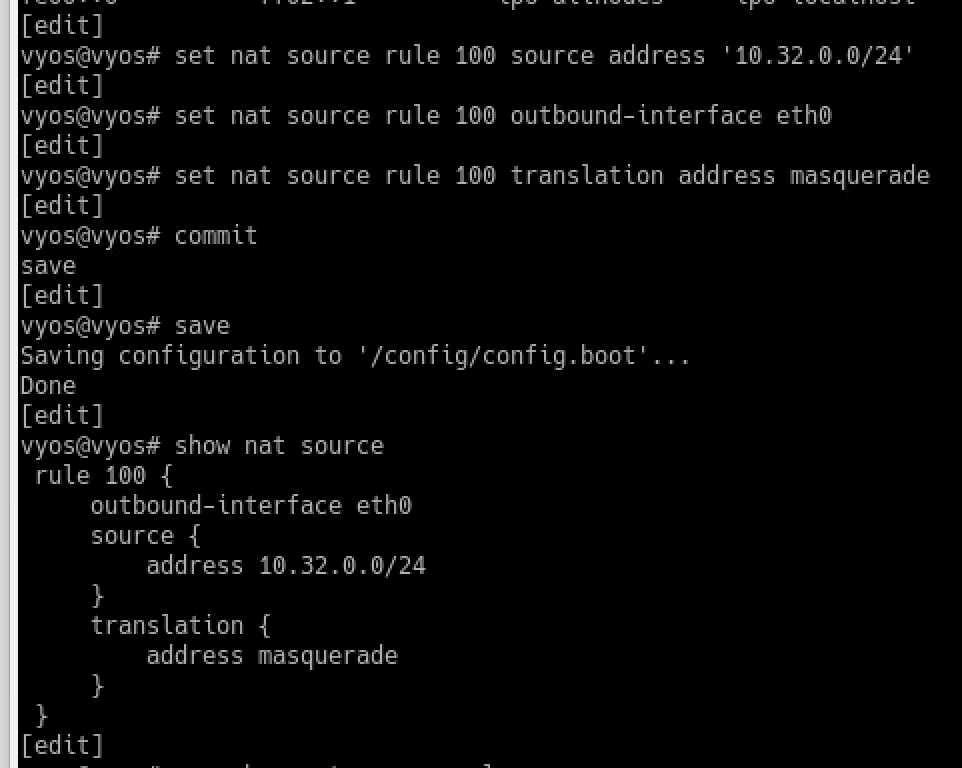
Once we set up our WAN interface, we’ll be able to type show nat source rules in op mode, or run show nat source rules in conf mode to run the op mode command, it will be clear what’s happening.
DNS
The next step is to set up our VyOS instance as for DNS. This will allow you to use local DNS and caching instead of your ISP’s, but also eventually will allow you run custom DNS and hosts.
Goals:
- Enter config mode
- Set the DNS Listen Address
- Set the subnets we are allowing from
- Set the cache size to 0
- commit and save
set service dns forwarding listen-address '10.32.0.1'
set service dns forwarding allow-from '10.32.0.0/24'
set service dns forwarding cache-size '0'
commit
save
As mentioned, this accomplishes three things.
- It tells VyOS to listen for DNS requests on its LAN IP,
10.32.0.1. - It limits requests from your LAN subnet.
- Finally, it sets the cache size to 0. This is good to start out with to make sure everything is working, but later you can bump it up to speed up multiple requests for the same sites.
Instead of allowing “10.32.0.0/24”, you would allow “10.32.0.0/16”. This would ensure that as you add VLANs and subnets, your DNS will just work without adding a long list of /24s.
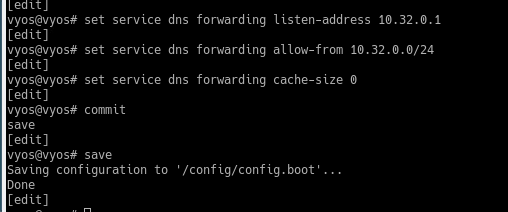
DNS Forwarding
There is one more consideration to be made. As configured, your DNS server will run in “recursor” mode. This means it will take responsibility for fully resolving DNS on its own. This may be a bad thing for a number of reasons:
- It leaks your IP to potential undesirables.
- It’s almost always slower, as you don’t get to benefit from the caches of a large service like CloudFlare or Google.
It’s quite simple to set up in forwarding mode, meaning when you make a DNS request, you end up asking an upstream resolver.
In the following example, we’ll be using CloudFlare and Google:
set service dns forwarding name-server 1.1.1.1
set service dns forwarding name-server 1.0.0.1
set service dns forwarding name-server 8.8.8.8
set service dns forwarding name-server 8.8.4.4
commit
save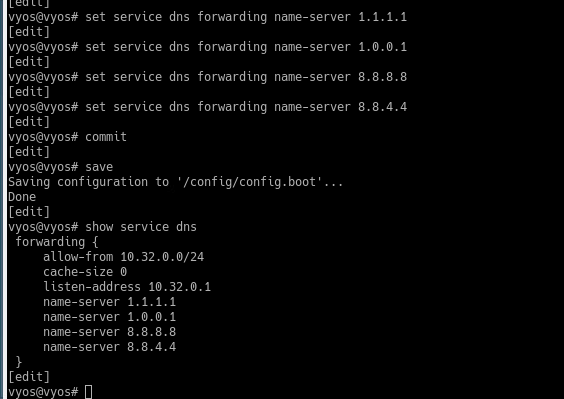
System DNS
One final step is to set the DNS for VyOS itself. Everything we’ve done so far has just set up VyOS to be a DNS server for your clients.
This will be the DNS that is used, for example, when you do a VyOS update, ping or traceroute from VyOS, etc.
The easiest thing to do if you’ve been following this guide, is just to use the DNS server you set up above:
set system name-server 10.32.0.1
commit
save
This is also another spot where if you wanted to use Google, CloudFlare, or AD-DNS, you could plug in that IP:
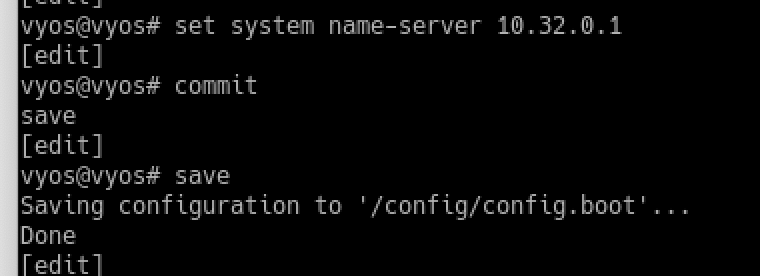
Alternatively, you call tell VyOS to use the DNS servers that it received from your WAN DHCP server with:
set system name-servers-dhcp eth0Firewall
If you’ve made it this far, congrats! We are almost there!
This section will cover the creation of a zone-based firewall, which is far superior to the default method of attaching firewalls to interfaces.
The reason it is superior is simple. It’s a bit more hassle to set up, but it’s far easier to manage on an ongoing basis, plus, you start thinking about firewalling as flows of information from interface to interface.
Goals:
- Enter configuration mode
- Create a firewall to allow all LAN traffic.
- Create firewall to allow all LAN traffic to access VyOS itself.
- Create a firewall to protect the router itself from WAN.
- Create a firewall to protect LAN devices from WAN.
- Commit
- Create LOCAL/LAN zones.
- Assign appropriate interfaces to zones.
- Commit and save
For as complex as firewalling seems, it’s actually pretty simple when you break it down.
A firewall tracks connection “states” to determine what is and is not allowed. This is where packets are originating and going to, ports involved, types of traffic like TCP/UDP/ICMP, and more.
We are going to build a very simple firewall that assumes that we want to block everything externally, and allow everything from LAN.
So let’s dig right into it.
LAN
First, create a firewall that will allow our LAN to access everything. This is a setup that would mimic what most consumer routers do:
conf
set firewall name LAN-WAN default-action accept
set firewall name LAN-LOCAL default-action accept
commit
save
The LAN-WAN and the LAN-LOCAL can be arbitrarily named anything. I use this naming scheme because as mentioned above, it’s better to think about firewalls as controlling the flow of information through the router, and these names are self-documenting.
LOCAL is a specific VyOS designation that means “this router”. When you are attaching the firewall in the zones, LOCAL will be what you use to control traffic destined to the firewall itself.
As should be obvious, we are just allowing everything. But you can set whatever rules you wanted. LAN-WAN would generally remain pretty open as it would be uncommon to block your own access to the Internet, but LAN-LOCAL might contain rules to maybe allow only specific devices access to manage the VyOS router.
Also note that we are just creating the firewalls here. They don’t become active until you attach them to the zones.
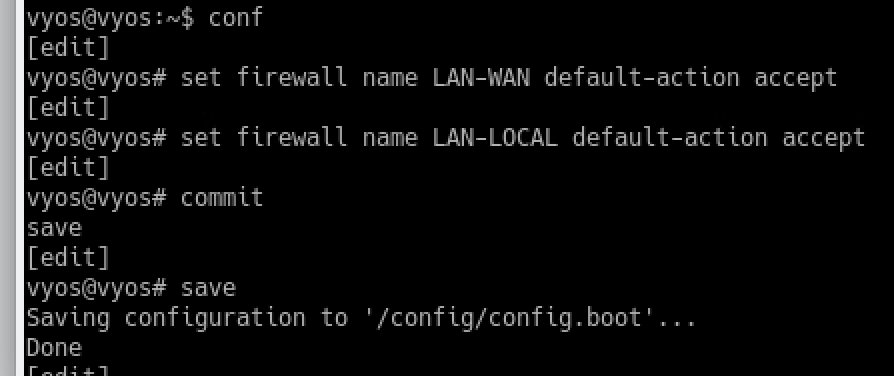
LOCAL
As mentioned, the LOCAL zone is traffic destined for the VyOS router itself.
In most cases, it will have a similar ruleset to the LAN one above, as most people want their router to have full access to the Internet and their LAN devices:
conf
set firewall name LOCAL-WAN default-action accept
set firewall name LOCAL-LAN default-action accept
commit
saveWhile I might be getting a little ahead of myself here, it’s important to note that you could use the same firewall instead of creating four different firewalls as we’ve done here. The firewalls are just attached to interfaces or zones by names, so there’s nothing really stopping you from creating a single firewall and attaching it to four different places.
As a bit of a pro-tip though, I would recommend not doing this. Eventually you’ll want them broken out, and it’s far more of a hassle to do it later than to just do it during initial setup.
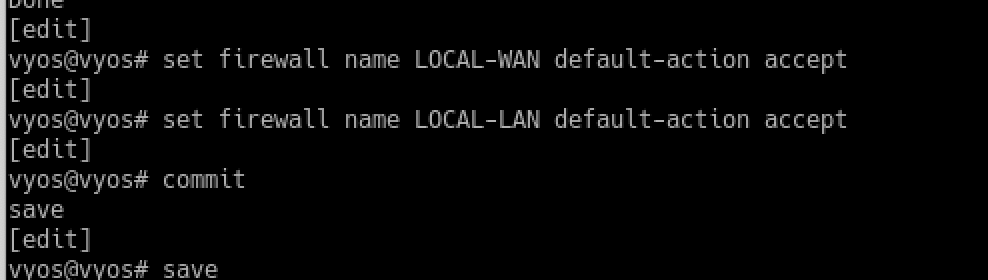
WAN
The WAN zone is where we are actually going to do most of our work.
The basic goal here will be two things. To block all access to the router itself, and to provide basic setup and template for future things like port forwarding to our LAN.
When you start moving data to and from the Internet, that’s when you need to start worrying about the state tracking I mentioned before.
For both LOCAL and LAN traffic, we’ll be setting up what’s known as a “stateful firewall”.
In stateful firewalling, there are three main states to worry about:
- New – Traffic in a
NEWstate is the first packet from a destination to a source. Allowing or denying this packet ultimately determines whether the traffic will be allowed. - Established – Once traffic from
NEWhas been allowed, the subsequent packets are marked asESTABLISHED. This is essentially traffic that has already been allowed by other rules. This is another basic requirement for a working stateful firewall. - Related – This means that this is traffic that is somehow related to already allowed traffic. Also required.
With that said, it doesn’t mean you shouldn’t plan ahead a bit:
- Rules are processed numerically, so for fastest firewalling and routing, you definitely want your ESTABLISHED/RELATED rule at the top. That ensures that existing traffic, which is going to be the bulk of the traffic your firewall processes, only has to look at a single rule.
- Leave yourself some gaps for future rules. You’ll appreciate it later if you want to insert a new rule before an existing one, though you can always rename and move around.
WAN-LOCAL
As mentioned, the WAN-LOCAL firewall is traffic destined for the VyOS router itself. In the future, this will be where you allow traffic, say to your WireGuard port for VPN.
The first rule we want to build is to allow all ESTABLISHED and RELATED traffic. So we’ll:
- Create the WAN-LOCAL firewall.
- Set the default policy on the firewall to drop everything.
- Create a rule to accept specific traffic for rule.
- Set the match for the rule to our established and related states.
- Set a description for ease of use later.
set firewall name WAN-LOCAL default-action drop
set firewall name WAN-LOCAL rule 5 action accept
set firewall name WAN-LOCAL rule 5 state established enable
set firewall name WAN-LOCAL rule 5 state related enable
set firewall name WAN-LOCAL rule 5 description "Allow EST/Related Traffic"
commit
save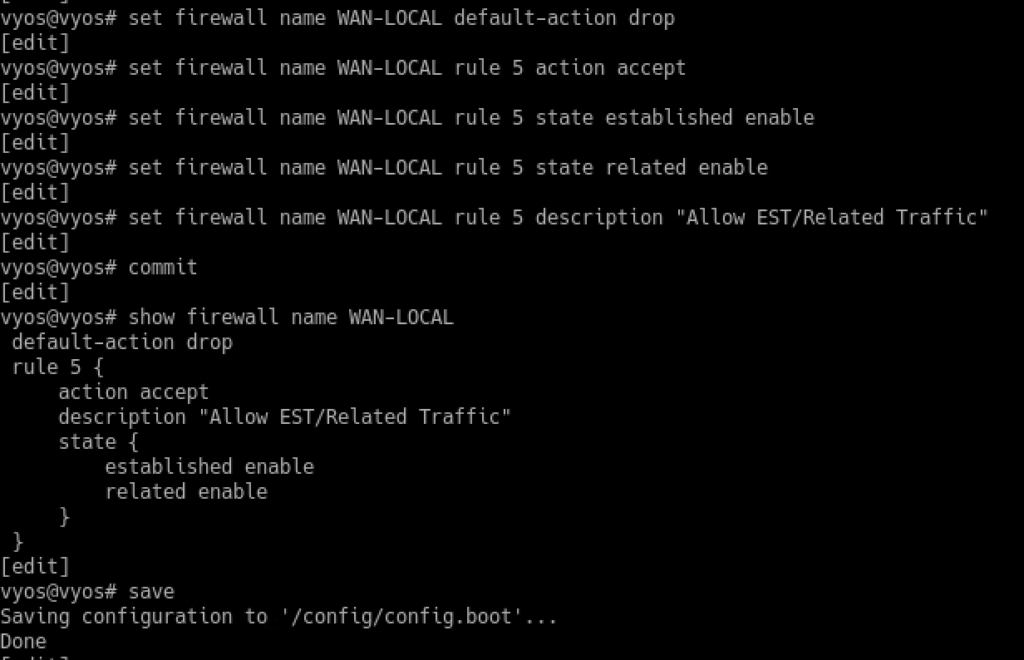
The next rule we want on is to allow ICMP. Many people like to block this, but not me. I’ll defer to ShouldIBlockICMP.com on this.
- Create a new rule matching ICMP
- Match the state of
NEW. This is what actually matches the unknown traffic to allow - Allow the traffic
- Commit and save
set firewall name WAN-LOCAL rule 20 protocol icmp
set firewall name WAN-LOCAL rule 20 state new enable
set firewall name WAN-LOCAL rule 20 action accept
commit
save
And you can see that the firewall is created (but still not attached to any interfaces), by doing the op mode command show interfaces.
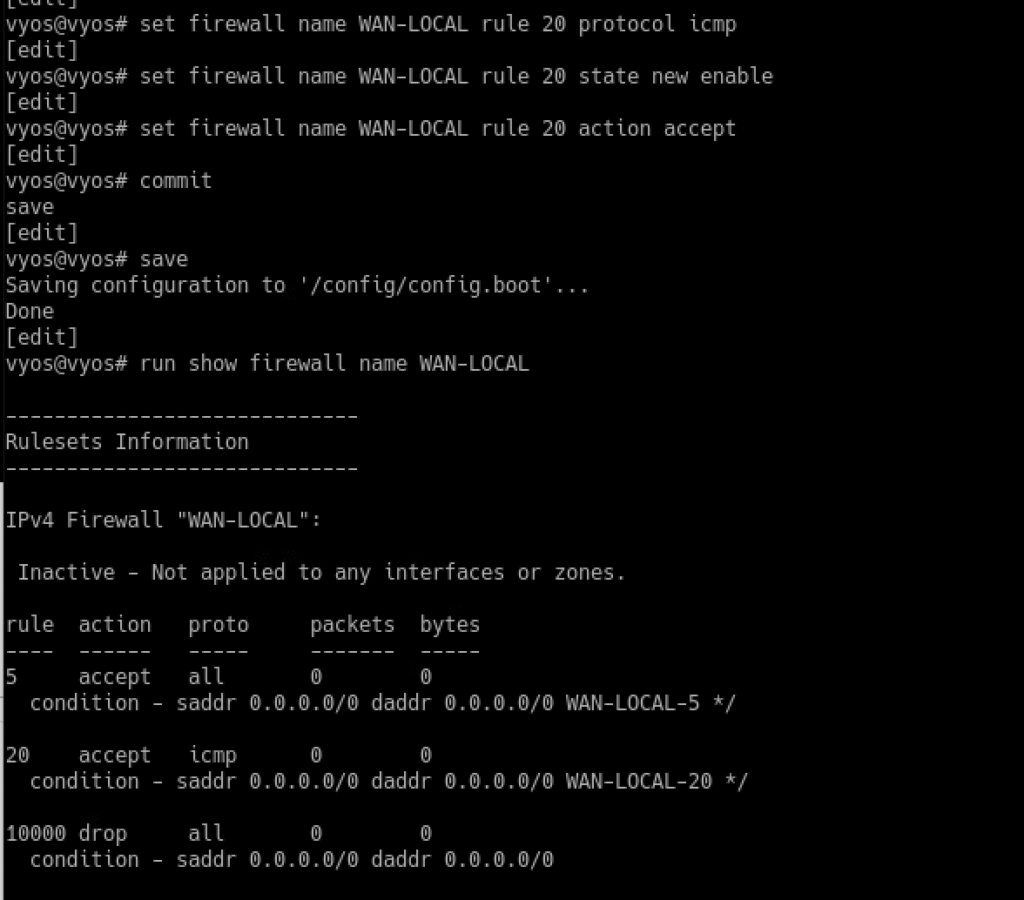
WAN-LAN
For now, the WAN-LAN firewall is identical to the WAN-LOCAL. In the future, this is where you will allow your port forward rules, or other traffic you want to send to your LAN devices, so it’s helpful to break it out beforehand.
As before, we create the firewall, set it to drop by default, allowed EST/RELATED, and allow ICMP, which won’t do anything now, but could be helpful in the future:
set firewall name WAN-LAN default-action drop
set firewall name WAN-LAN rule 5 action accept
set firewall name WAN-LAN rule 5 state established enable
set firewall name WAN-LAN rule 5 state related enable
set firewall name WAN-LAN rule 5 description "Allow EST/Related Traffic"
set firewall name WAN-LAN rule 20 protocol icmp
set firewall name WAN-LAN rule 20 state new enable
set firewall name WAN-LAN rule 20 action accept
Don’t forget you can dive down into levels as in the following example:
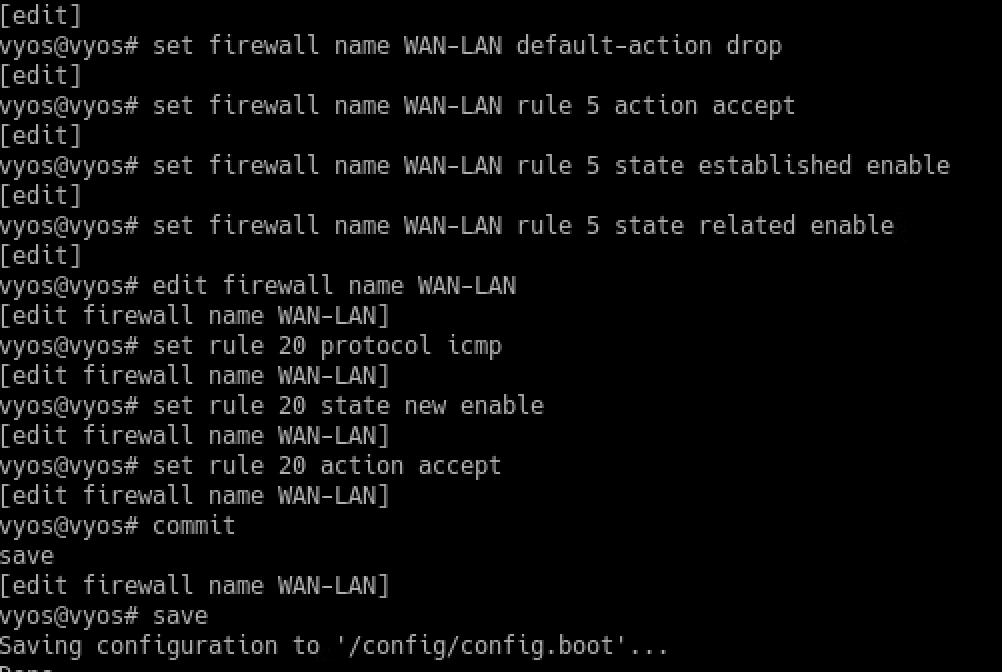
Finally! We have our firewalls set up and ready to deploy.
WAN and Zones
If you’ve been paying attention, we still don’t have one VERY important piece to this puzzle. We still don’t have WAN access!
Of course I did this to protect your router during the initial setup phase. Until you have firewalls ready to deploy, you probably don’t want to be kicking your brand new VyOS install out on the open Internet.
Zones
Zones are easily one of my favorite parts of VyOS, and something that in my opinion, puts it lightyears ahead of other firewall solutions.
Especially as your firewalling needs grow, zones just make it so EASY. As I sort of touched on, zones are a bit more work initially, but save you MUCH more time in the future.
If you mistype something and are still configuring VyOS over SSH, you can potentially lock yourself out.
The naming scheme as I’ve outlined above should be helpful here when creating our firewall zones. It basically says FROMZONE->TOZONE
So let’s run through the whole thing.
Goals:
- Set the default action for the zone. This should always be drop to cover yourself in case you miss something.
- Apply the “For traffic from X zone to current zone, attach Y firewall”
- Add the interfaces that are part of this zone
- Repeat for all zones
- commit
- save
So what does this look like for the LAN:
- In this example we are working on the LAN zone
- We drop everything by default
- We assign the
WAN-LANfirewall to traffic from any interface in the belowWANzone - Similarly for the
LOCAL-LAN. This is traffic from the VyOS instance itself to LAN hosts. - We put
eth1in our LAN zone.
set zone-policy zone LAN default-action drop
set zone-policy zone LAN from WAN firewall name WAN-LAN
set zone-policy zone LAN from LOCAL firewall name LOCAL-LAN
set zone-policy zone LAN interface eth1
Repeat all steps for the LOCAL zone. The major difference here is the local-zone designation. As I’ve mentioned a few times, LOCAL is a special designation that means “this firewall”, so you don’t attach interfaces:
set zone-policy zone LOCAL local-zone
set zone-policy zone LOCAL from LAN firewall name LAN-LOCAL
set zone-policy zone LOCAL from WAN firewall name WAN-LOCAL
set zone-policy zone LOCAL default-action drop
Finally, the WAN zone is basically the same as the LAN zone. The only major change you should notice is that I just changed the firewall names and interface name:
set zone-policy zone WAN from LAN firewall name LAN-WAN
set zone-policy zone WAN from LOCAL firewall name LOCAL-WAN
set zone-policy zone WAN interface eth0
set zone-policy zone WAN default-action drop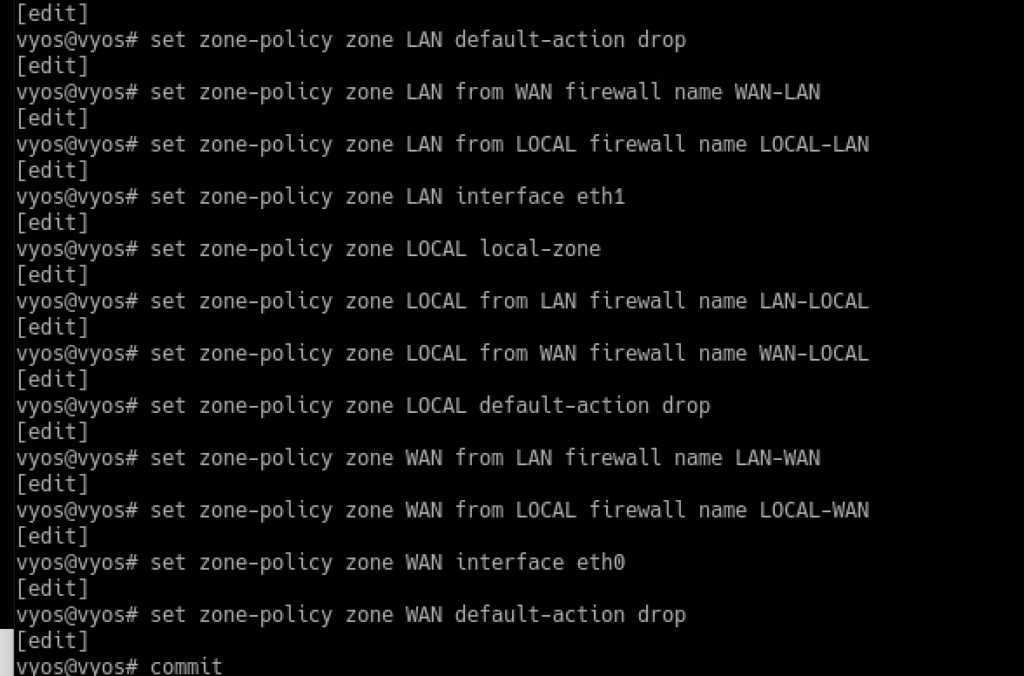
If you were like me, you might have tried committing between steps. Unfortunately, if you don’t set up everything at once, you’ll quickly discover that zones are interdependent on one another. This happens because I’ve created the LAN zone, but the referenced WAN and LOCAL zones don’t exist yet.
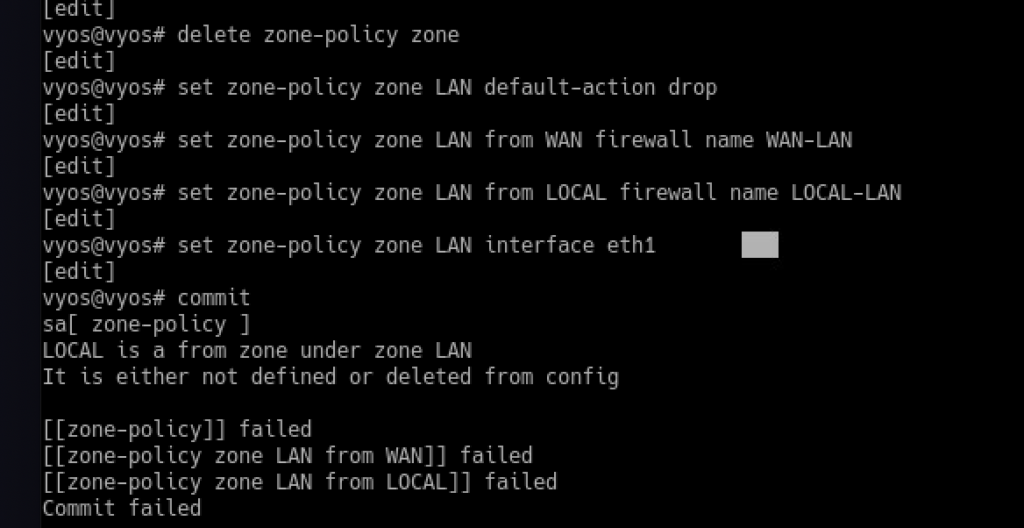
Show your work
Hopefully, if you’ve done everything correctly, you should see all your zone policies set up under the op mode command run show zone-policy. This view should make it obvious which traffic is flowing through what firewall:
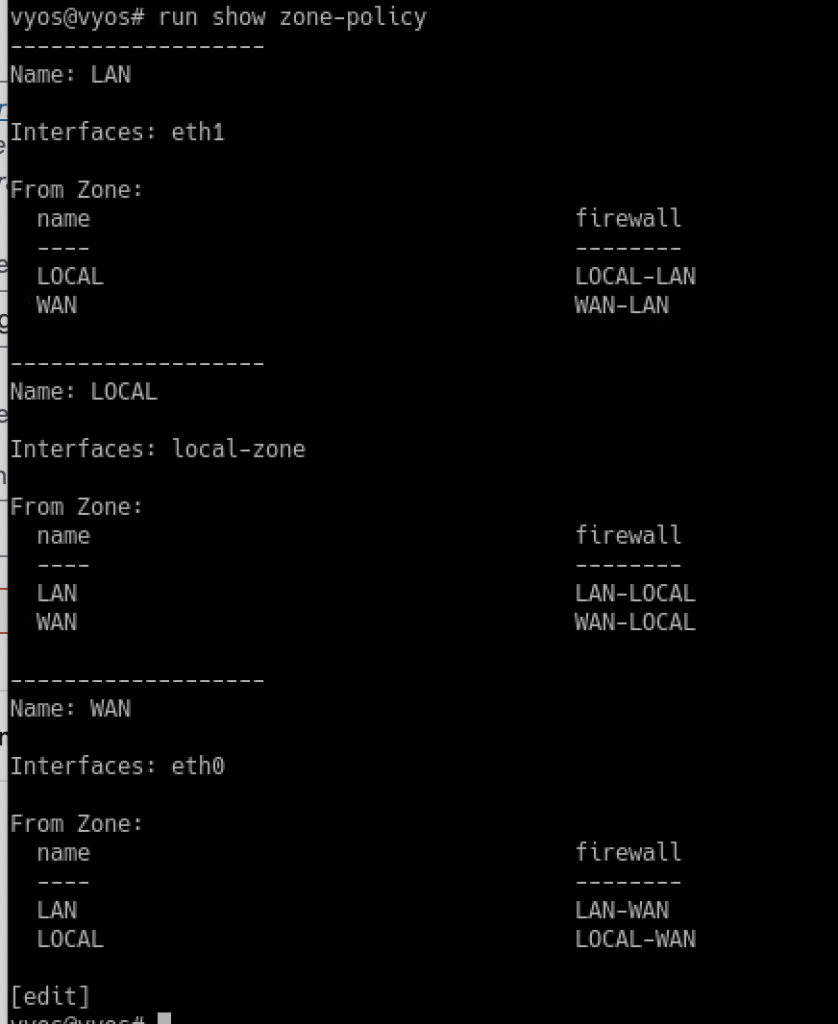
WAN Setup
Finally, here we are.
Setting up your WAN. If you’ve made it this far, congrats. You are basically 1 or 2 commands away from having a working router and firewall!
There are multiple ways to get a WAN address. For simplicity’s sake, I’ll just cover two of them here, static and DHCP assignment. For something like PPPoE, you’ll need a few more steps.
DHCP Assignment
DHCP is when your router asks your ISP’s servers for what it should use for its IP address and routing information. This is accomplished with one simple command (well, four if you add a description to the interface, and commit and save):
set interfaces ethernet eth0 address dhcp
set interfaces ethernet eth0 description WAN
commit
save
You can verify that the setup is complete with the op mode commands run show interfaces and run show ip route. (I have some debug variables set, so ignore the extra output:
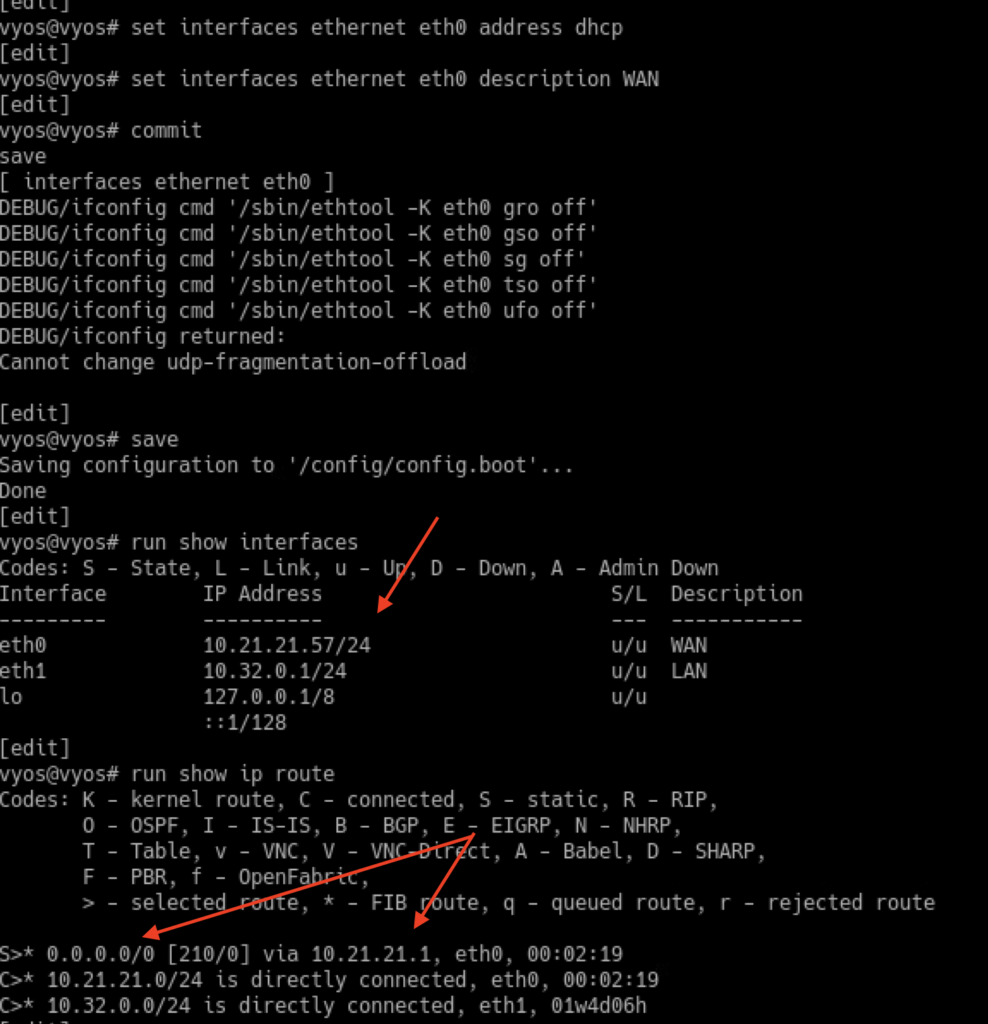
In the above output, 10.21.21.57 is the IP address I was assigned via DHCP. The show ip route verifies that I have a default route.
In the networking world, this is represented by 0.0.0.0/0, which is a shortcut for the entire Internet
So in the above example, this VyOS knows how to talk directly to anything in the 10.21.21.0/24 or 10.32.0.0/24 subnets because they are directly connected. Anything outside of that, it needs to ask 10.21.21.1 for a route to it.
Static IP
Static IPs just skip the automatic configuration. It’s up to your ISP how this is configured, but usually it’s an extra step, manually applying your default route.
So to duplicate my above DHCP configuration:
set interfaces ethernet eth0 address 10.21.21.57/24
set protocols static route 0.0.0.0/0 next-hop 10.21.21.1
commit
save
As you can see in the following screenshot, I forgot the exact format, so I hit my <TAB> button to get hints:
Check your work
Assuming nothing has gone wrong, you should be able to verify everything with the op mode command ping. So let’s hit Google with 4 pings:
run ping www.google.com count 4
If all goes well, you should see a response:
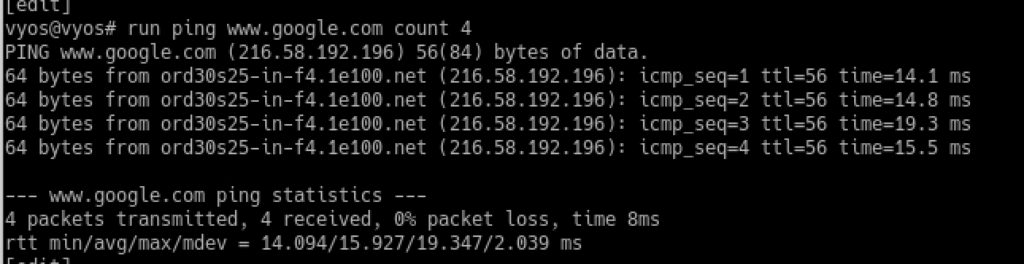
Conclusion
So wow, this post turned into a bit of a novel. Hopefully if you’ve made it this far, your LAN clients now have accessible Internet. From a client, you should be able to ping google:
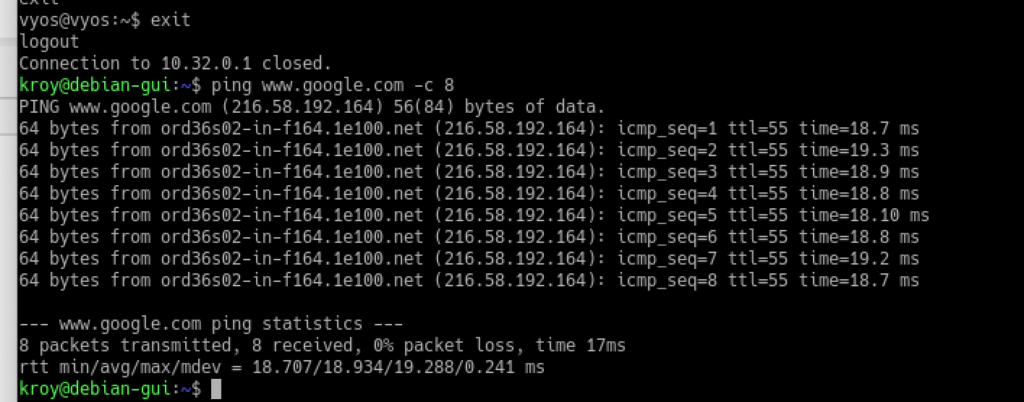
Obviously there are a lot of basic topics I haven’t covered yet. But I wanted to lay out and explain the basic setup first.
Future editions will feature:
- Port Forwarding.
- Hairpin NAT (this goes hand-in-hand with the first).
- VPNs, especially WireGuard
- How routing works when you have VPNs.
- Some potential hardening tactics.
- Other advanced topics like BGP/OSPF.
Cheers!
]]>The Path to Another WYSE
I love my WYSE 5070. That little box is so much power stuffed into a tiny little form factor. And as I outlined in my last review, it sips power, averaging about 7.5 watts under normal load.
Although I initially threw VyOS on it, I don’t really have a need for another dedicated router right now. So the duties of the box shifted, and it became the charter member of a newly minted Proxmox cluster, where it’s actually running a backup routing VyOS instance:
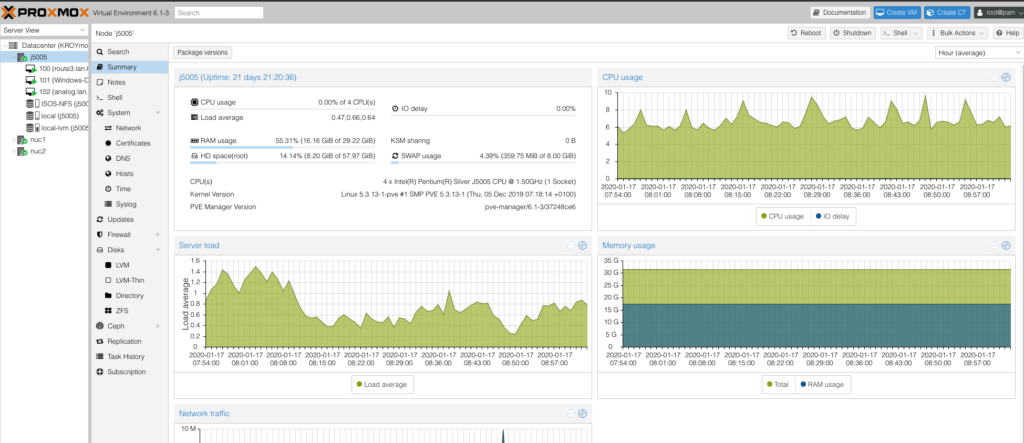
When the opportunity came to pick up a WYSE3040, I absolutely jumped on it. Especially when it was less than a cost of a Raspberry Pi.
Dell WYSE 3040
So when I got the 3040, I didn’t realize how SMALL it would be. I mean, this thing is downright TINY:

As pictured, the thing has a footprint that’s only slightly bigger than an SSD.
Even at that size, it has a surprising amount of ports:
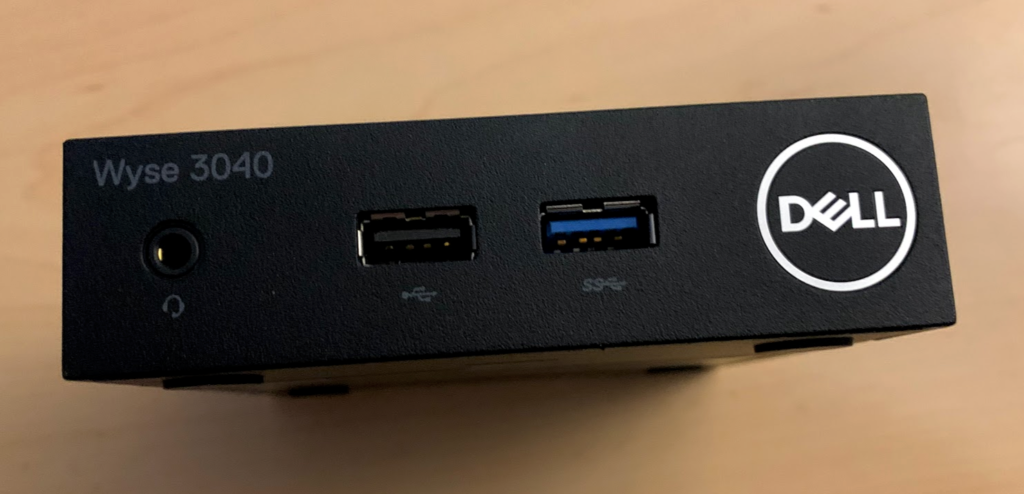
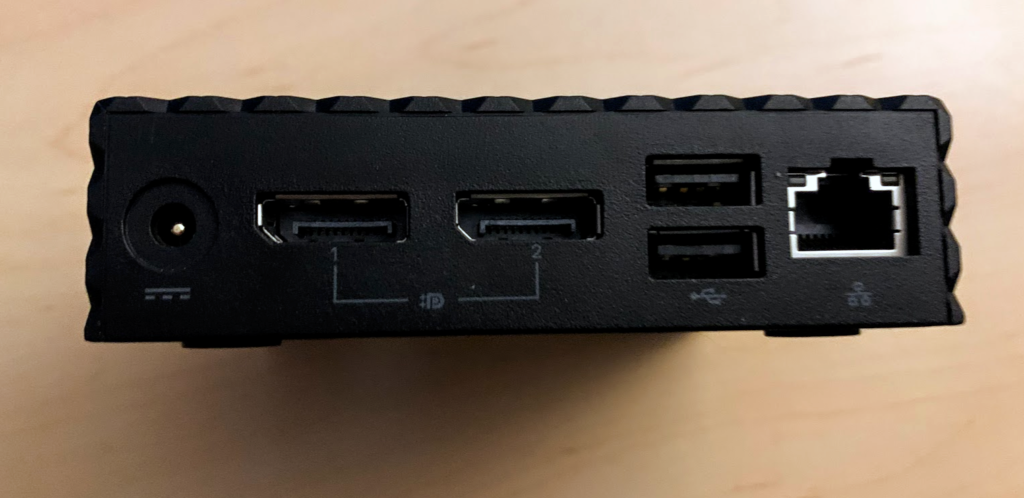
The Guts
I don’t know why, but I alway feel a driving NEED to open up my new toys. It’s a disease. And this thing was no exception.
With the bottom of the case off, it has an open spot for a WiFi card. With the limited storage space in this sucker, at some point I’m going to research if I can drop an M2 SSD in there:
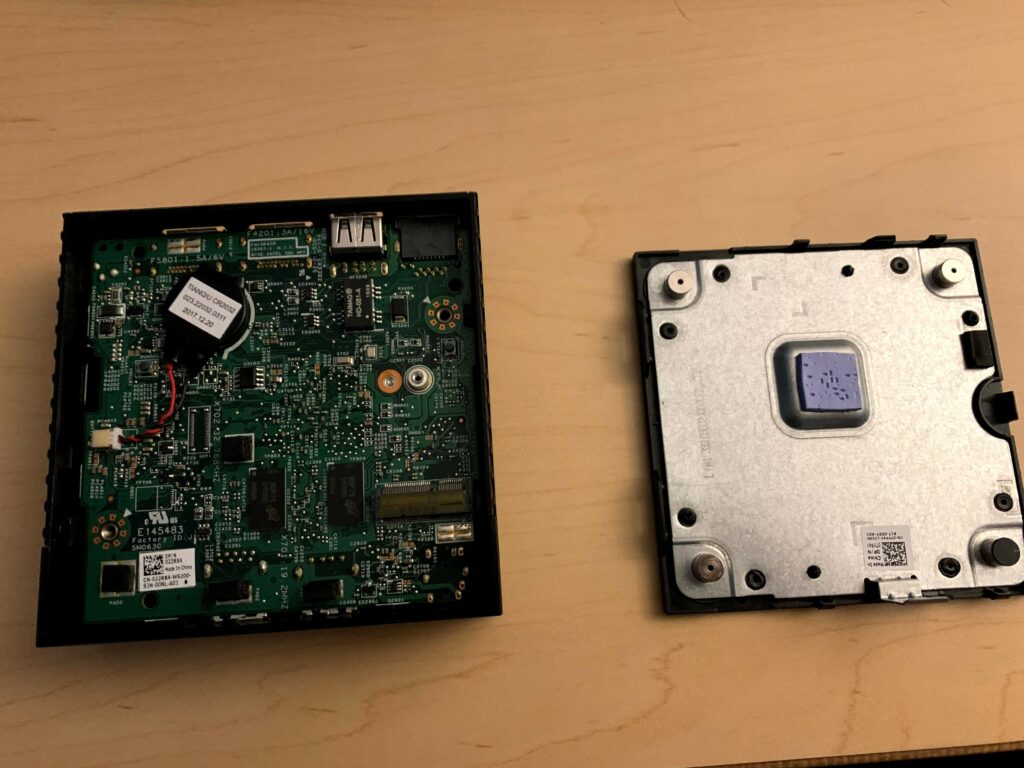
Once the device is fully extricated from its case, there’s really not much to look at. Just a huge heatsink that covers most of the top of the motherboard:
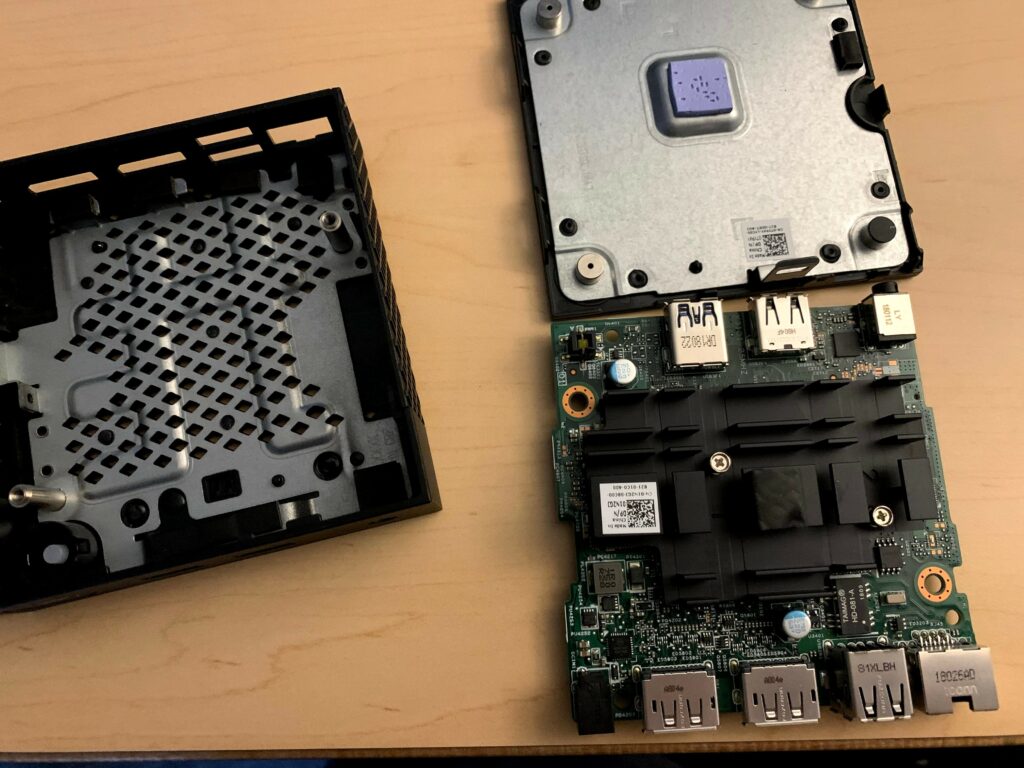
The Specs
While the WYSE5070 is a powerhouse in a tiny form-factor, this 3040 is a bit more… modest.
- Atom x5-Z8350 Processor
- 2GB of DDR3L RAM (soldered on)
- 8GB of eMMC (soldered on)
- Gigabit Realtek NIC (RTL8111/8168/8411)
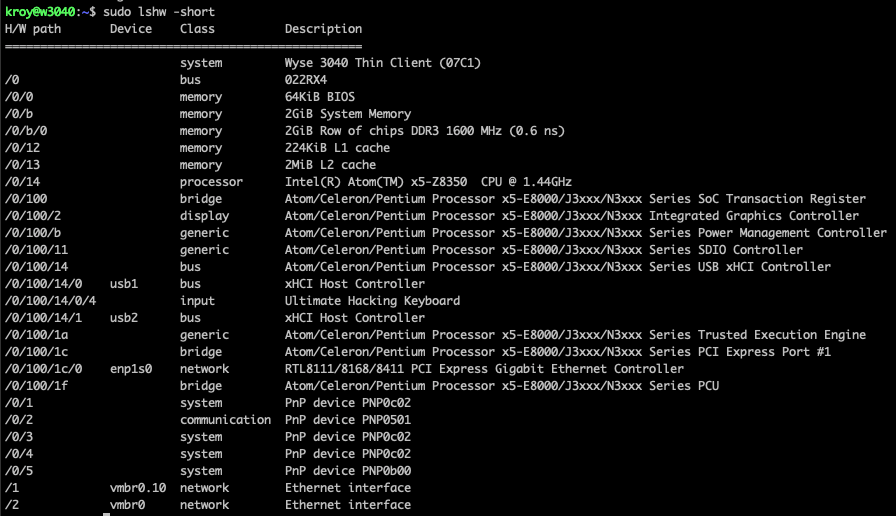
Like I said. Pretty modest specs. And the small RAM and storage space somewhat limit the options. The eMMC is particularly painful as that kind of flash is REALLY not designed for general usage. I’ll probably end up using a SATA SSD over a sata-wire.
VyOS
So one of the first things I usually do with a new device is toss VyOS on it. I’m a huge VyOS enthustiast, evangelist, and as mentioned recently, now maintainer.
Unfortunately on this device, the VyOS installer died on a black screen. But during the course of doing this write-up, I took another look at it, and discovered the reason for this. GRUB tries to pass the output to a non-existent serial port. While I’ve had other devices that lacked serial ports that installer didn’t care about, on this one it refused to boot. So I just had to edit the grub boot line to remove the serial information.
Also, the 1.3 line of VyOS had a broken UEFI installer since release due to a change in Debian Buster, but I recently fixed that as well.
So expect a VyOS write-up on this forthwith.
Testing
For testing, I just installed Ubuntu 18.04 or 19.10 I think. Whatever ISO I had stuck on a USB at the time.
The space on the device is obviously a very real concern. Not to mention, as I said, the eMMC probably wouldn’t stand up very long to even minor usage without some hacks. 2.1G available with a fairly minimal install + WireGuard.
Filesystem      Size  Used Avail Use% Mounted on
udev            909M     0  909M   0% /dev
tmpfs           190M  1.4M  189M   1% /run
/dev/mmcblk0p2  6.7G  4.2G  2.1G  68% /
tmpfs           950M     0  950M   0% /dev/shm
tmpfs           5.0M     0  5.0M   0% /run/lock
tmpfs           950M     0  950M   0% /sys/fs/cgroup
/dev/loop0       90M   90M     0 100% /snap/core/8268
/dev/mmcblk0p1  511M  7.8M  504M   2% /boot/efi
/dev/loop1       55M   55M     0 100% /snap/lxd/12211
/dev/loop2       90M   90M     0 100% /snap/core/7917
/dev/loop3       55M   55M     0 100% /snap/lxd/12631
tmpfs           190M     0  190M   0% /run/user/1000
Obviously I could probably get that a lot leaner if I went with something like Alpine or Arch.
A basic iperf3 to a different host on my network shows gigabit speeds:
[SUM]   0.00-10.00  sec  1.09 GBytes   934 Mbits/sec    0             sender
[SUM]   0.00-10.00  sec  1.08 GBytes   931 Mbits/sec                  receiver
with moderate CPU usage:

And firing up WireGuard and running an iperf3, show slightly less speed
[SUM]   0.00-10.00  sec   991 MBytes   831 Mbits/sec    0             sender
[SUM]   0.00-10.01  sec   988 MBytes   828 Mbits/sec                  receiver
And lots more CPU:

Power Consumption
The power consumption is where this thing really shines. Again, sorry for the potato pic, I just have a terrible time getting a decent picture of my kill-a-watt with a dying screen. 4.1 watts at idle:

And 7.3 watts under WireGuard:

Conclusion
In all, this is a great little device for projects. I might turn it into a DNS server or something. For a lower speed network, I can also see it making a great little router. I could see the CPU crumbling under heavy load that was coming from more than just a handful of streams.
For the $30 I paid for it, it can definitely replace a Raspberry Pi for me. And it will be even more useful if I can drop an M2 SSD into that WiFi slot.
]]>For a while now, I’ve been looking for a replacement to a Supermicro E200-9B that I had an “accident” with. By “accident”, I mean I killed the box by messing around on it with a FlashCat.
I wanted something that was similarly low power usage, and I wasn’t really looking to spend too much, especially since it was my own silliness that killed the last one.
The Hardware
After a bit of hunting, I found the Dell WYSE 5070.
This is a Intel Pentium Silver DDR4 platform based on the J5005. There are two versions, the thin and the thick version, with the latter having room for a PCIe card. I found some for $60 locally, but they can easily be found online for only a little more.
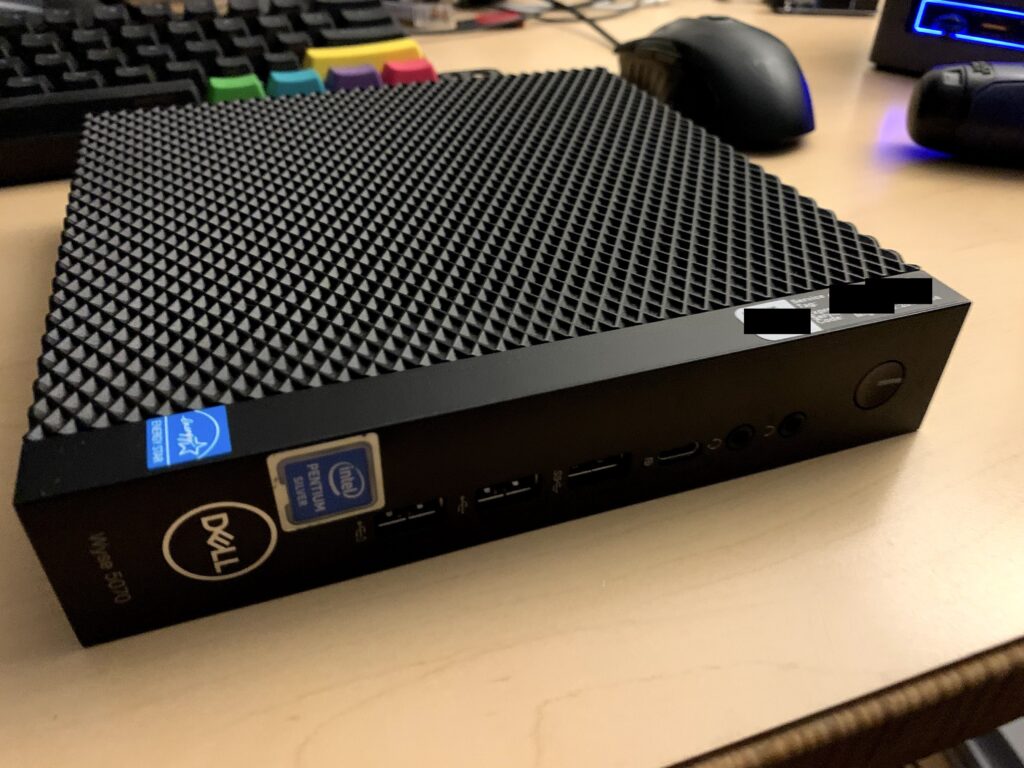
The versions I bought were the thin version, which only have a single Realtek NIC. But they have USB-C on the front, which means a second gigabit NIC can easily be added. And as I’m running VyOS, Realtek NICs aren’t a problem at all.
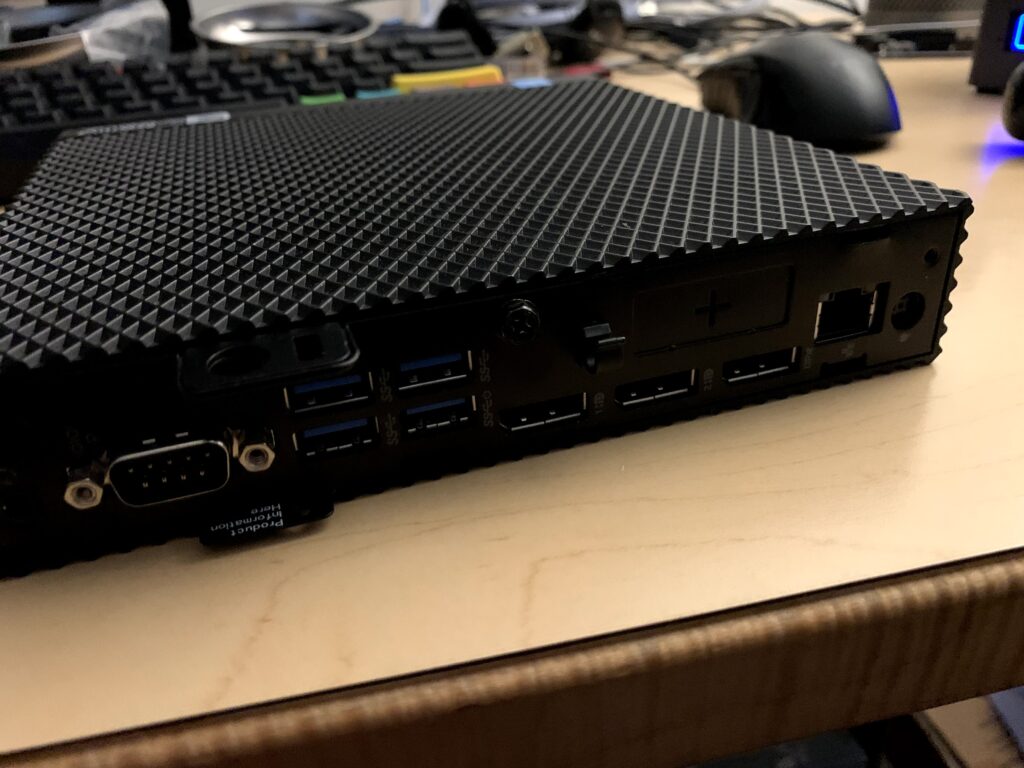
The Goods
Inside, the version I have came with:
- A single Realtek NIC. This isn’t a problem for me because I have a managed switch for router-on-a-stick.
- Three DisplayPorts
- A variety of USB ports. Don’t ask me about revisions as that USB naming scheme is a mess that I can’t be bothered to look up. I do know there is a USB-C port at 5Gbps. The other USB ports are blue, meaning better than USB2.0.
- Serial port. It would have been nice to turn this into a console redirection port for a sort of out-of-band access, but I couldn’t figure it out.
- 16GB eMMC storage. I’m pretty sure I could just install straight to this, but for now I wanted to leave it intact in case I wanted to play with ThinOS. Though I do know that it’s generally recommended to skip eMMC storage for anything that might do lots of writes, like a firewall logging a bunch.
- 4GB of DDR4 RAM. Officially these only support 8GB, but I added another 8GB for a total of 12GB.
Apparently 16GB and even possible 32GB will work, which I have sticks for, but I haven’t had a chance to rearrange things to test.Confirmed. Currently running 32GB in it without an issue. - To further revise, it looks like it might be picky about 16GB chips. I currently have CT16G4SFD8213 in mine.
- An M.2 storage slot. I tossed a Crucial MX500 in here because eventually this thing might become a tiny VM Host. Plus, I got it cheap on Black Friday.
A peek inside and this thing is surprisingly expandable.
- Towards the left, you see the blue USB internal header that could be used for an internal USB drive.
- The top has the unused M.2 WiFi slot.
- Above the battery, you can see the PCIe header which would be populated if this was the thick version of the box.
- And then of course the M.2 SSD and extra RAM that I added.
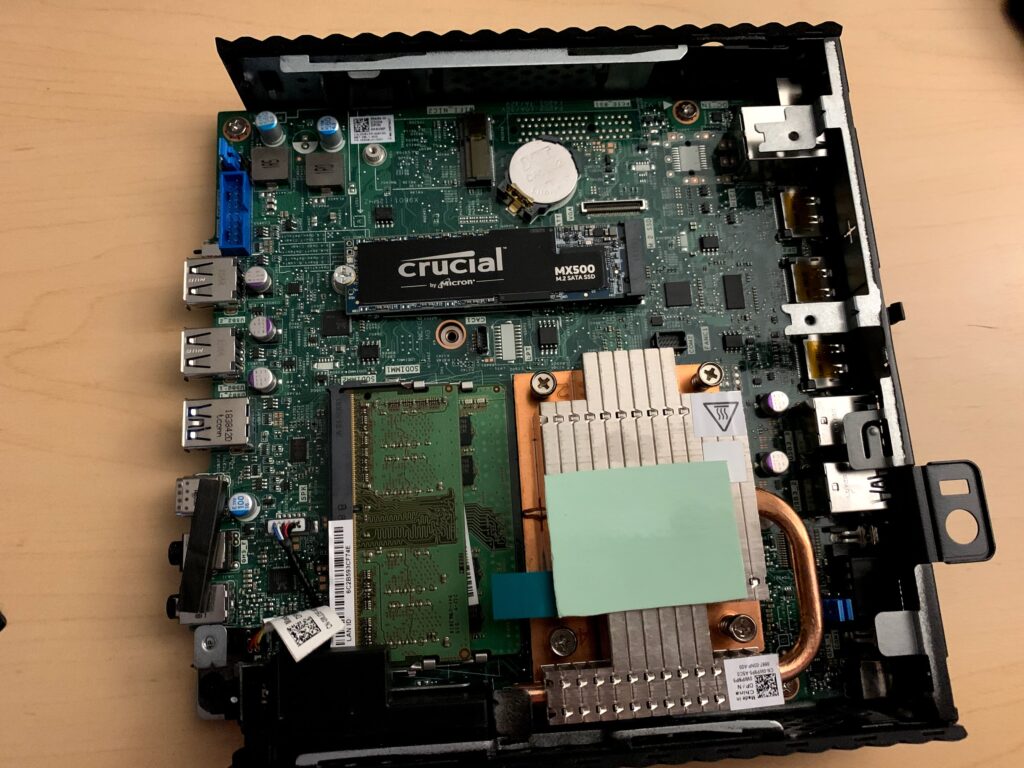
Power Consumption
The idle power consumption on this device is amazing:

The highest usage I saw was during boot where it hit a whopping 15 watts. Oh, and I’m dangling an additional SSD off a SATA wire to use temporarily as a boot drive since I was doing other testing with this server, so that 5.7 watts includes this guy:

VyOS
Installing VyOS is pretty standard. In this case, I just used Etcher to put the latest VyOS Rolling ISO on a USB, and ran through the quick install.
As mentioned above, I’m just doing a router-on-a-stick setup with the single onboard NIC, but I also tested out a USB-C Gigabit Ethernet adapter and it worked identically.
Config
The config I used was almost verbatim from the VyOS Quick Start Guide, except I’m using VLANs and a static WAN IP. In my case, VLAN10 is the “WAN” and VLAN2222 is my test LAN here.
firewall {
    all-ping enable
    broadcast-ping disable
    config-trap disable
    ipv6-receive-redirects disable
    ipv6-src-route disable
    ip-src-route disable
    log-martians enable
    name OUTSIDE-IN {
        default-action drop
        rule 10 {
            action accept
            state {
                established enable
                related enable
            }
        }
    }
    name OUTSIDE-LOCAL {
        default-action drop
        rule 10 {
            action accept
            state {
                established enable
                related enable
            }
        }
        rule 20 {
            action accept
            icmp {
                type-name echo-request
            }
            protocol icmp
            state {
                new enable
            }
        }
        rule 30 {
            action drop
            destination {
                port 22
            }
            protocol tcp
            recent {
                count 4
                time 60
            }
            state {
                new enable
            }
        }
        rule 31 {
            action accept
            destination {
                port 22
            }
            protocol tcp
            state {
                new enable
            }
        }
    }
    receive-redirects disable
    send-redirects enable
    source-validation disable
    syn-cookies enable
    twa-hazards-protection disable
}
interfaces {
    ethernet eth0 {
        duplex auto
        hw-id 6c:2b:59:3c:f7:4e
        smp-affinity auto
        speed auto
        vif 10 {
            address 10.0.10.234/24
            firewall {
                in {
                    name OUTSIDE-IN
                }
                local {
                    name OUTSIDE-LOCAL
                }
            }
        }
        vif 2222 {
            address 10.222.222.1/24
        }
    }
    loopback lo {
    }
    wireguard wg0 {
        address 10.172.24.60/24
        peer edge {
            allowed-ips 10.172.24.1/32
            endpoint 10.0.10.1:2224
            pubkey ****************
        }
    }
}
nat {
    source {
        rule 100 {
            outbound-interface eth0.10
            source {
                address 10.222.222.0/24
            }
            translation {
                address masquerade
            }
        }
    }
}
protocols {
    static {
        route 0.0.0.0/0 {
            next-hop 10.0.10.1 {
            }
        }
    }
}
service {
    dhcp-server {
        shared-network-name LAN {
            subnet 10.222.222.0/24 {
                default-router 10.222.222.1
                dns-server 10.53.53.53
                domain-name internal-network
                lease 86400
                range 0 {
                    start 10.222.222.98
                    stop 10.222.222.200
                }
            }
        }
    }
    ssh {
        port 22
    }
}
system {
    config-management {
        commit-revisions 100
    }
    console {
        device ttyS0 {
            speed 9600
        }
    }
    host-name vyos
    login {
        user vyos {
            authentication {
                encrypted-password ****************
                plaintext-password ****************
            }
            level admin
        }
    }
    name-server 10.53.53.53
    ntp {
        server 0.pool.ntp.org {
        }
        server 1.pool.ntp.org {
        }
        server 2.pool.ntp.org {
        }
    }
    syslog {
        global {
            facility all {
                level info
            }
            facility protocols {
                level debug
            }
        }
    }
    time-zone UTC
}
Tests
I ran a number of different tests to try and show how this thing might perform in real world usage.
Speedtest
The first test was just a normal speedtest. If someone were going to install this for their primary firewall and router, this is probably the first thing they would do:
As I’ve mentioned a few other times, this is basically gigabit on my network. And what was the CPU doing during this?
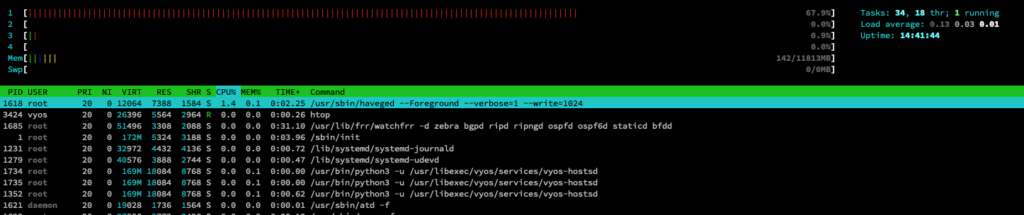
With about ~70% usage on a single core out of four, this little J5005 doesn’t do too terribly.
File Copy – CIFS
For this test, I copied a single large file from a fileserver elsewhere on my network over an CIFS mounted share.

97.2MB/s or 777Mbps is pretty admirable for a simple file copy.
And the CPU usage on the WYSE 5070 during the copy:

Again, with only 60% usage of a single core, I think that shows this thing has lots of room for growth.
Simple iperf3
A simple iperf3 gives us gigabit performance:
vyos@vyos:~$ iperf3 -c 10.0.10.1 -P2
Connecting to host 10.0.10.1, port 5201
[  4] local 10.0.10.234 port 32910 connected to 10.0.10.1 port 5201
[  6] local 10.0.10.234 port 32912 connected to 10.0.10.1 port 5201
[ ID] Interval           Transfer     Bandwidth       Retr  Cwnd
[  4]   0.00-1.00   sec  57.2 MBytes   480 Mbits/sec    0    209 KBytes
[  6]   0.00-1.00   sec  56.9 MBytes   478 Mbits/sec    0    198 KBytes
[SUM]   0.00-1.00   sec   114 MBytes   958 Mbits/sec    0
- - - - - - - - - - - - - - - - - - - - - - - - -
[  4]   1.00-2.00   sec  55.9 MBytes   469 Mbits/sec    0    209 KBytes
[  6]   1.00-2.00   sec  55.7 MBytes   467 Mbits/sec    0    198 KBytes
[SUM]   1.00-2.00   sec   112 MBytes   936 Mbits/sec    0
- - - - - - - - - - - - - - - - - - - - - - - - -
[  4]   2.00-3.00   sec  56.1 MBytes   471 Mbits/sec    0    209 KBytes
[  6]   2.00-3.00   sec  56.1 MBytes   471 Mbits/sec    0    198 KBytes
[SUM]   2.00-3.00   sec   112 MBytes   941 Mbits/sec    0
- - - - - - - - - - - - - - - - - - - - - - - - -
[  4]   3.00-4.00   sec  55.7 MBytes   467 Mbits/sec    0    209 KBytes
[  6]   3.00-4.00   sec  56.1 MBytes   471 Mbits/sec    0    223 KBytes
[SUM]   3.00-4.00   sec   112 MBytes   938 Mbits/sec    0
- - - - - - - - - - - - - - - - - - - - - - - - -
[  4]   4.00-5.00   sec  54.3 MBytes   456 Mbits/sec    1    228 KBytes
[  6]   4.00-5.00   sec  58.2 MBytes   488 Mbits/sec    0    240 KBytes
[SUM]   4.00-5.00   sec   113 MBytes   944 Mbits/sec    1
- - - - - - - - - - - - - - - - - - - - - - - - -
[  4]   5.00-6.00   sec  54.7 MBytes   459 Mbits/sec    0    228 KBytes
[  6]   5.00-6.00   sec  56.9 MBytes   477 Mbits/sec   45    240 KBytes
[SUM]   5.00-6.00   sec   112 MBytes   936 Mbits/sec   45
- - - - - - - - - - - - - - - - - - - - - - - - -
[  4]   6.00-7.00   sec  53.8 MBytes   451 Mbits/sec    0    228 KBytes
[  6]   6.00-7.00   sec  57.7 MBytes   484 Mbits/sec    0    240 KBytes
[SUM]   6.00-7.00   sec   111 MBytes   935 Mbits/sec    0
- - - - - - - - - - - - - - - - - - - - - - - - -
[  4]   7.00-8.00   sec  54.2 MBytes   455 Mbits/sec    0    228 KBytes
[  6]   7.00-8.00   sec  58.2 MBytes   488 Mbits/sec    0    240 KBytes
[SUM]   7.00-8.00   sec   112 MBytes   942 Mbits/sec    0
- - - - - - - - - - - - - - - - - - - - - - - - -
[  4]   8.00-9.00   sec  52.2 MBytes   438 Mbits/sec    0    230 KBytes
[  6]   8.00-9.00   sec  59.8 MBytes   502 Mbits/sec    0    247 KBytes
[SUM]   8.00-9.00   sec   112 MBytes   940 Mbits/sec    0
- - - - - - - - - - - - - - - - - - - - - - - - -
[  4]   9.00-10.00  sec  51.7 MBytes   434 Mbits/sec    0    230 KBytes
[  6]   9.00-10.00  sec  59.8 MBytes   501 Mbits/sec    0    247 KBytes
[SUM]   9.00-10.00  sec   111 MBytes   935 Mbits/sec    0
- - - - - - - - - - - - - - - - - - - - - - - - -
[ ID] Interval           Transfer     Bandwidth       Retr
[  4]   0.00-10.00  sec   546 MBytes   458 Mbits/sec    1             sender
[  4]   0.00-10.00  sec   545 MBytes   457 Mbits/sec                  receiver
[  6]   0.00-10.00  sec   575 MBytes   483 Mbits/sec   45             sender
[  6]   0.00-10.00  sec   574 MBytes   482 Mbits/sec                  receiver
[SUM]   0.00-10.00  sec  1.09 GBytes   941 Mbits/sec   46             sender
[SUM]   0.00-10.00  sec  1.09 GBytes   939 Mbits/sec                  receiver
And similar CPU usage to the other tests, 50% usage on a single core:

WireGuard
If you read through the config above, you’ll notice I dropped in the config for a WireGuard tunnel to my main router.
Even though WireGuard isn’t 100% vetted yet, it’s enough that I believe it will be officially part of the Linux kernel soon. And hopefully these results will demonstrate why:
vyos@vyos:~$ iperf3 -c 10.172.24.1 -P2
Connecting to host 10.172.24.1, port 5201
[  4] local 10.172.24.60 port 36752 connected to 10.172.24.1 port 5201
[  6] local 10.172.24.60 port 36754 connected to 10.172.24.1 port 5201
[ ID] Interval           Transfer     Bandwidth       Retr  Cwnd
[  4]   0.00-1.00   sec  54.3 MBytes   456 Mbits/sec    0    281 KBytes
[  6]   0.00-1.00   sec  53.9 MBytes   452 Mbits/sec    0    283 KBytes
[SUM]   0.00-1.00   sec   108 MBytes   908 Mbits/sec    0
- - - - - - - - - - - - - - - - - - - - - - - - -
[  4]   1.00-2.00   sec  53.5 MBytes   449 Mbits/sec    0    281 KBytes
[  6]   1.00-2.00   sec  53.5 MBytes   449 Mbits/sec    0    283 KBytes
[SUM]   1.00-2.00   sec   107 MBytes   898 Mbits/sec    0
- - - - - - - - - - - - - - - - - - - - - - - - -
[  4]   2.00-3.00   sec  53.5 MBytes   449 Mbits/sec    0    293 KBytes
[  6]   2.00-3.00   sec  53.5 MBytes   449 Mbits/sec    0    283 KBytes
[SUM]   2.00-3.00   sec   107 MBytes   898 Mbits/sec    0
- - - - - - - - - - - - - - - - - - - - - - - - -
[  4]   3.00-4.00   sec  53.7 MBytes   451 Mbits/sec    0    293 KBytes
[  6]   3.00-4.00   sec  53.7 MBytes   450 Mbits/sec    0    283 KBytes
[SUM]   3.00-4.00   sec   107 MBytes   901 Mbits/sec    0
- - - - - - - - - - - - - - - - - - - - - - - - -
[  4]   4.00-5.00   sec  53.3 MBytes   447 Mbits/sec    0    293 KBytes
[  6]   4.00-5.00   sec  53.4 MBytes   448 Mbits/sec    0    310 KBytes
[SUM]   4.00-5.00   sec   107 MBytes   895 Mbits/sec    0
- - - - - - - - - - - - - - - - - - - - - - - - -
[  4]   5.00-6.00   sec  53.3 MBytes   448 Mbits/sec    0    293 KBytes
[  6]   5.00-6.00   sec  53.3 MBytes   447 Mbits/sec    0    310 KBytes
[SUM]   5.00-6.00   sec   107 MBytes   895 Mbits/sec    0
- - - - - - - - - - - - - - - - - - - - - - - - -
[  4]   6.00-7.00   sec  53.7 MBytes   451 Mbits/sec    0    293 KBytes
[  6]   6.00-7.00   sec  53.6 MBytes   450 Mbits/sec    0    310 KBytes
[SUM]   6.00-7.00   sec   107 MBytes   900 Mbits/sec    0
- - - - - - - - - - - - - - - - - - - - - - - - -
[  4]   7.00-8.00   sec  53.0 MBytes   444 Mbits/sec    0    293 KBytes
[  6]   7.00-8.00   sec  53.0 MBytes   444 Mbits/sec    0    310 KBytes
[SUM]   7.00-8.00   sec   106 MBytes   889 Mbits/sec    0
- - - - - - - - - - - - - - - - - - - - - - - - -
[  4]   8.00-9.00   sec  54.0 MBytes   453 Mbits/sec    0    415 KBytes
[  6]   8.00-9.00   sec  53.8 MBytes   451 Mbits/sec    0    415 KBytes
[SUM]   8.00-9.00   sec   108 MBytes   904 Mbits/sec    0
- - - - - - - - - - - - - - - - - - - - - - - - -
[  4]   9.00-10.00  sec  53.5 MBytes   449 Mbits/sec    0    415 KBytes
[  6]   9.00-10.00  sec  54.0 MBytes   453 Mbits/sec    0    415 KBytes
[SUM]   9.00-10.00  sec   107 MBytes   902 Mbits/sec    0
- - - - - - - - - - - - - - - - - - - - - - - - -
[ ID] Interval           Transfer     Bandwidth       Retr
[  4]   0.00-10.00  sec   536 MBytes   450 Mbits/sec    0             sender
[  4]   0.00-10.00  sec   535 MBytes   449 Mbits/sec                  receiver
[  6]   0.00-10.00  sec   536 MBytes   449 Mbits/sec    0             sender
[  6]   0.00-10.00  sec   534 MBytes   448 Mbits/sec                  receiver
[SUM]   0.00-10.00  sec  1.05 GBytes   899 Mbits/sec    0             sender
[SUM]   0.00-10.00  sec  1.04 GBytes   897 Mbits/sec                  receiver
Getting 900Mbps on a $60 thin client? That’s pretty amazing in my book.
Finally we are stressing the CPU a bit, 60%, 35%, 25%, 25% on the various cores:

I think the screen on my kill-a-watt is dying as I’m having a heck of a time photographing it. But this 12.7 watts is the power usage when testing WireGuard, which is about the most amount of stress I was able to put on this little server:

Conclusion
It’s amazing that these things are going for only $60. Well, a bit more since I added the extra drive and RAM. And this is for hardware that according to Dell, was manufactured in March of 2019. Practically brand new!
For the price and feature set, I would DEFINITELY recommend this device for anyone looking for a capable VyOS host. I’m really tempted to try and source a thick version now so I can toss a 10 gigabit NIC in one and see how it performs.
]]>